Reset Button
Depending on the AWK Series model, the Reset is located on the side panel (AWK-4252A), top panel (AWK-
3252A), or bottom panel (AWK-1151C). You can reboot the AWK series or reset it to factory default settings
by pressing the RESET button with a pointed object such as an unfolded paper clip.
• System reboot: Hold down the Reset button for under 5 seconds and then release. The SYS LED will
blink at 1 Hz.
• Reset to factory default: Hold down the Reset button for over 5 seconds until the SYS LED starts
blinking green. Release the button to reset the AWK Series to its factory default settings. The SYS LED
will blink at 4 Hz.
• Abort the action: Hold the Reset button down for longer than 10 seconds and then release to abort
the reset action. The SYS LED will stop blinking and turn solid.
NOTE
The reset to default factory settings function of the reset button is disabled by default and must be
enabled in the web console. Refer to the Reset Button Active Duration section for more detailed
information.
Relay (AWK-3252A and AWK-4252A Only)
The AWK-3252A and AWK-4252A Series have one relay output which is used to forward system failures and
user-configured events.
The two wires attached to the relay contacts form an open circuit when a user-configured event is triggered.
If a user-configured event does not occur, the relay circuit will remain closed. For safety reasons, the relay
circuit is kept open when the device is not powered up.
Summary of the AWK-3252A’s Relay Status
On
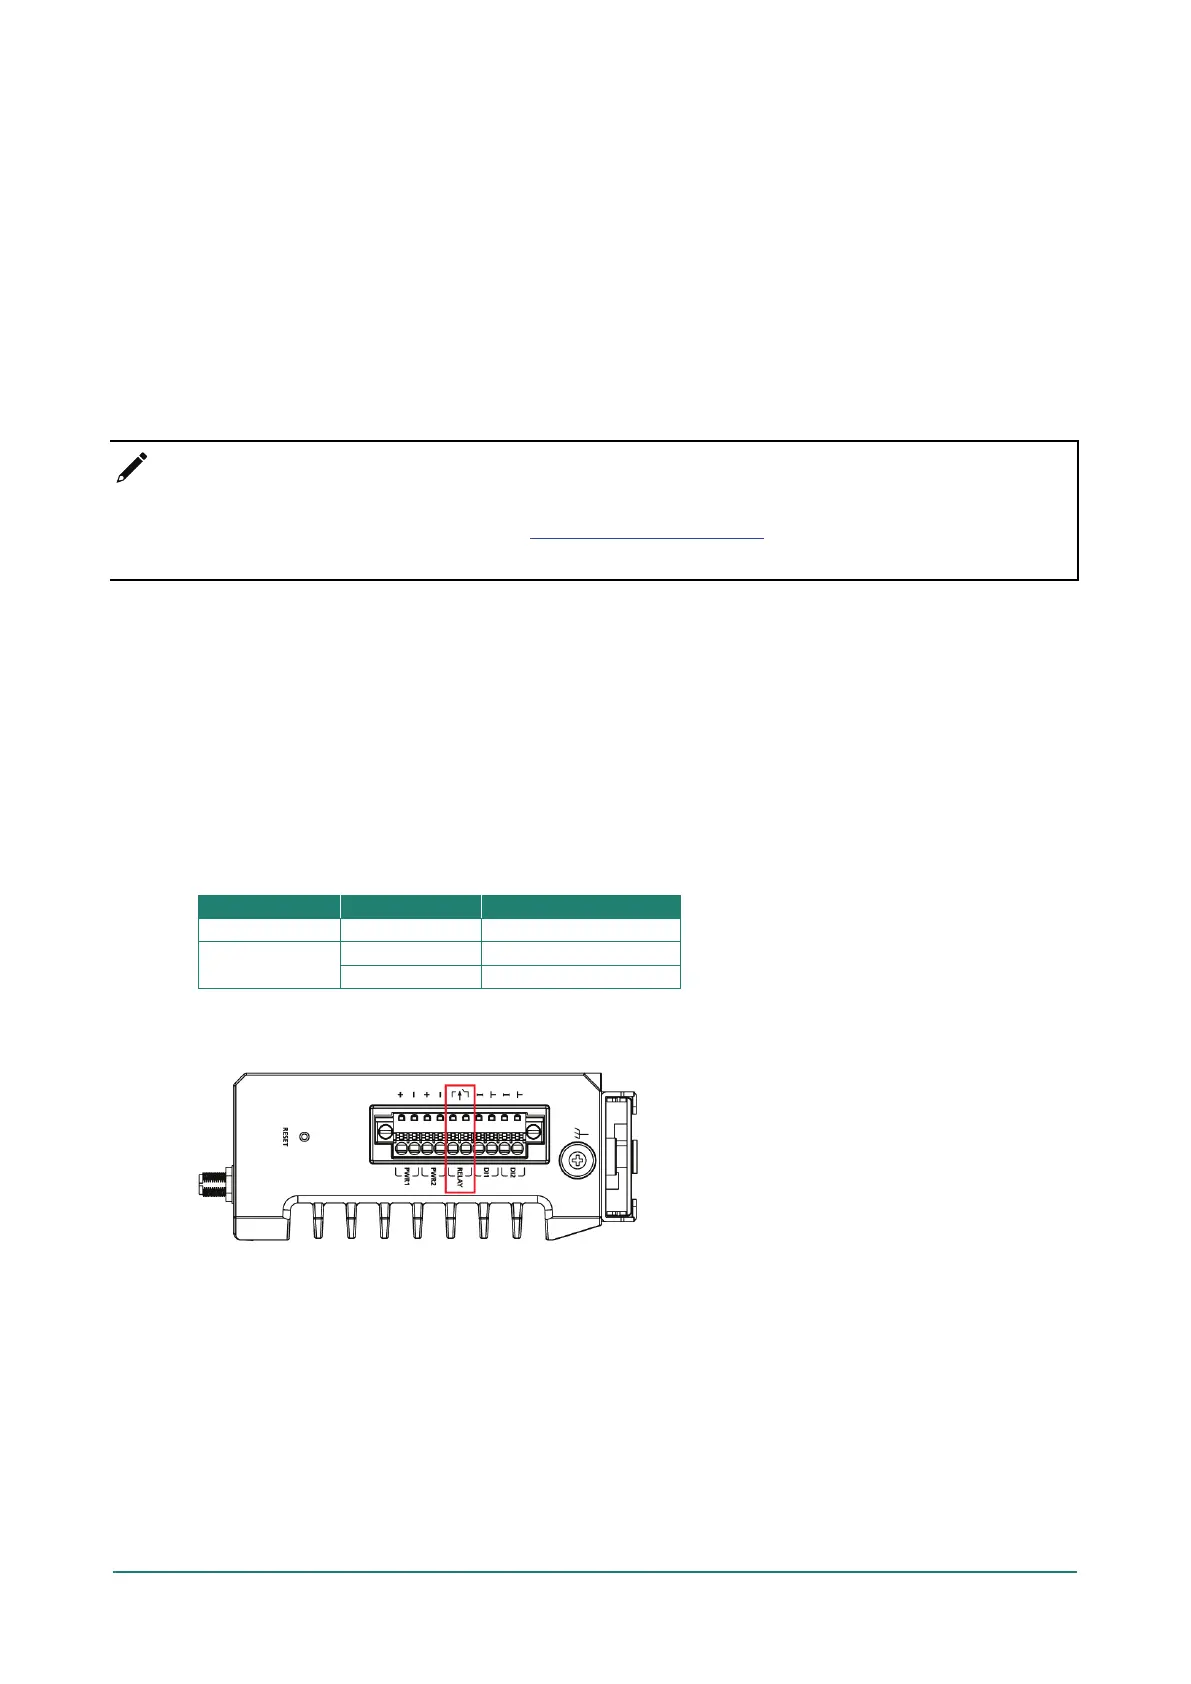
The AWK-3252A relay is marked on the 2 terminal block contacts, as shown in the image below:
The AWK-4252A relay is integrated into the DI/DO connector (pins 1 and 2), as shown in the image below: