EasyManuals Logo

Moxa Technologies ioLogik E1212 User Manual

Moxa Technologies ioLogik E1212
120 pages
To Next Page IconTo Next Page
To Previous Page IconTo Previous Page
Page #16 background imageLoading...
Page #16 background image
ioLogik E1200 Series Initial Setup
2-3
STEP 2
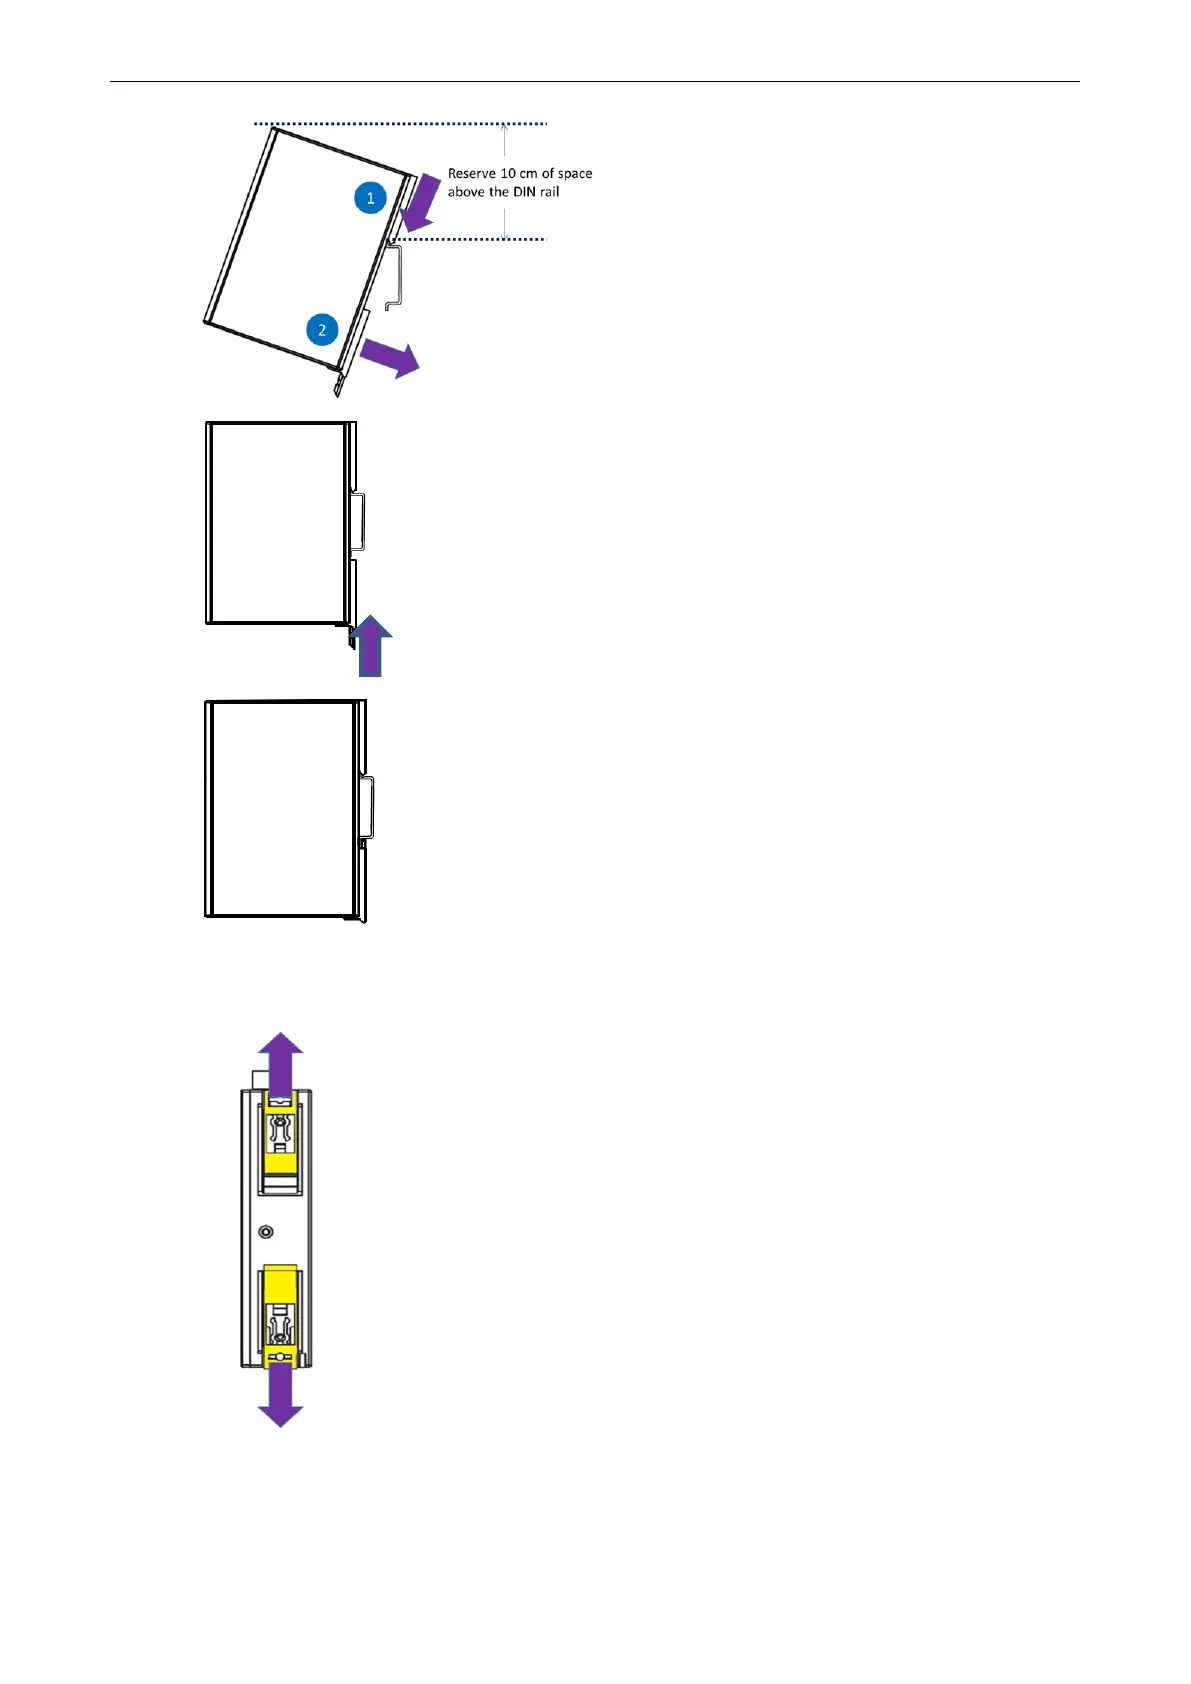
. Latch the top slider of the unit onto the DIN rail
as
shown in the diagram.
Reserve at least 10 cm of space
above
the DIN rail to ensure
that there is enough space to
complete the
installation.
STEP 3.
Rotate the unit down into a vertical position, and then p
ush
the bottom slider
back up to its original position
to lock the unit to
the DIN rail
.
STEP 4.
At this point, if the mounting was done correctly, t
he unit
sh
ould be securely fixed to the DIN Rail.
Wall Mounting
STEP 1. There are two sliders
on the back of the unit, pull out both slider
s out away from the
product
.

Table of Contents

Other manuals for Moxa Technologies ioLogik E1212

Questions and Answers:

Question and Answer IconNeed help?

Do you have a question about the Moxa Technologies ioLogik E1212 and is the answer not in the manual?

Moxa Technologies ioLogik E1212 Specifications

General IconGeneral
Cable typeAWG
Module typeDigital
Channel type-
Signal directionInput/output
Power consumption130 mA
Dimensions (WxDxH)27.8 x 84 x 124 mm
Output current range0 - 0.2 A
Ethernet LAN (RJ-45) ports2
Supported network protocolsModbus/TCP, TCP/IP, UDP, DHCP, Bootp, HTTP
Isolation3 kV
Channels quantity16 channels

Related product manuals