HYDROCAL 1001+ Installation and operation manual Page 11/76
2.4.1.1. Direct installation
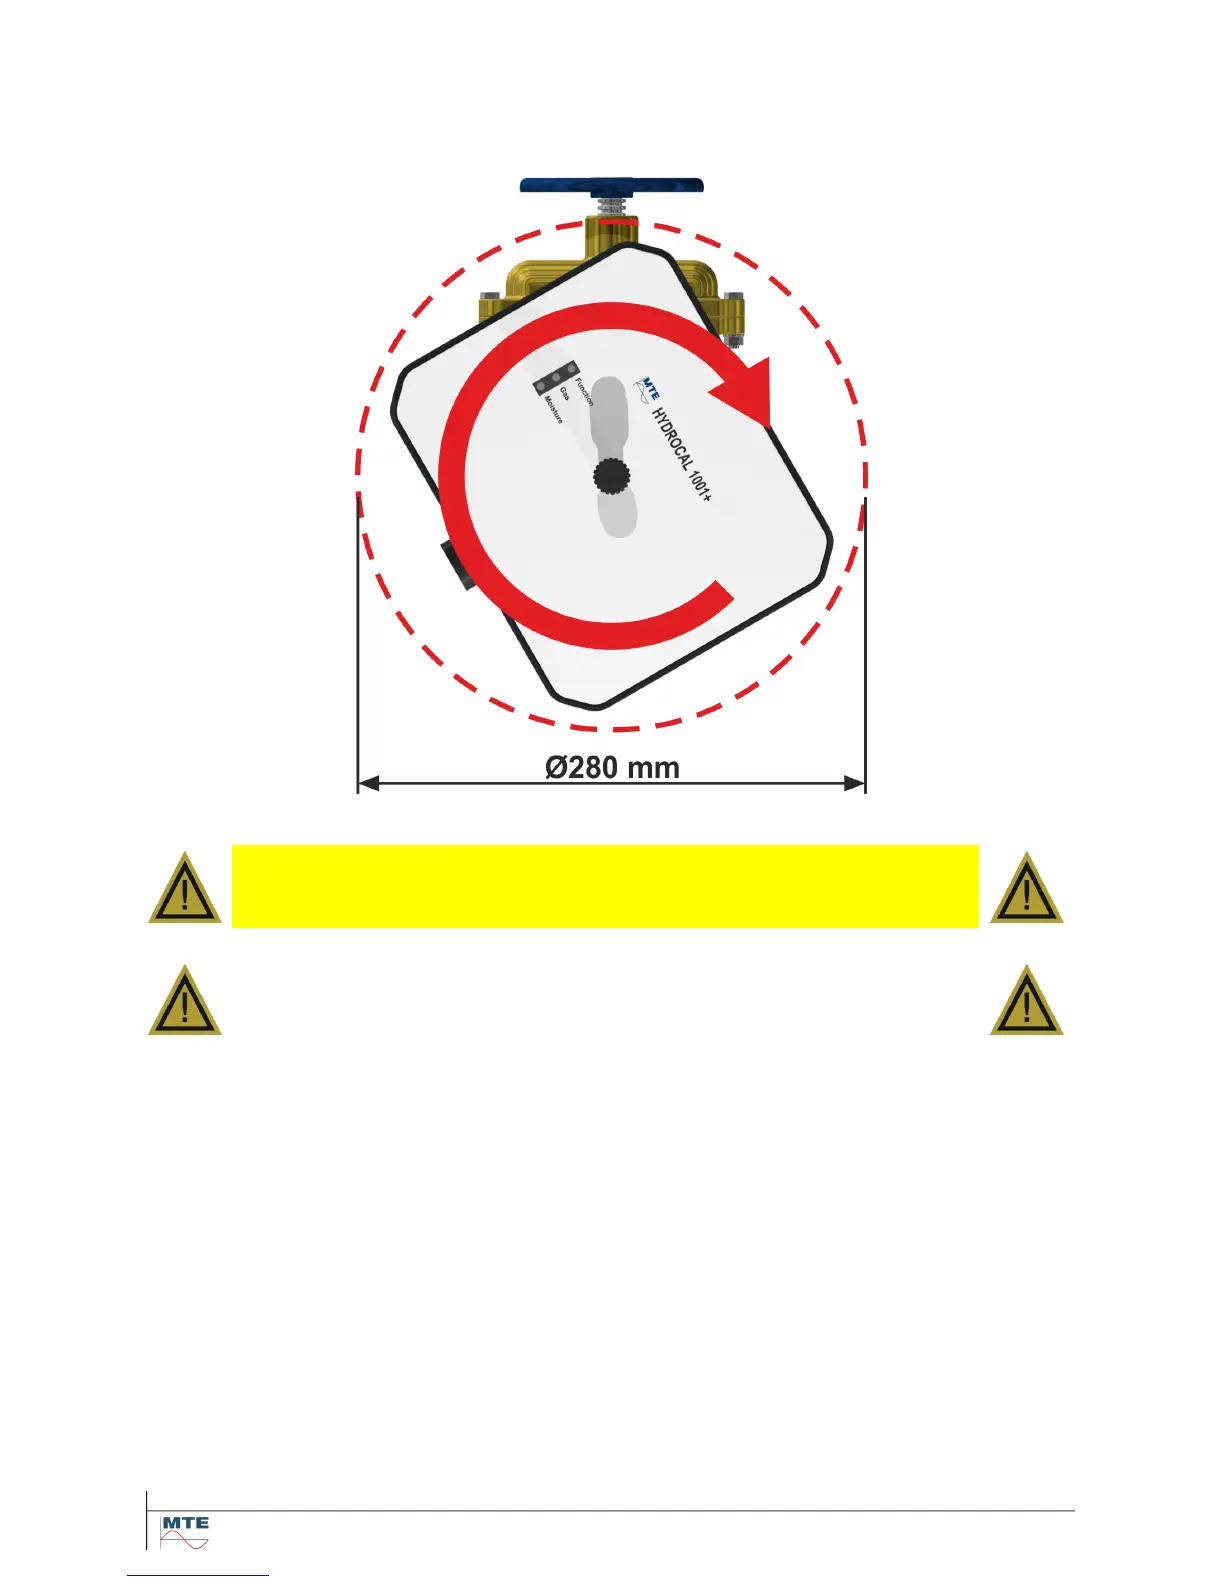
Direct installation means, the unit is screwed directly onto the threaded flange, i.e. the unit is rotated
around its own axis in order to fix it. In this type of installation the space around the center of the
connection unit must be free in a diameter of 280 mm.
The connection thread can be sealed and fixed using either a thread seal tape or a thread sealant.
Attention!!!
Only remove the protection cap (slowly while turning) when to aeration
screw is open and you are ready to mount the HYDROCAL unit!
Then mount the unit according to the following steps (sequence description with Teflon tape):
Clean the inside of the threaded flange with a dry cleaning rag or paper towel.
Clean the outer thread of the connection unit with a dry cleaning rag or paper towel. Remove
any remaining of thread sealing tape completely from the threads. For persistent remaining
you can use the brass brush or use white spirit (pure alcohol). White spirit must dry out com-
pletely before proceeding.
Wrap 3 to 15 layers of Teflon tape (depending on the tolerance of the two threads) clockwise
(rear view) tightly around the connection thread of HYDROCAL unit. The first thread should
remain free.
Place the HYDROCAL unit horizontally to the threaded flange. Make sure that the unit is lev-
eled.
Turn in the HYDROCAL unit 2 to 3 turns clockwise by hand to the threaded flange.
Now turn in the HYDROCAL unit for another 5 to 6 turns clockwise using a tin spanner M55 or
adjustable tin spanner 1 ½“ and stop when the aeration screw is at about 9 o`clock.
Note: If the turn in was possible without major effort, too less Teflon tape was used. Turn out the
unit, remove Teflon tape completely and perform the installation again.