EasyManua.ls Logo

NETASQ U30 - Installation Procedure

NETASQ U30
63 pages
Print Icon
To Next Page IconTo Next Page
To Previous Page IconTo Previous Page
Loading...
INSTALLATION GUIDE
APPENDIX G: INSTALLING THE 3G MODEM
The Status LEDs
Installation procedure
The procedure for installing the modem takes place in 2 steps:
Step 1: Connecting the modem
- Insert your SIM card in the correct slot,
- Plug the antenna into its base and plug this base into the modem,
- Plug the USB cable into the modem and the firewall (this operation does not require the
firewall to be shut down).
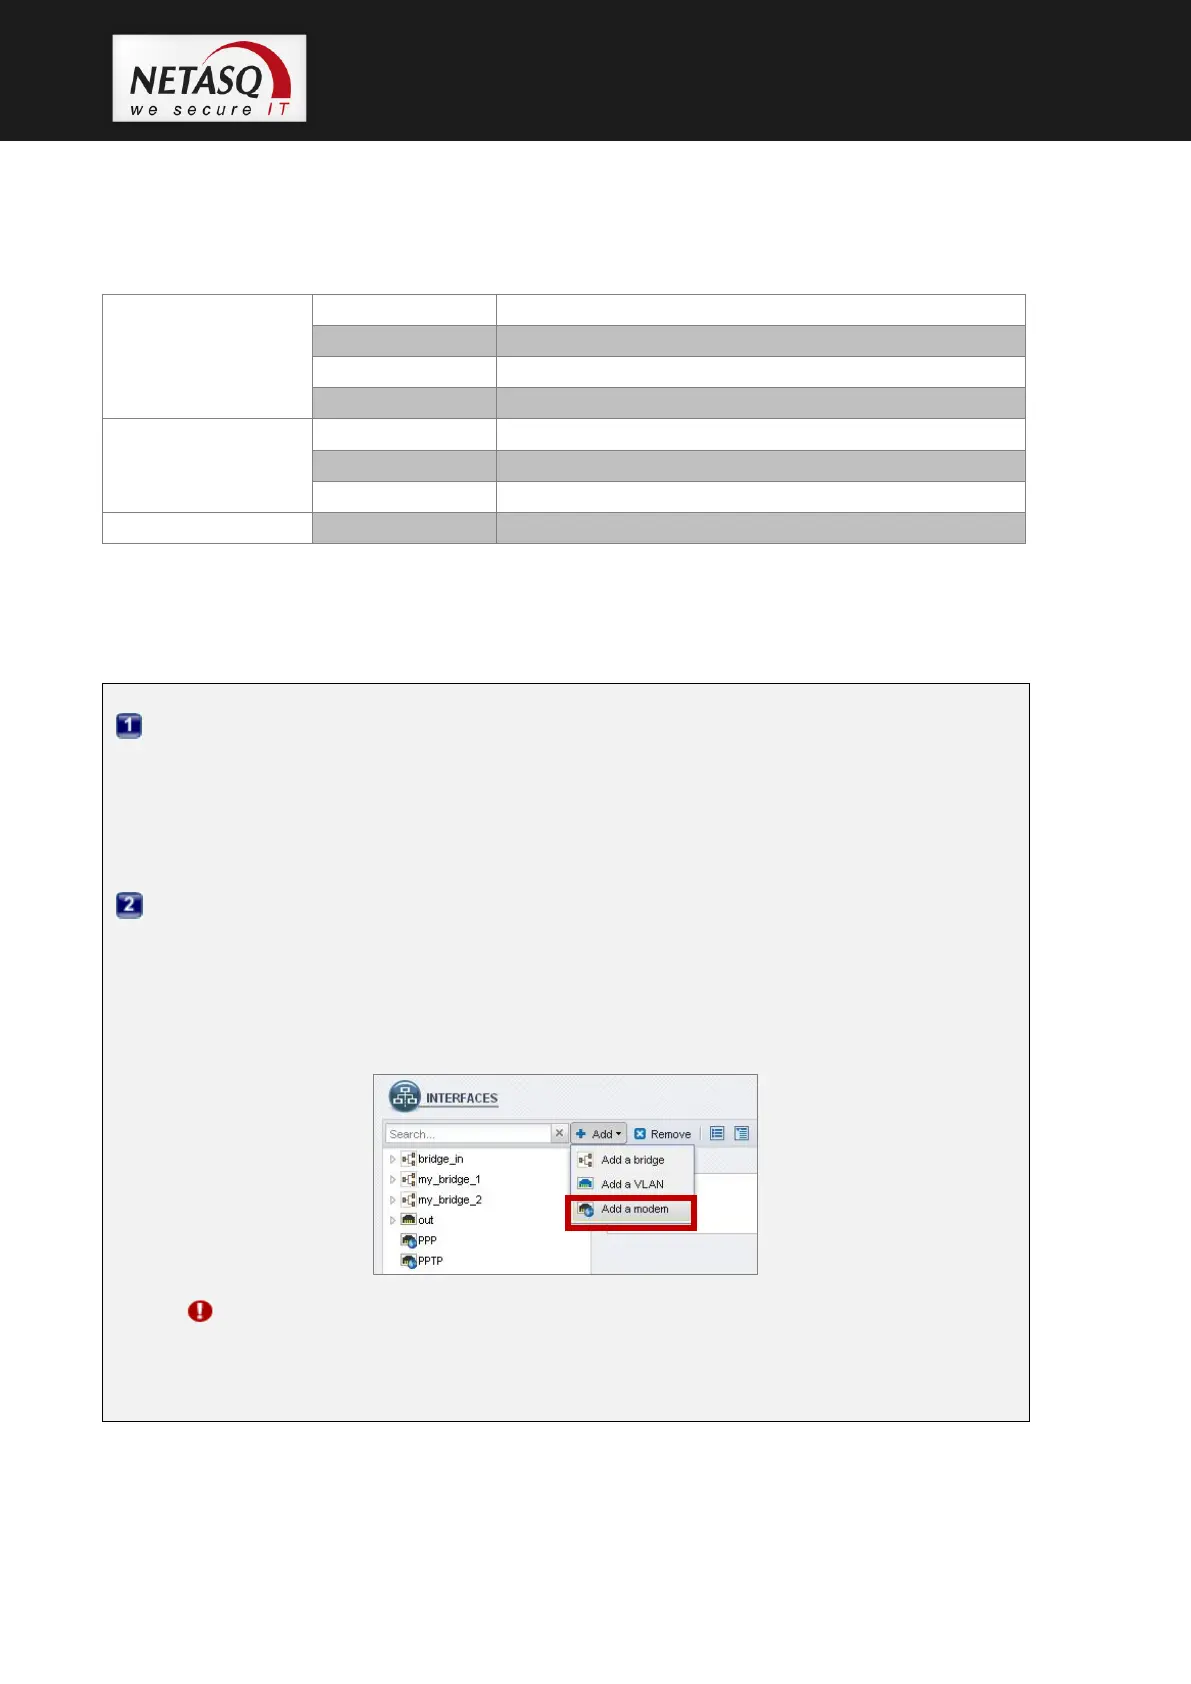
Step 2: Configuration
To configure the 3G modem, go to the administration interface. For help with settings, an
installation wizard will appear when you go to the module NETWORK > INTERFACES and
in the menu Add > Add a modem.
Refer to the documentation, section INTERFACES > Creating a modem in order to
configure your modem.
WARNING
The lowest firmware version needed is version 9.0.1. The installation of the modem
does not require an update of the license.
Green LED
Blinking
Networks searching
Slow blinking
Successful 3G/UMTS connection with provider established
Fast blinking
Data transfer using 3G/UMTS uplink
Steady
Successful 3G/UMTS connection but no data transmitting
Green + Red LED
Slow blinking
Successful 2G connection with provider established
Fast blinking
Data transfer using 2G uplink
Steady
Successful 2G connection but no data transmitting
Red LED
Steady
Error (No SIM card or failed 2G/3G connection)

Table of Contents

Other manuals for NETASQ U30

Related product manuals