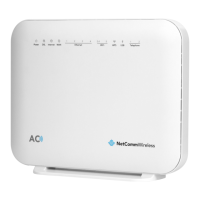
VDSL/ADSL2+ Dual Band AC1600 Gigabit Gateway with VoIP – NF18ACV
UG01040 v 1.04 December 2018
Experiment with more than one of the available channels, in order to find the clearest
connection and avoid interference from neighbouring cordless phones or other wireless
devices.
Hardware installation
1 Connect the power adapter to the Power socket on the back of the NF18ACV.
2 Plug the power adapter into the wall socket and switch on the power.
3 Wait approximately 60 seconds for the NF18ACV to power up.
Connect a client via Ethernet cable
1 Connect the yellow Ethernet cable provided to one of the yellow ports marked
‘Ethernet’ at the back of the NF18ACV.
2 Connect the other end of the yellow Ethernet cable to your computer.
3 Wait approximately 30 seconds for the connection to establish.
4 Open your Web browser, and enter http://192.168.20.1 into the address bar and
press enter.
5 Follow the steps to set up your NF18ACV.
Connect a client wirelessly
1 Ensure WiFi is enabled on your device (e.g. computer/laptop/smartphone).
2 Scan for wireless networks in your area and connect to the network name that
matches the Wireless network name configured on the NF18ACV.
Note – Refer to the included Wireless Security Card for the default SSID and wireless security
key of your NF18ACV.
3 When prompted for your wireless security settings, enter the Wireless security key
configured on the NF18ACV.
4 Wait approximately 30 seconds for the connection to establish.
5 Open your Web browser, and enter http://192.168.20.1 into the address bar and
press Enter.
6 Follow the steps to set up your NF18ACV.
Connect a client via WPS
The NF18ACV provides three methods to establish a connection with client devices using the
WPS (WiFi Protected Setup™) functionality.
Connect a device using the WPS button (default setting)
1 Bring a WPS enabled device within WiFi range and press its WPS (it may be physical or
virtual, e.g. on its user interface) button.
2 Press the WPS button on the left side of the NF18ACV. Its WPS orange icon will blink for
up to two minutes.
3 Once the device is connected, the WPS LED will remain illuminated and details of the
device will be added to the Wireless Clients list.
Connect a device using its WPS PIN
1 Bring a WPS enabled device within WiFi range and generate a WPS PIN.
2 In the NF18ACV’s web interface open WIRELESS > More Settings > WPS Setup:

 Loading...