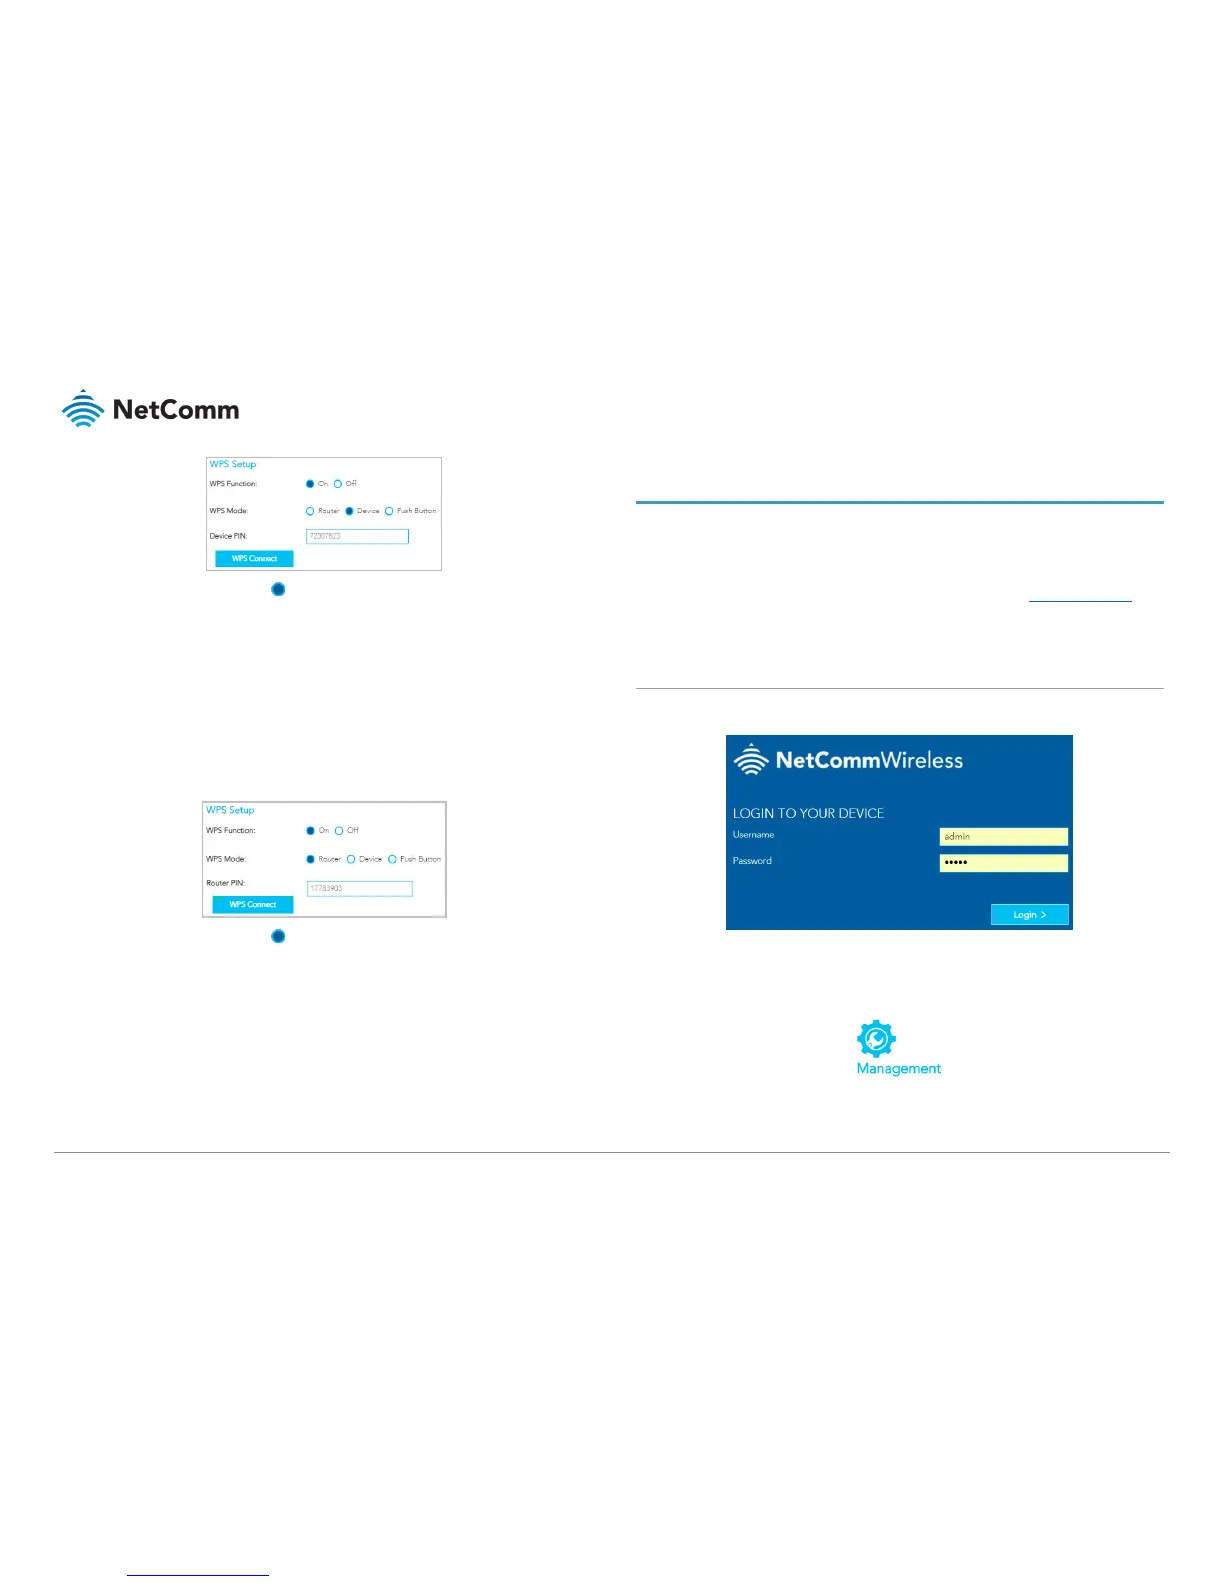
a Select WPW Mode Device and click the Apply button.
b Enter the device’s WPS PIN into the Device PIN field and click the WPS
Connect button.
3 The WPS blue icon will blink while the connection is established.
4 Once the device is connected, the WPS LED will remain illuminated and details of the
device will be added to the Wireless Clients list.
Connect a device using the NF18ACV’s WPS PIN
1 In the NF18ACV’s web interface open WIRELESS > More Settings > WPS Setup:
a Select WPW Mode Router and click the Apply button.
b Copy the Router PIN number.
2 Bring a WPS enabled device within WiFi range and enter the Router PIN into its WPS
setup interface.
3 Return to WIRELESS > More Settings > WPS Setup and click the WPS Connect button.
4 The WPS blue icon will blink while the connection is established.
5 Once the device is connected, the WPS LED will remain illuminated and details of
the device will be added to the Wireless Clients list.
Initial NF18ACV configuration
This section is for users who are connecting the NF18ACV to the internet for the first time after
either initial purchase or factory reset of the device.
After establishing a connection between the NF18ACV and your web browser (see previous:
Connect a client via Ethernet cable or Connect a client wirelessly) enter http://192.168.20.1 into
the address bar and press Enter.
Log in
The login screen will appear:
Enter the default Username and Password: both are “admin” (all letters are lowercase).
It is recommended that after you set up the NF18ACV you choose a more secure username and
password. These can be set in: Main menu >Advanced > Management > Passwords