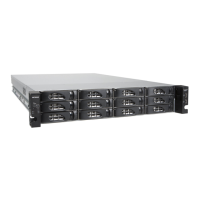
Figure 14. Drive bay
1. Disk tray handle
2. Disk Present LED
3. Disk tray release latch
4. Disk Activity or Fault LED
WARNING: No matter how many hard drives are installed in your system, ensure that
all drive trays remain in the drive bays to maintain proper airflow.
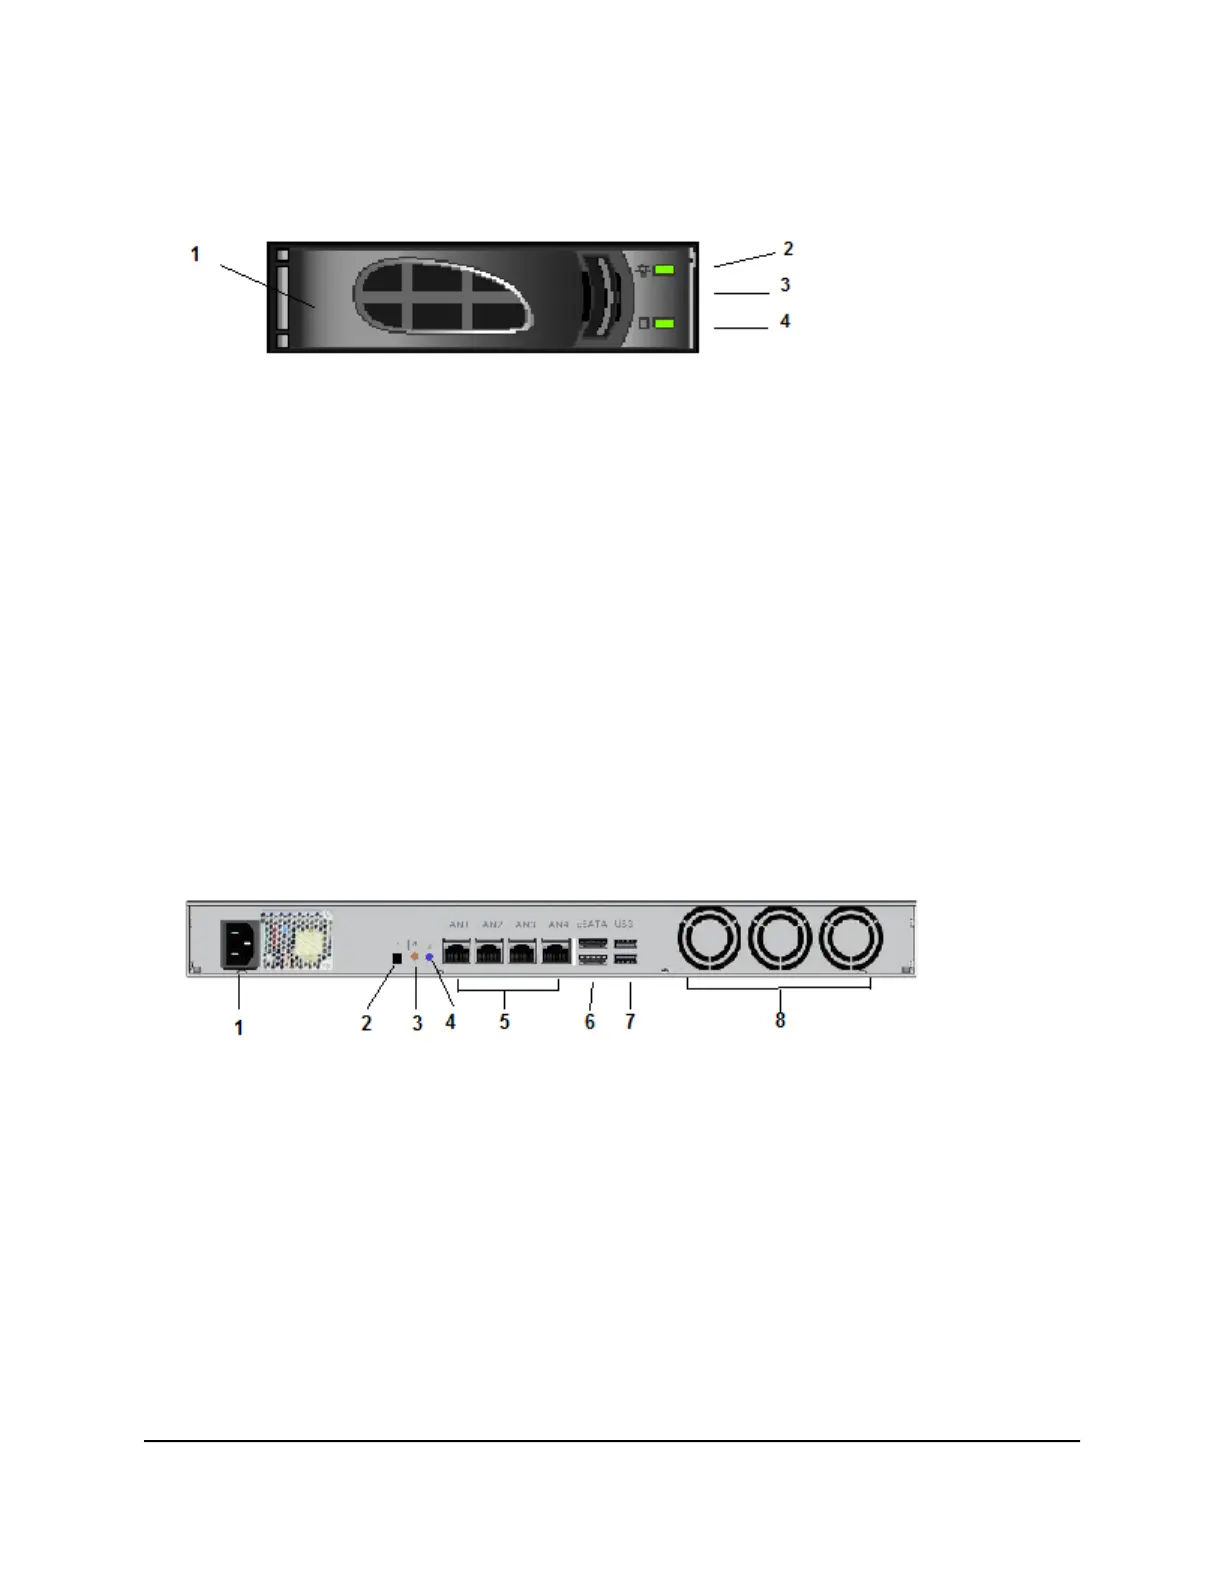
Rear Panel
The following figure shows the rear panel of the ReadyNAS 3138 storage system.
Figure 15. Rear panel
1. Power cable socket
2. Reserved for NETGEAR support
3. Unit Identifier (UID) button
4. Unit Identifier (UID) LED
5. Four 1-gigabit LAN ports with LED status indicators
6. Two eSATA ports
Hardware Manual40ReadyNAS 3138
ReadyNAS OS 6
 Loading...