46
4
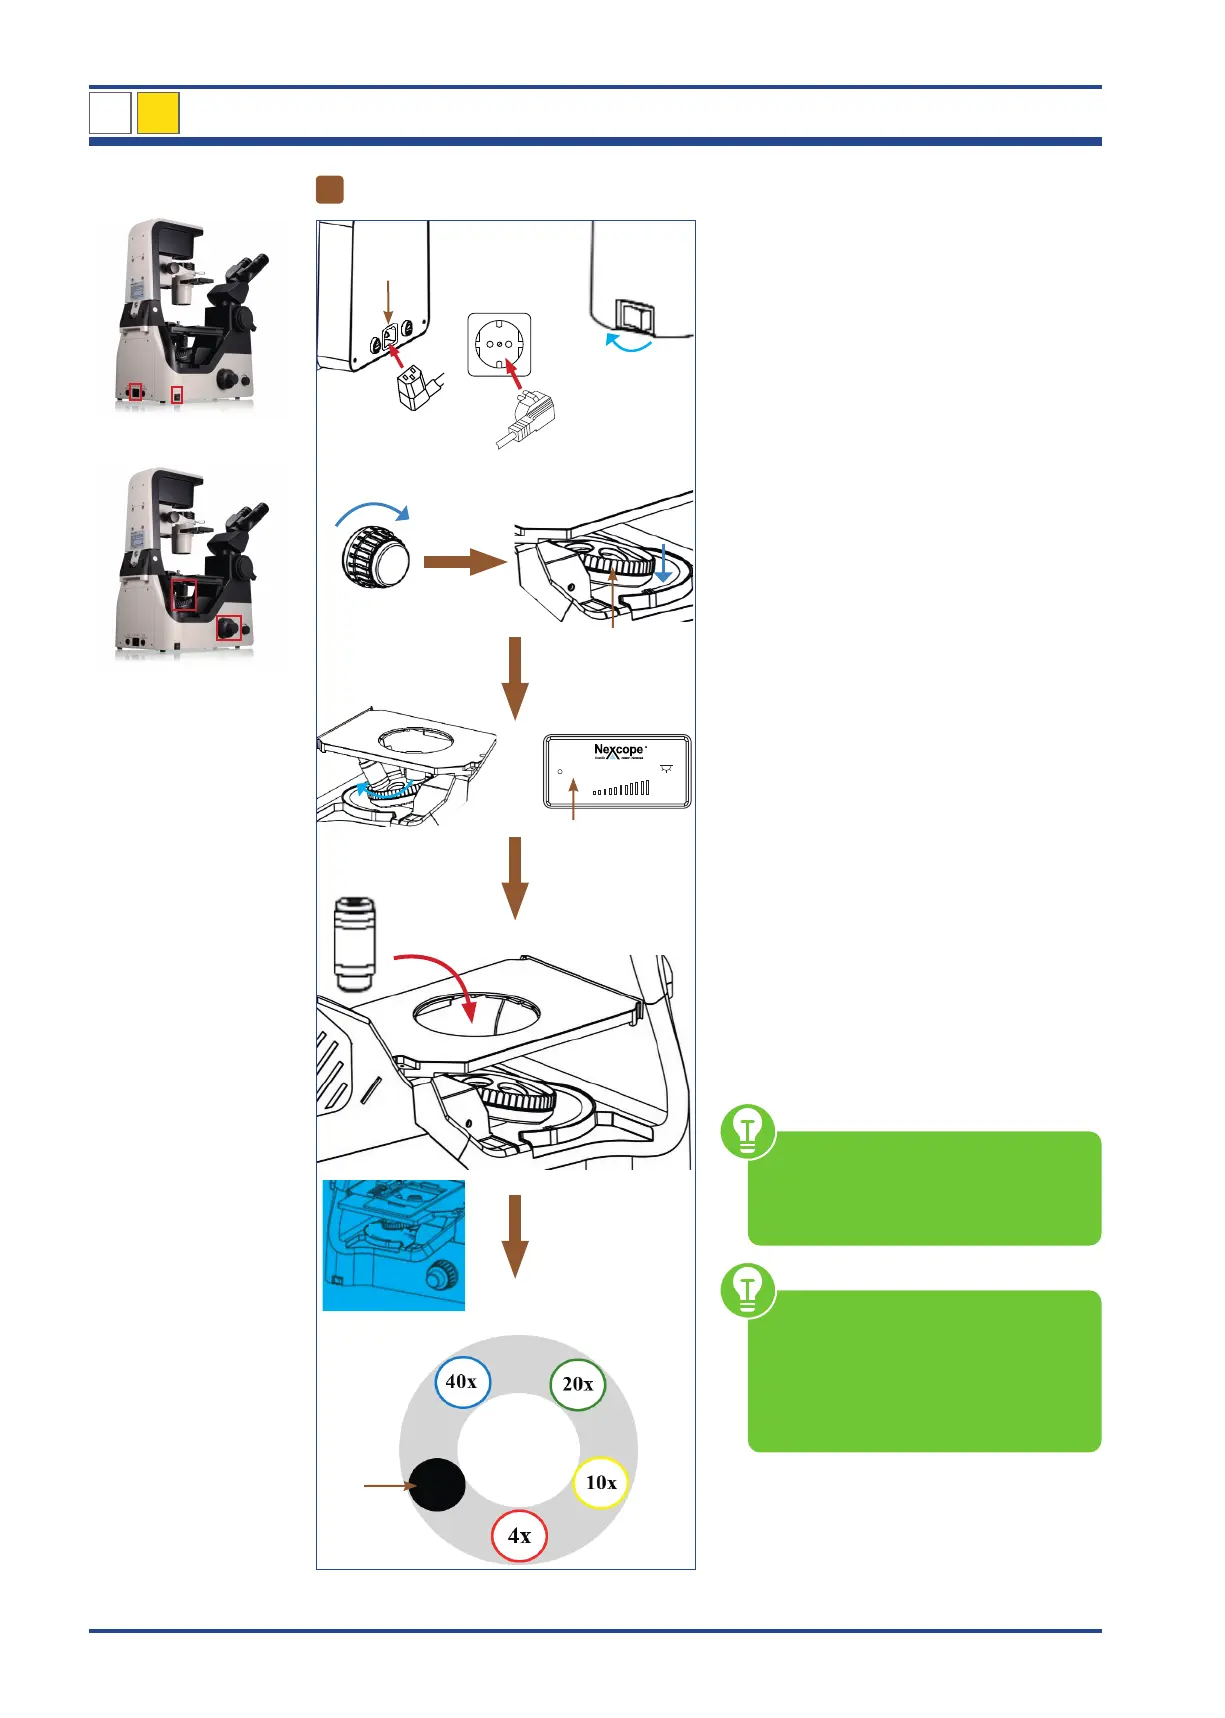
Attaching the objectives
I
III
IV
II
V
VI
VII
4x
10x
100
VIII
4x
X
IX
Illustration 035: NIB630 - Attaching the objectives to the nosepiece.
Connect the cold-device plug (I) to the ap-
propriate mains in (II) on the back of the mi-
croscope.
Insert the main power plug (III) into the pow-
er socket (IV).
Move power switch (V) to position I to turn
on the device on the left side of the micro-
scope.
Use the coarse focusing knob (VI) to turn the
encoded quintuple objective nosepiece (VII)
to the lowest position.
Turn the nosepiece by hand until the Liquid
Crystal Display (LCD) shows the programmed
position for the 4x objective (VIII).
Screw the 4x objective (IX) into the assigned
free space on the nosepiece.
Repeat the procedure for the next higher
objectives to occupy the programmed posi-
tions on the nosepiece until all objectives are
mounted.
The sequence is defined so that the magnifi-
cation increases continuously when turning
clockwise.
The following objectives are included in de-
livery:
4x: infinity planachromatic objective (NIS60)
10x,20x,40x: planachromatic phase contrast objective
(NIS60)
Protect the free opening on the objective
nosepiece with the black protective cap (X).
The objectives snap into place with
an audible “click” when they are po-
sitioned in the beam path. Only in this
position does the lighting come on.
Before each use, check the front
lens of the objective for dirt. The clos-
er a contamination is to the object or a
camera sensor, the greater its effect on
the visual or recorded image. There-
fore clean the objectives regularly.
NIB630
4
LCD