17
Insert the free end of the Inlet tubing into the running buffer container (500 mL glass bottle
with red cap). The running buffer container should be placed on the workbench beside the XT
autosampler. Do not place the running buffer container on top of the XT autosampler as it may
spill and damage the instrument.
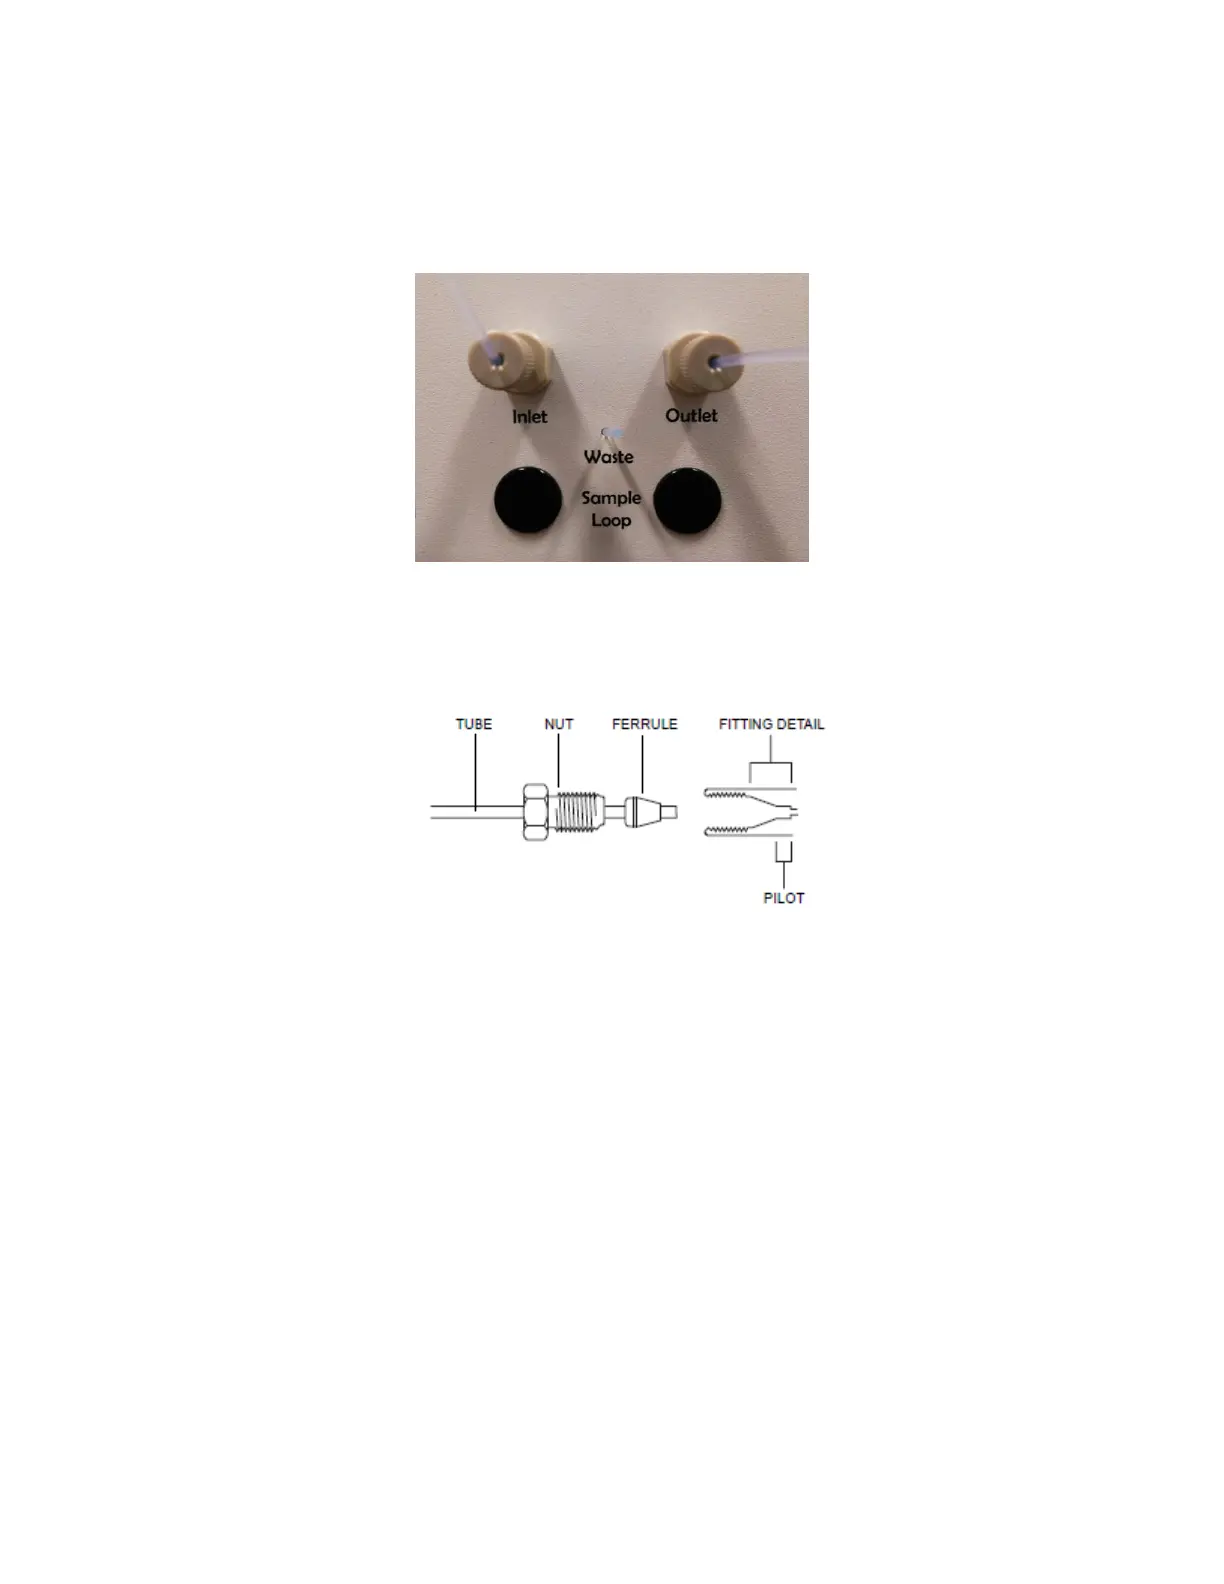
Figure 1.12 - Ports on the left side of the OpenSPR™ instrument. The running buffer is connected to the left port (Inlet) and the
waste container to the right port (Outlet). The “Sample Loop” ports are only used if the Sample Loop is installed on the outside of
the instrument. By default it is installed inside the instrument
Figure 1.13 - Inlet and Outlet port tubing connection detail
10. Install the Outlet tubing using the same procedure as above. Insert the free end into the waste
container (provided). You may use your own waste container in place of the one provided.
11. Place a second waste container (not provided) below the tubing that exists through the hole
labelled “Waste” [Figure 1.12]. This is the overflow from when the Sample Loop is filled. A
small petri dish or beaker will be sufficient to catch the overflow that drips out of the Sample
Loop waste line.
1.1.5 Turning on the OpenSPR-XT
TM
1. Install the OpenSPR-XT™ software onto your computer if a computer was not provided with
your instrument. Ensure that the computer meets the specifications listed above. Follow the
instructions in the “Software Installation” document (separate). The software installation files
are on the provided USB Drive.