29
2.2.3 Loading a New Sensor Chip
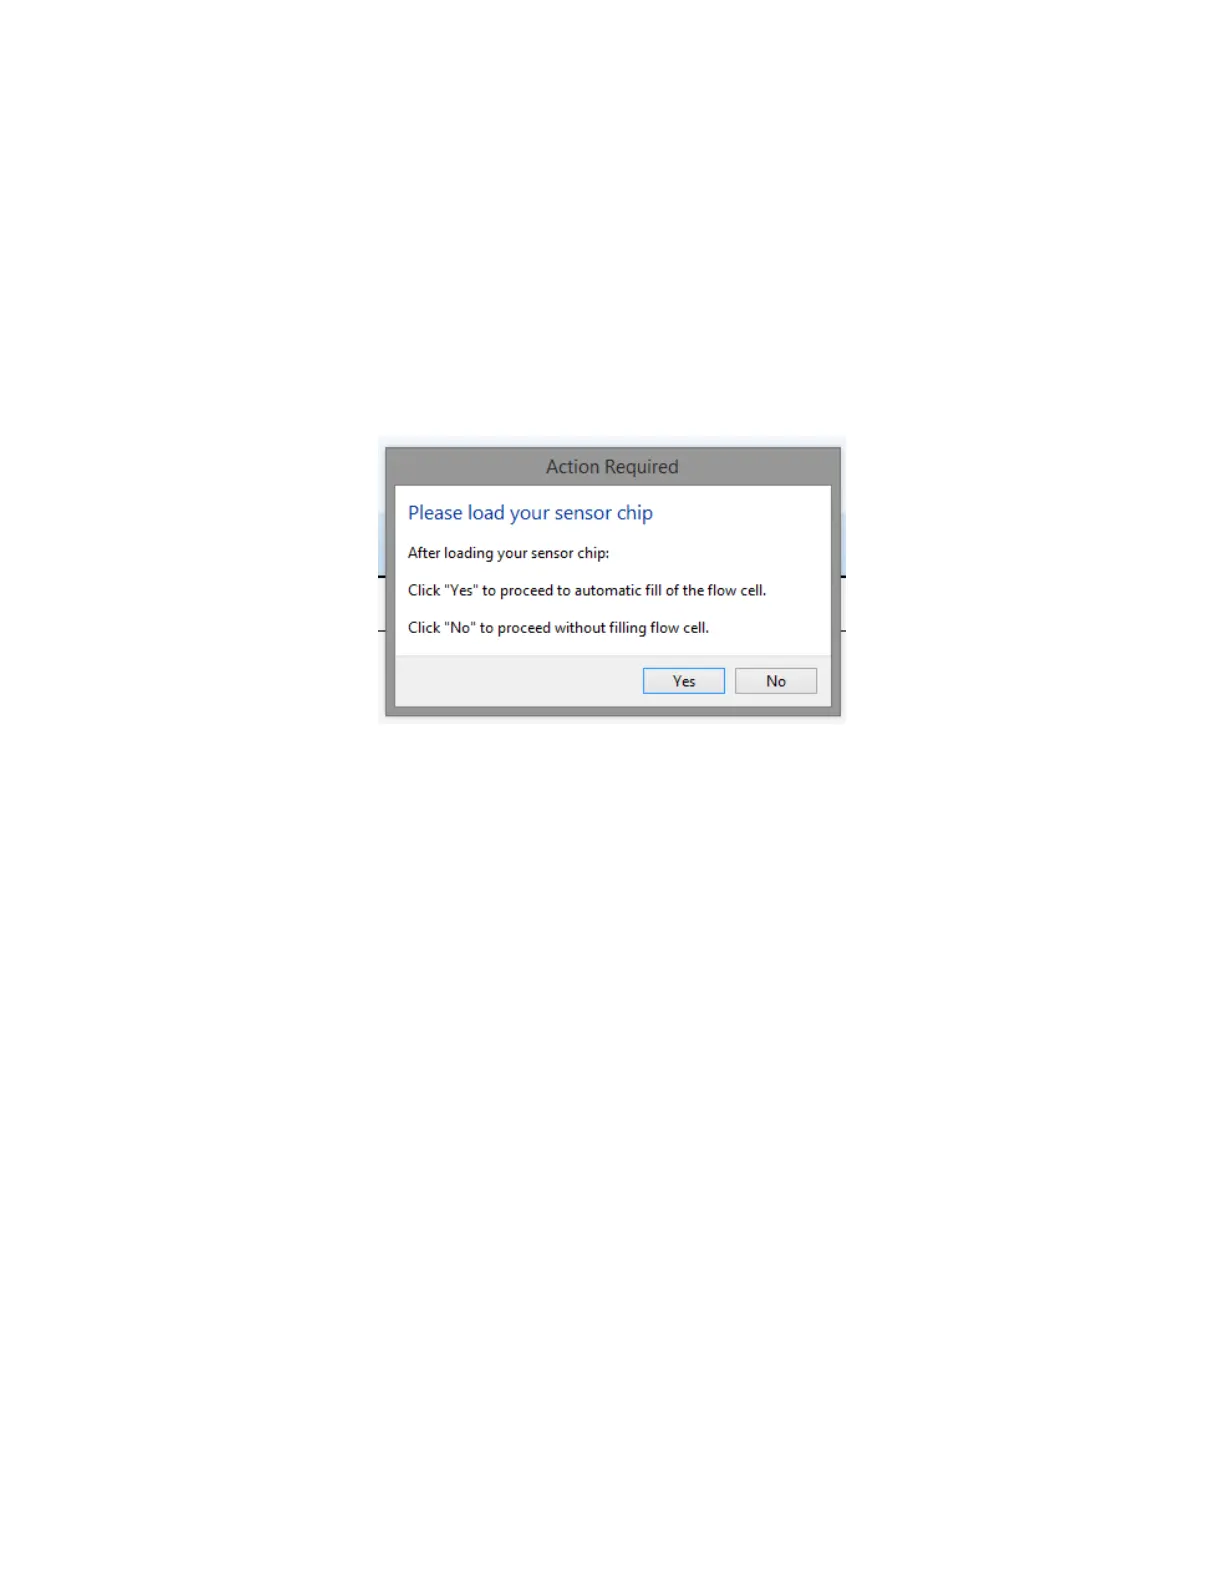
1. Next, the software will prompt you to load your Sensor Chip [Figure 2.7]. Always ensure that
the Flow Cell is clean of dust and debris prior to loading a new Sensor Chip. Do this by soaking
a lint free wipe in isopropanol and gently wiping the Flow Cell surface. Dry with nitrogen gas
or clean compressed air.
Note – you may notice that the sensor spots are larger than the width of the Flow Cell, so some
of the sensor spot may become stuck to the surface of the Flow Cell. This is normal and can be
easily removed with the above procedure.
Figure 2.7 - Load Sensor Chip and automatic fill of Flow Cell prompt.
2. Using a pair of tweezers, remove a Sensor Chip from the storage container. All Sensor Chips
are packaged with the sensor surfaces facing the label on the outside of the storage
container. If unsure which side of the glass the sensor is located, look at the chip at an oblique
angle and reflect light off of the sensor circle. It should become clear which side of the glass
the sensor is on. Do Not Touch the sensor directly, as this will scratch the surface and severely
diminish its performance.
3. The sensor should be rinsed with distilled water and dried with clean compressed air or
nitrogen. It is important that the surface of the chip be completely dry when loading to prevent
bubble formation in the Flow Cell.
Note - For plain gold sensors, follow the directions outlined in the “Sensor Chip Cleaning”
section to optimize the performance of the sensor before loading the chip into the OpenSPR-
XT™.
4. Remove the Sensor Holder from the Fludics block. Magnets are used to hold the Sensor Holder
to the Fludics block. The easiest way to remove it is to remove it at an angle, removing the side
closest to your first followed by the side furthest away from you [Figure 2.8]. Trying to remove
the Sensor Holder by pulling directly back on it can be challenging due to the strength of the
magnets. Be careful not to pinch your hand or glove between the Sensor Holder and Fludics
block.