43
If a bubble is present inside the Flow Cell channel, click “Back” once more to return to the
Bubble Removal Screen and repeat the bubble removal process as specific in section “Bubble
Removal & Cooling”. Your sample information and Test Timeline will be saved.
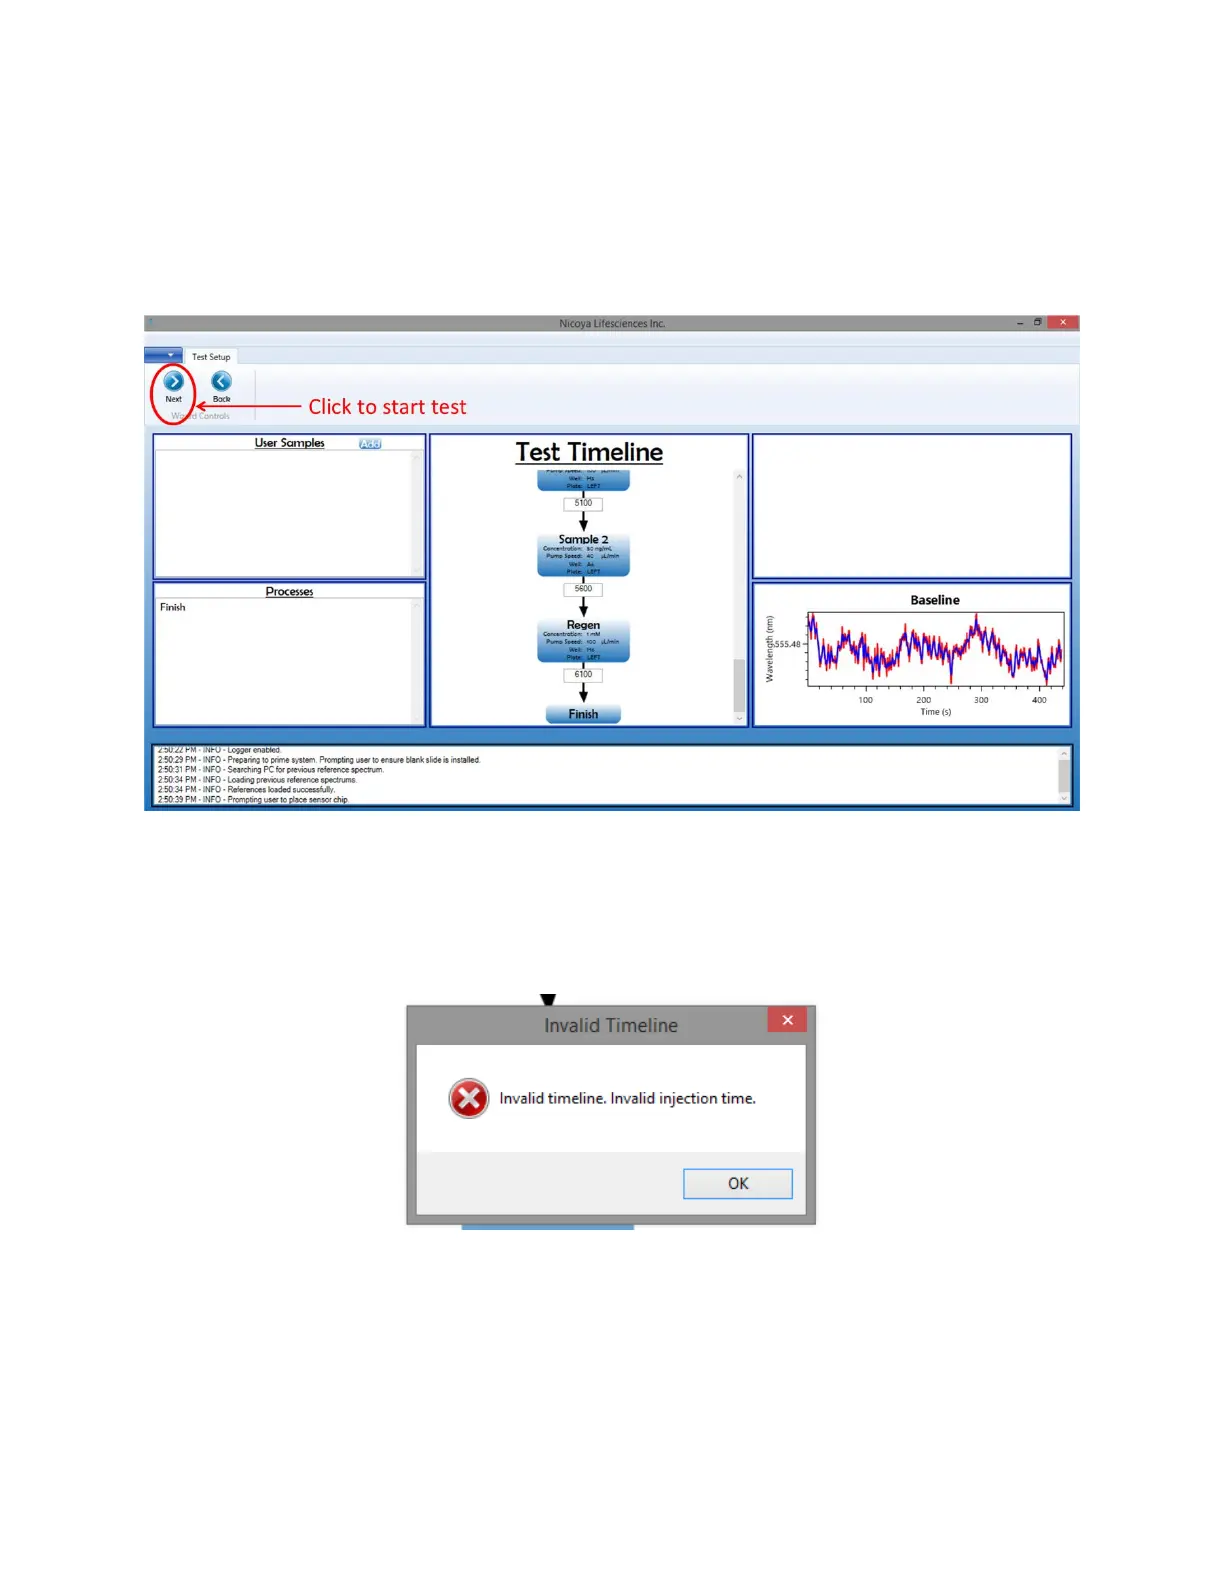
11. When you are ready for the autosampler to start the Test Timeline, on the Test Setup screen
click “Next” [Figure 2.31].
Figure 2.31 To start test, click "Next" on Test Setup screen.
The software will now do a check to make sure that your specified timepoints in the Test
Timeline are logical. If they are not logical, an error message will appear [Figure 2.32]. You will
have to correct the invalid timepoints in order to proceed with your test. The timepoints
should always be increasing in time from the start to finish.
Figure 2.32 Invalid timeline error message.
12. If your timepoints are logical, a message box will appear, prompting you to ensure your well
plates are loaded and the Sample Compartment Door are closed. If these criteria are met, click
“Yes” and the autosampler will begin your test. You can view the data being collected on the
Test screen in real time [Figure 2.33].