76
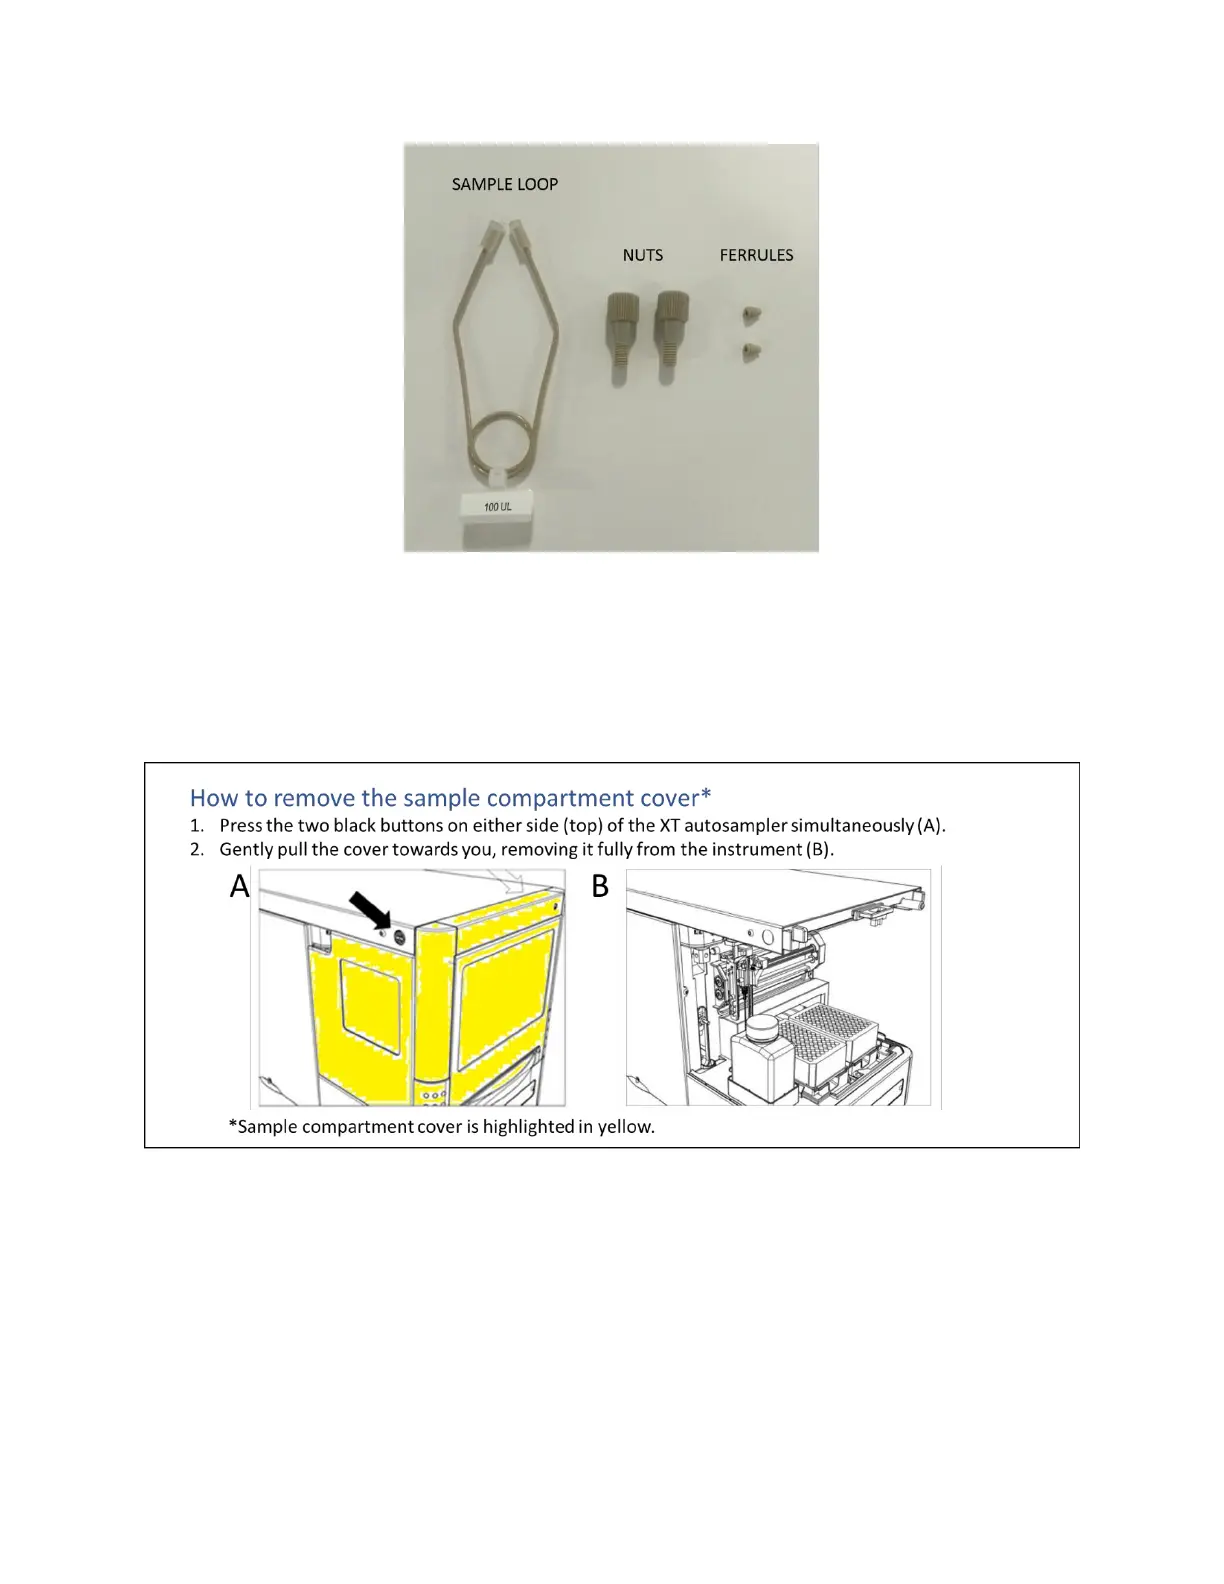
Figure 6.3 - Sample Loop and connectors
1. Ensure the OpenSPR and XT autosampler units of the OpenSPR-XT™ instrument are
powered off.
2. Remove the Sample Compartment Cover of the XT autosampler following the procedure
outlined in Figure 6.4. This will allow you easier access to the valve.
Figure 6.4 How to remove the Sample Compartment Cover.
3. Locate the valve near the top of the Sample Compartment. The current Sample Loop will
be installed in positions 2 and 5 and can be identified by the opaque tubing [Figure 6.5].
Remove the existing Sample Loop by turning the connector nuts counter-clockwise.