77
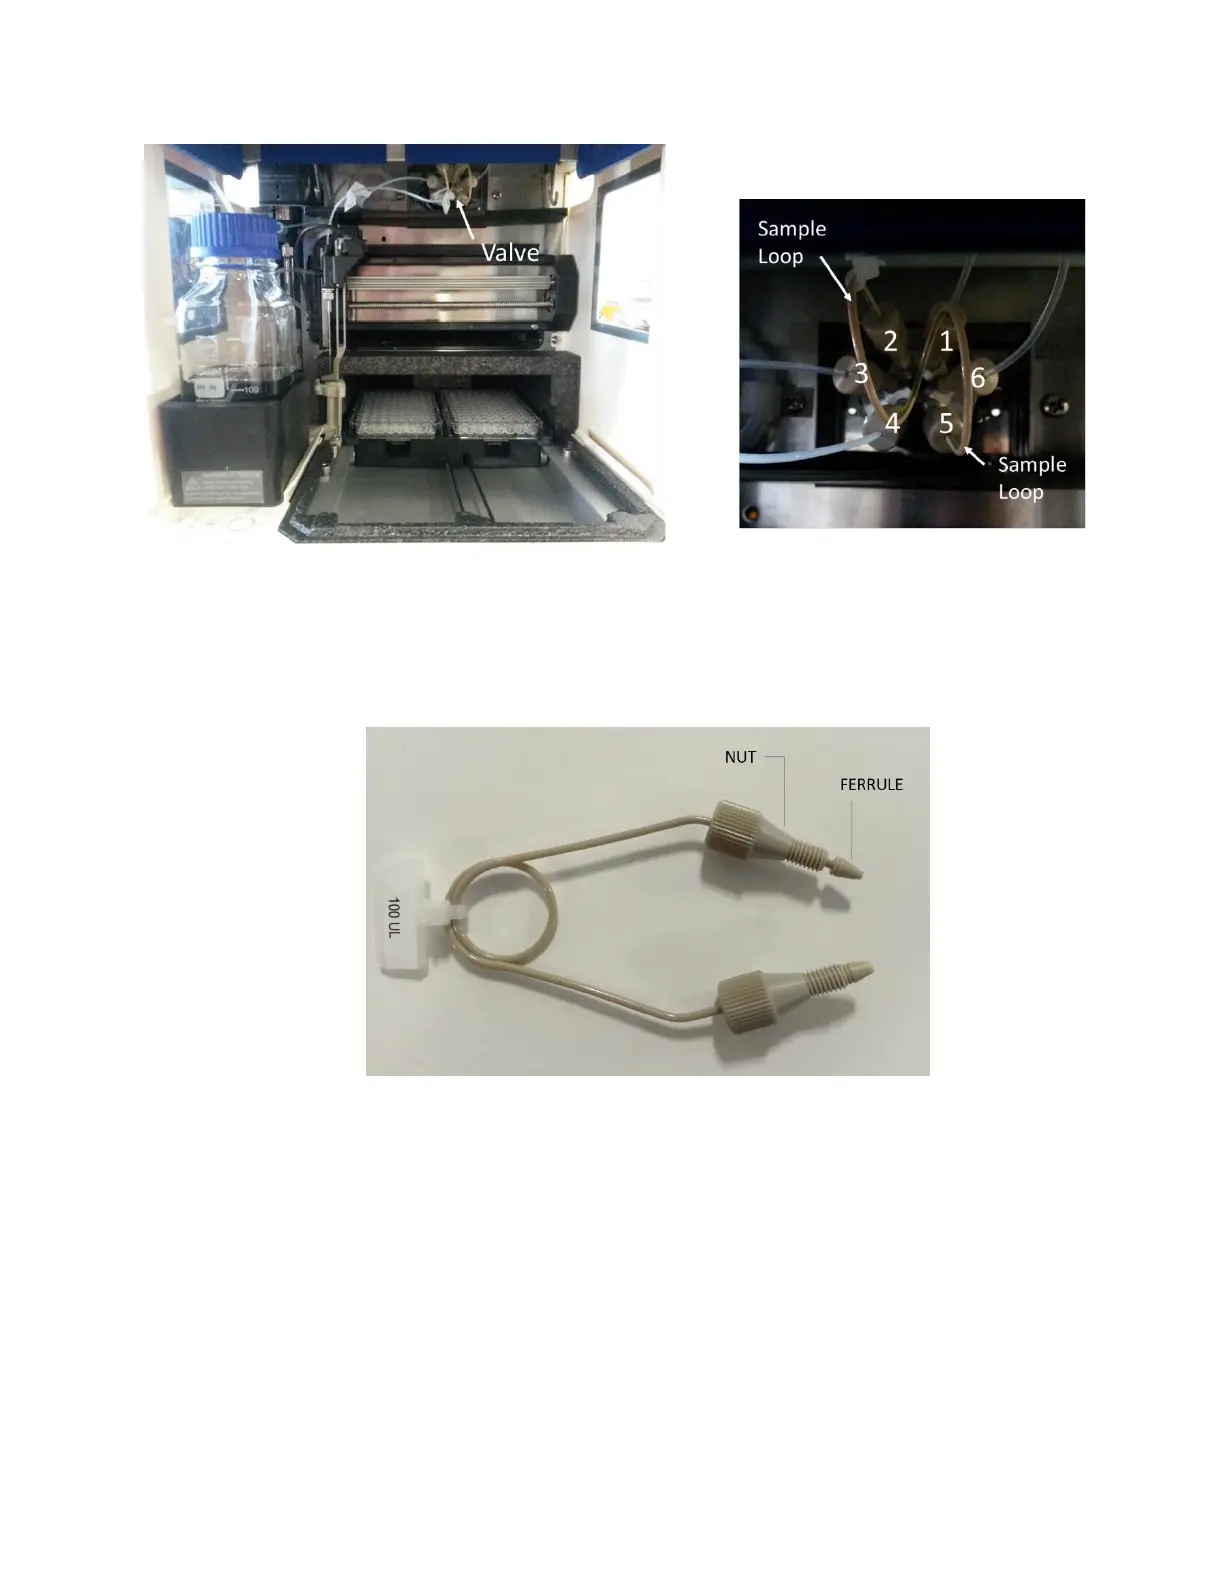
Figure 6.5 Location of the valve and Sample Loop inside the sample compartment.
4. Remove the plastic covers from both ends of the new Sample Loop.
5. Slide the nuts onto the ends of the Sample Loop followed by the ferrules in the orientation
shown in Figure 6.6.
Figure 6.6 - Proper orientation required for nuts and ferrules on Sample Loop
6. Install the new Sample Loop into the same port positions as the old one (ports 2 and 5)
by turning the nuts clockwise, tightening them fully by hand to ensure the tubing stays
fully seated.
7. Gently replace and secure the Sample Compartment Cover.