Chapter 4. Capturing Color Images (Standard Detector) A1
14
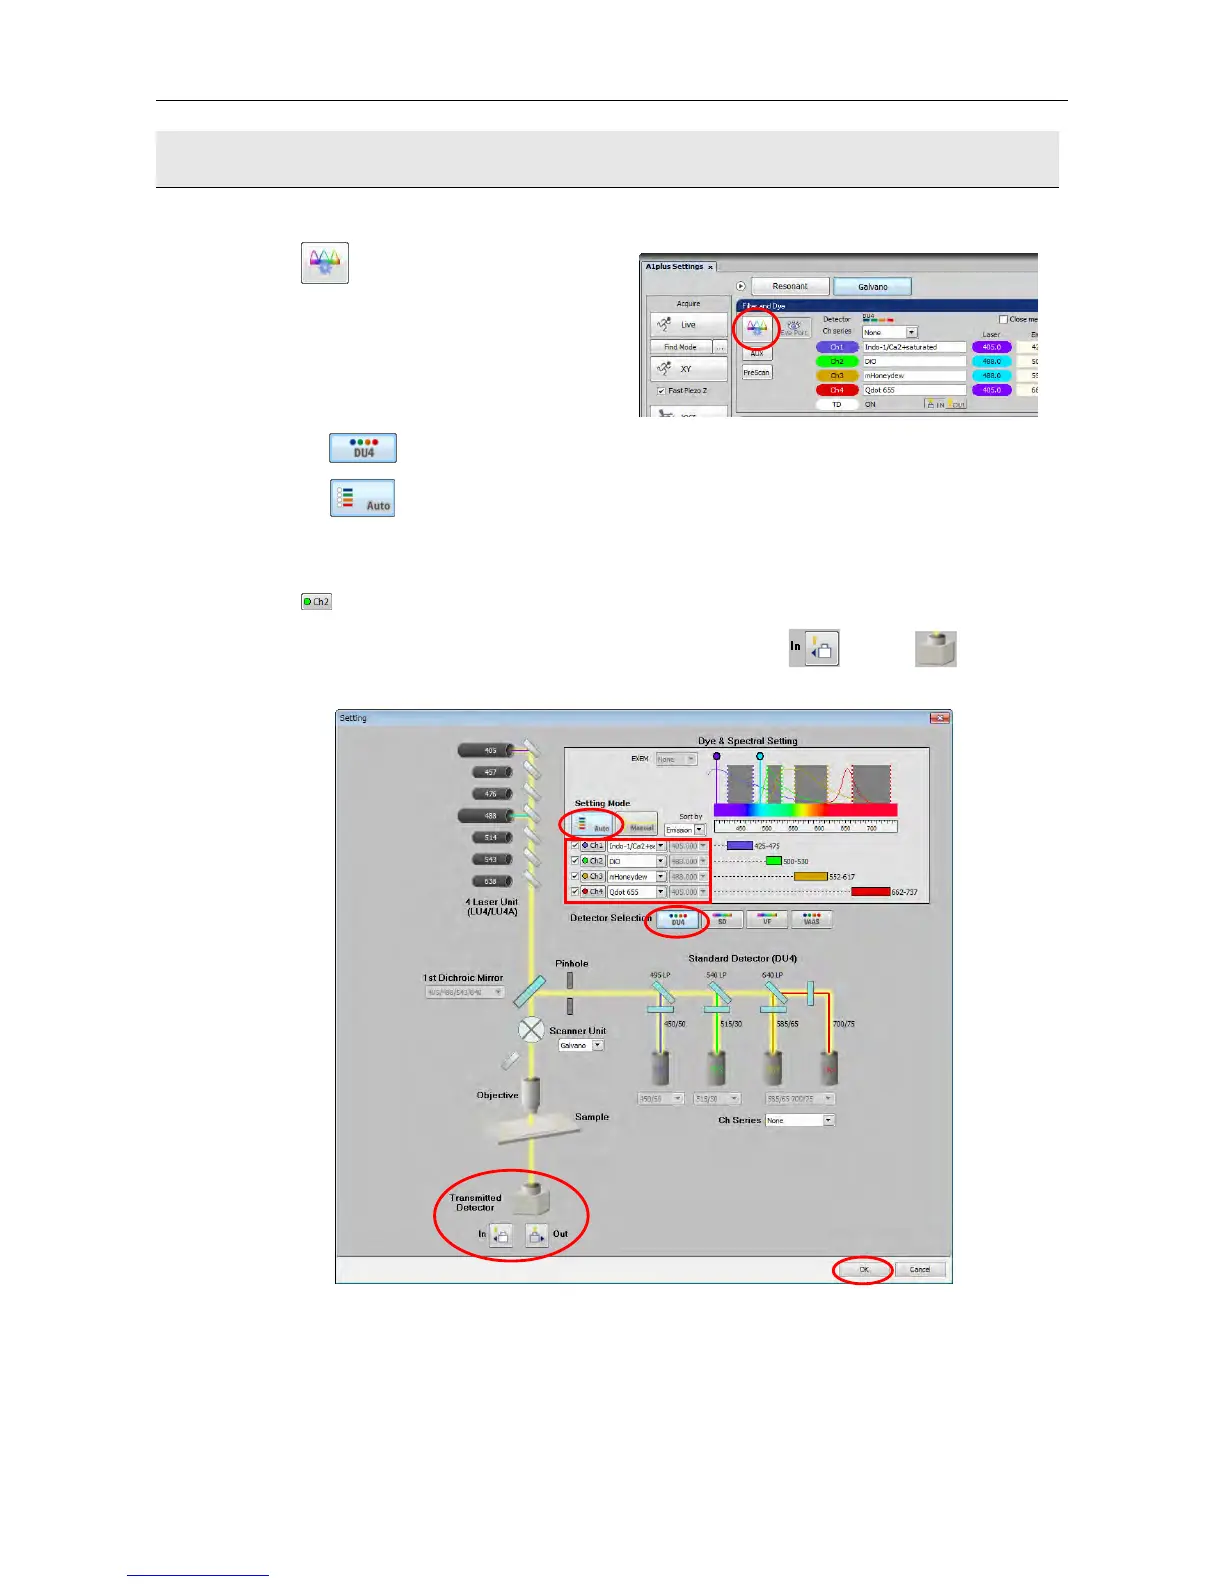
4.6 Set the optical path. (Optical path setting for the confocal system required for
acquiring images)
Check the settings.
(1) Click
to open the Optical path window.
(2) Click the
[DU4] button to select the standard detector.
(3) Click the
[Auto] button to set the optical path in the Auto mode.
(4) Check the checkboxes of channels to be used.
Select a reagent name.
Click
of each channel and select a pseudo-color.
(5) If acquiring a transmitted image together with a confocal image, click
to bring
into the
optical path.
Note: Before acquiring a transmitted image, turn off the light above the microscope.
Note: Because the transmitted light detector is placed in front of transmitted light, transmitted images
(differential interferences (DIC)) cannot be observed visually while putting the transmitted light
detector into the optical path.
To observe transmitted images visually, remove the transmitted light detector from the optical path.
(6) Click the [OK] button to set the optical path automatically.
(1)
(2)
(3)
(4)
(5)
(6)