EasyManuals Logo

Nikon A1 User Manual

Nikon A1
88 pages
To Next Page IconTo Next Page
To Previous Page IconTo Previous Page
Page #26 background imageLoading...
Page #26 background image
Chapter 7. Capturing ROI Scan and CROP Scan A1
26
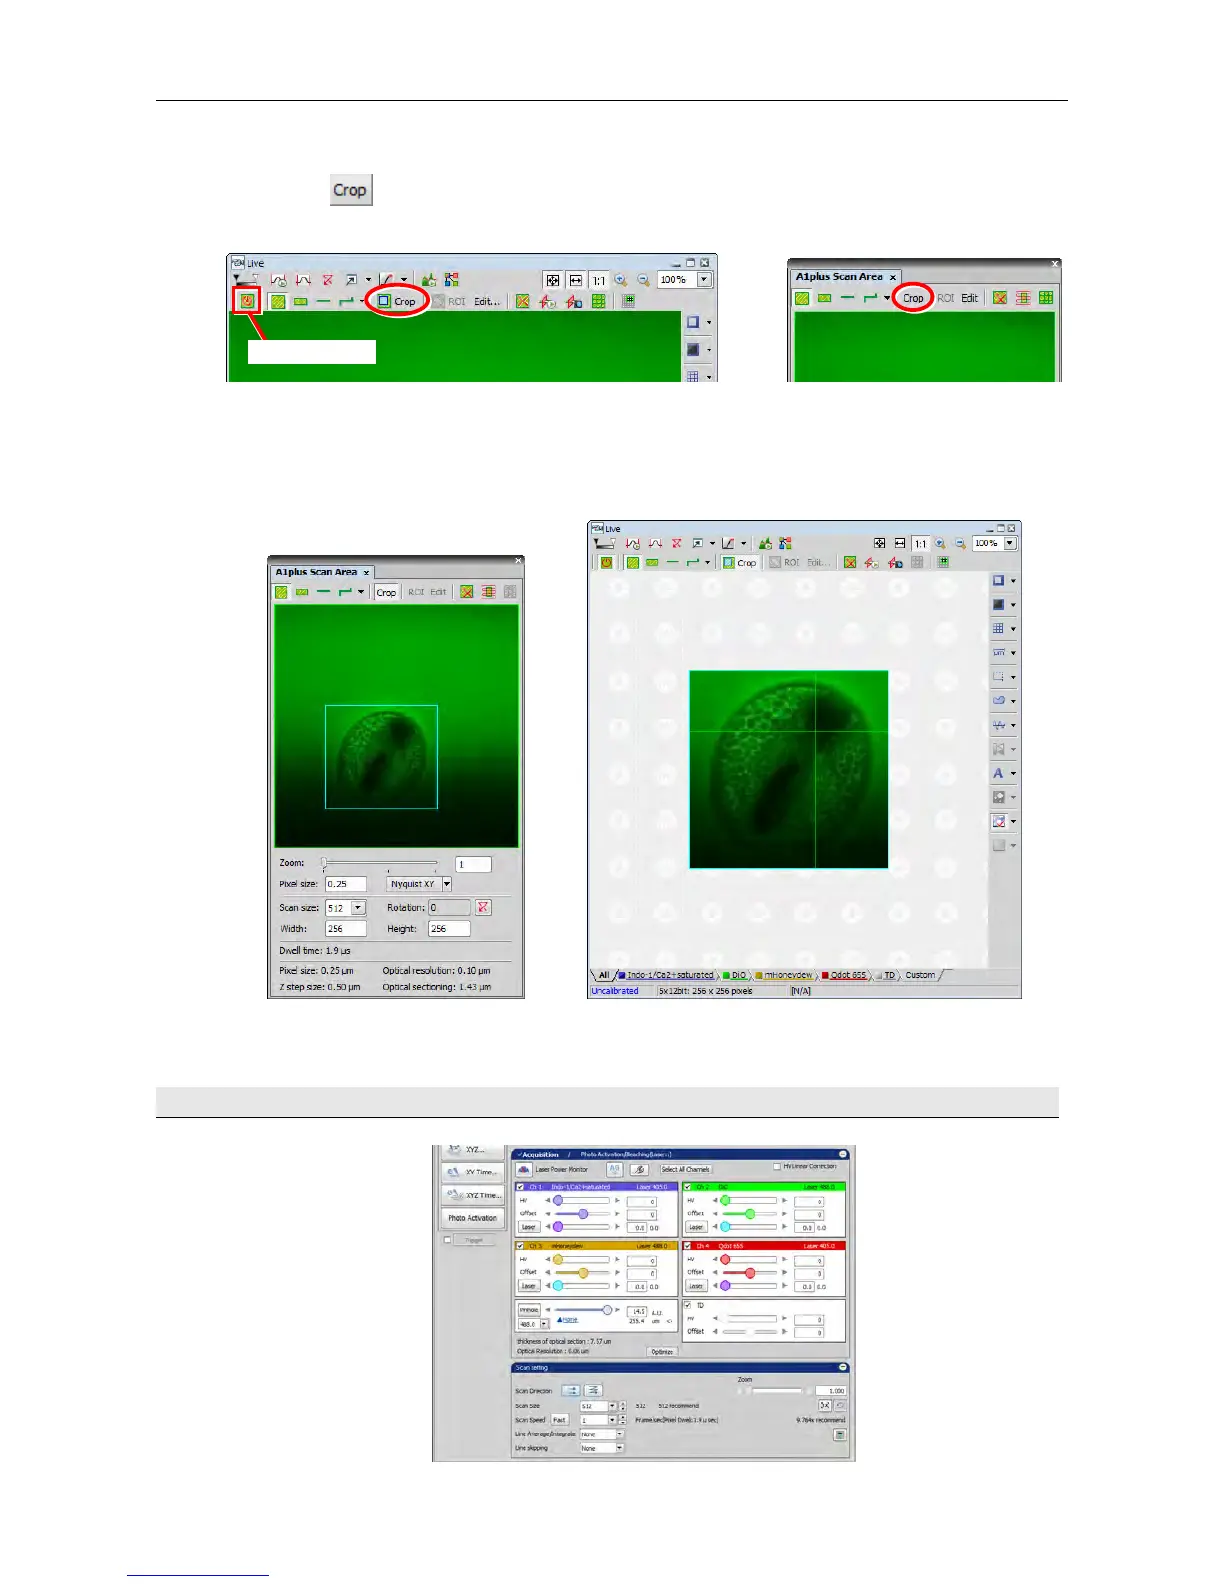
2) CROP scan extracts the selected area (pixel) and images it.
(1) Click the [Crop] button in the Live window or Scan Area window.
To draw a crop in the Live window, turn on the [Show Scan Area] button beforehand.
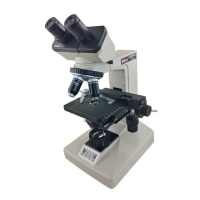
(2) In the Scan Area window, drag the light blue frame to reduce its size.
The frame can be moved with the mouse cursor set in the cross arrow state. (When the size or position of
the frame is changed, the light blue frame turns to red.)
The scan position can be determined by right-clicking.
Note: If a crop is drawn on Frozen images, click the Live button to start crop scanning.
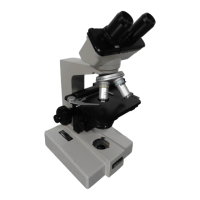
7.4 Readjust image acquisition conditions while checking the live image.
Show Scan Area

Questions and Answers:

Question and Answer IconNeed help?

Do you have a question about the Nikon A1 and is the answer not in the manual?

Nikon A1 Specifications

General IconGeneral
TypeConfocal Microscope
SoftwareNIS-Elements
Laser Lines405 nm, 488 nm, 561 nm, 640 nm
DetectorGaAsP PMT detectors
Imaging ModesConfocal, Spectral, FRAP
Scanning MethodGalvanometer-based scanning
ObjectivesCompatible with Nikon CFI objectives
DimensionsVaries with configuration
WeightVaries with configuration
LaserMultiple laser lines available

Related product manuals