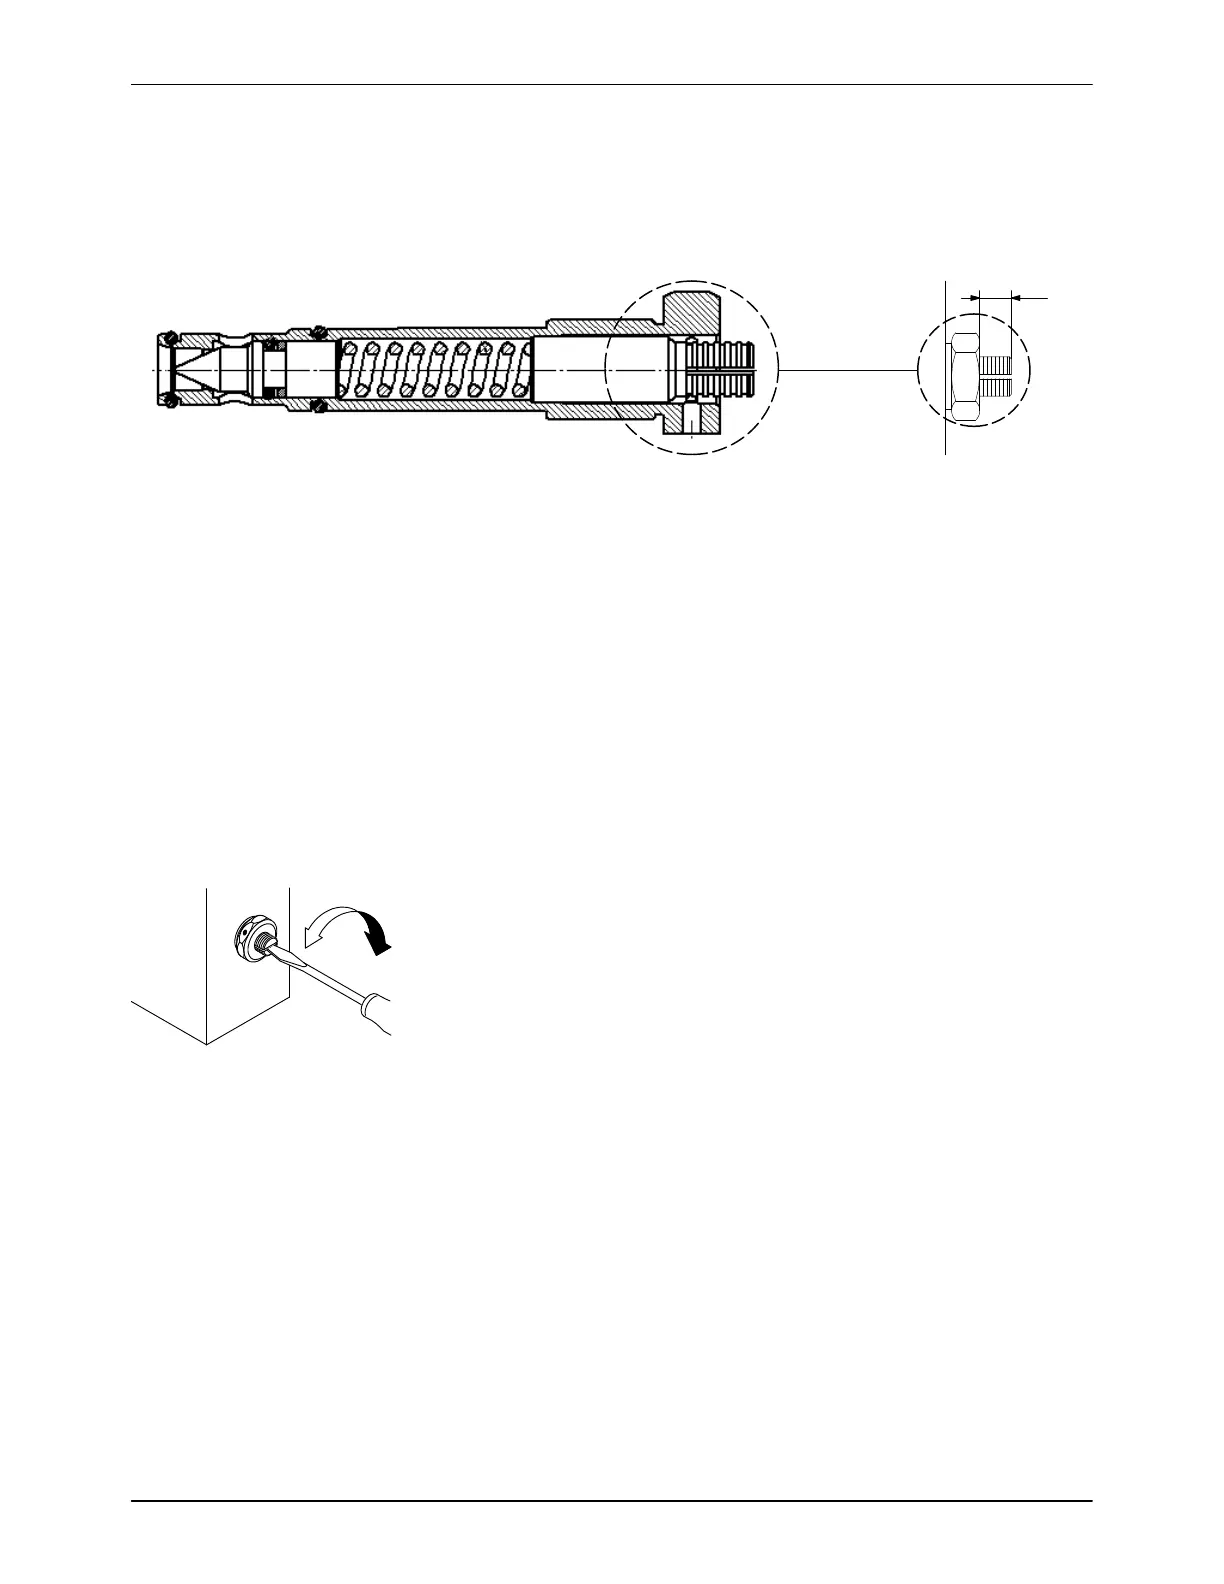
Adjusting the set screw
+*
Service
5-15
Part 1126931_01
2018 Nordson Corporation
Pressure Control Valve
Replace the Pressure Control Valve
X
Figure 5‐10 Pressure control valve set screw insertion depth
NOTE: Screw in only when valve and pump are warm and material is soft.
1. Ensure the melter is at operating temperature.
2. Relieve system pressure. Refer to Section 1, Safety.
3. Measure and make a note of the insertion depth of the set screw
(dimension X). This way the insertion depth can be replicated after
reassembly.
4. To prevent adhesive from leaking into the valve bore, drain the tank.
Refer to Draining Material from the Tank later in this section as needed.
5. Remove the old pressure control valve.
6. Apply high temperature grease to all threads and O-rings.
7. Slide the valve into the hole and tighten with torque wrench
(15 N•m / 133 in.-lb).
8. Adjust the setting screw to the recorded dimension X.
Turning to the right increases material pressure.
Turning to the left decreases material pressure.
 Loading...