Service
5-18
Part 1126931_01
2018 Nordson Corporation
Main PCA Board
Replace the Main PCA Board
1. Disconnect power to the melter at the local disconnect switch.
2. Switch the melter off.
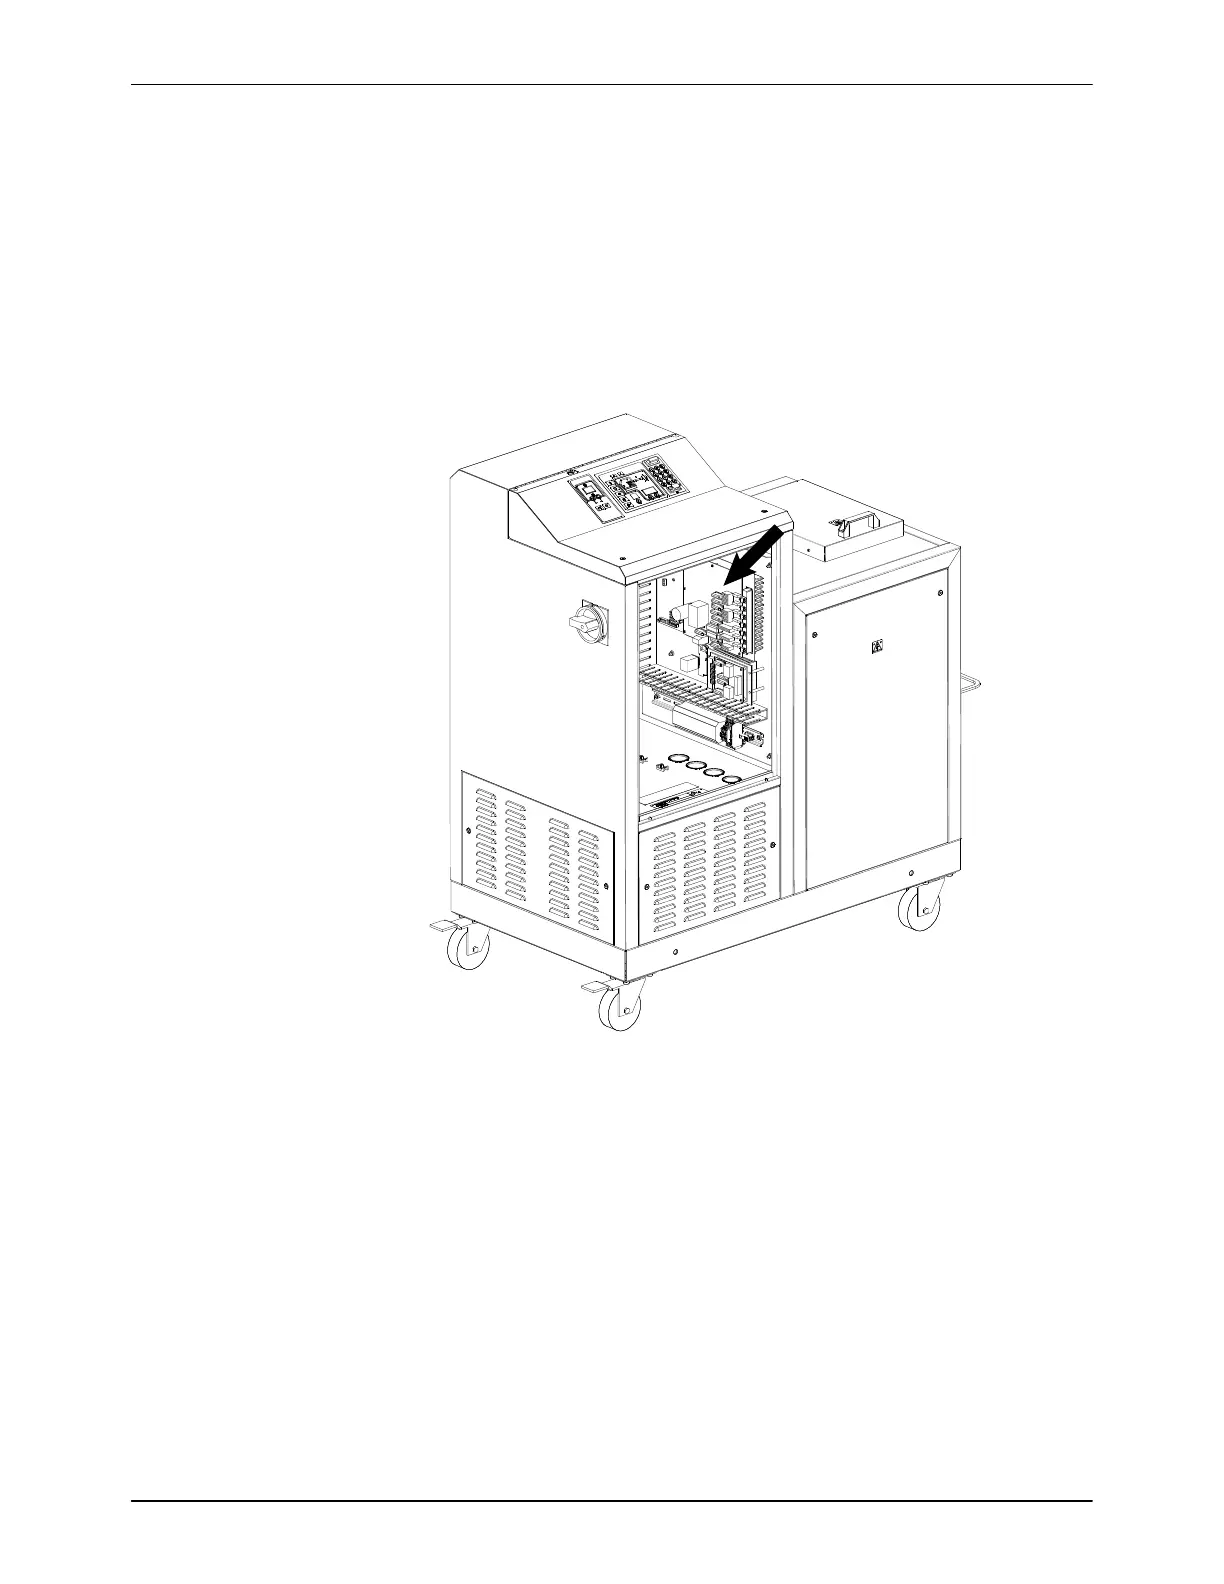
3. See Figure 5‐11. Open the electrical enclosure access panel and locate
the main PCA board.
Figure 5‐11 Location of the main PCA board
4. Disconnect all of the power and control cables from the board.
5. Remove the four fastening screws that hold the board on the mounting
studs and then remove the board.
NOTE: Before installing the new board, you must ensure that the board
is properly configured for the type of temperature sensors present on the
melter. If the melter uses 100‐ohm platinum sensors, the jumpers
connected to the JP1 terminal on the old board must be removed and
then installed on the new board. Figure 5‐12 shows the location of
terminal JP1 on the main PCA board. Figures 5‐13 and 5‐14 show the
jumpers installed and not installed, as appropriate for each type of melter.
 Loading...