System Setup
3-8
Part 1602221-01
E 2012 Nordson Corporation
Entering Configuration Mode
To enter configuration mode, press and hold the Plus and Minus buttons on
the kV/uA panel while either turning on power or pressing the
Enable/Disable button (if the controller is already powered up). After 1
second all panels flash CF for 3 seconds. After 3 seconds the kV/
μA panel
displays F − 1 for function 1. The controller is now in configuration mode.
To save your settings and exit Configuration Mode, press the
Enable/Disable button.
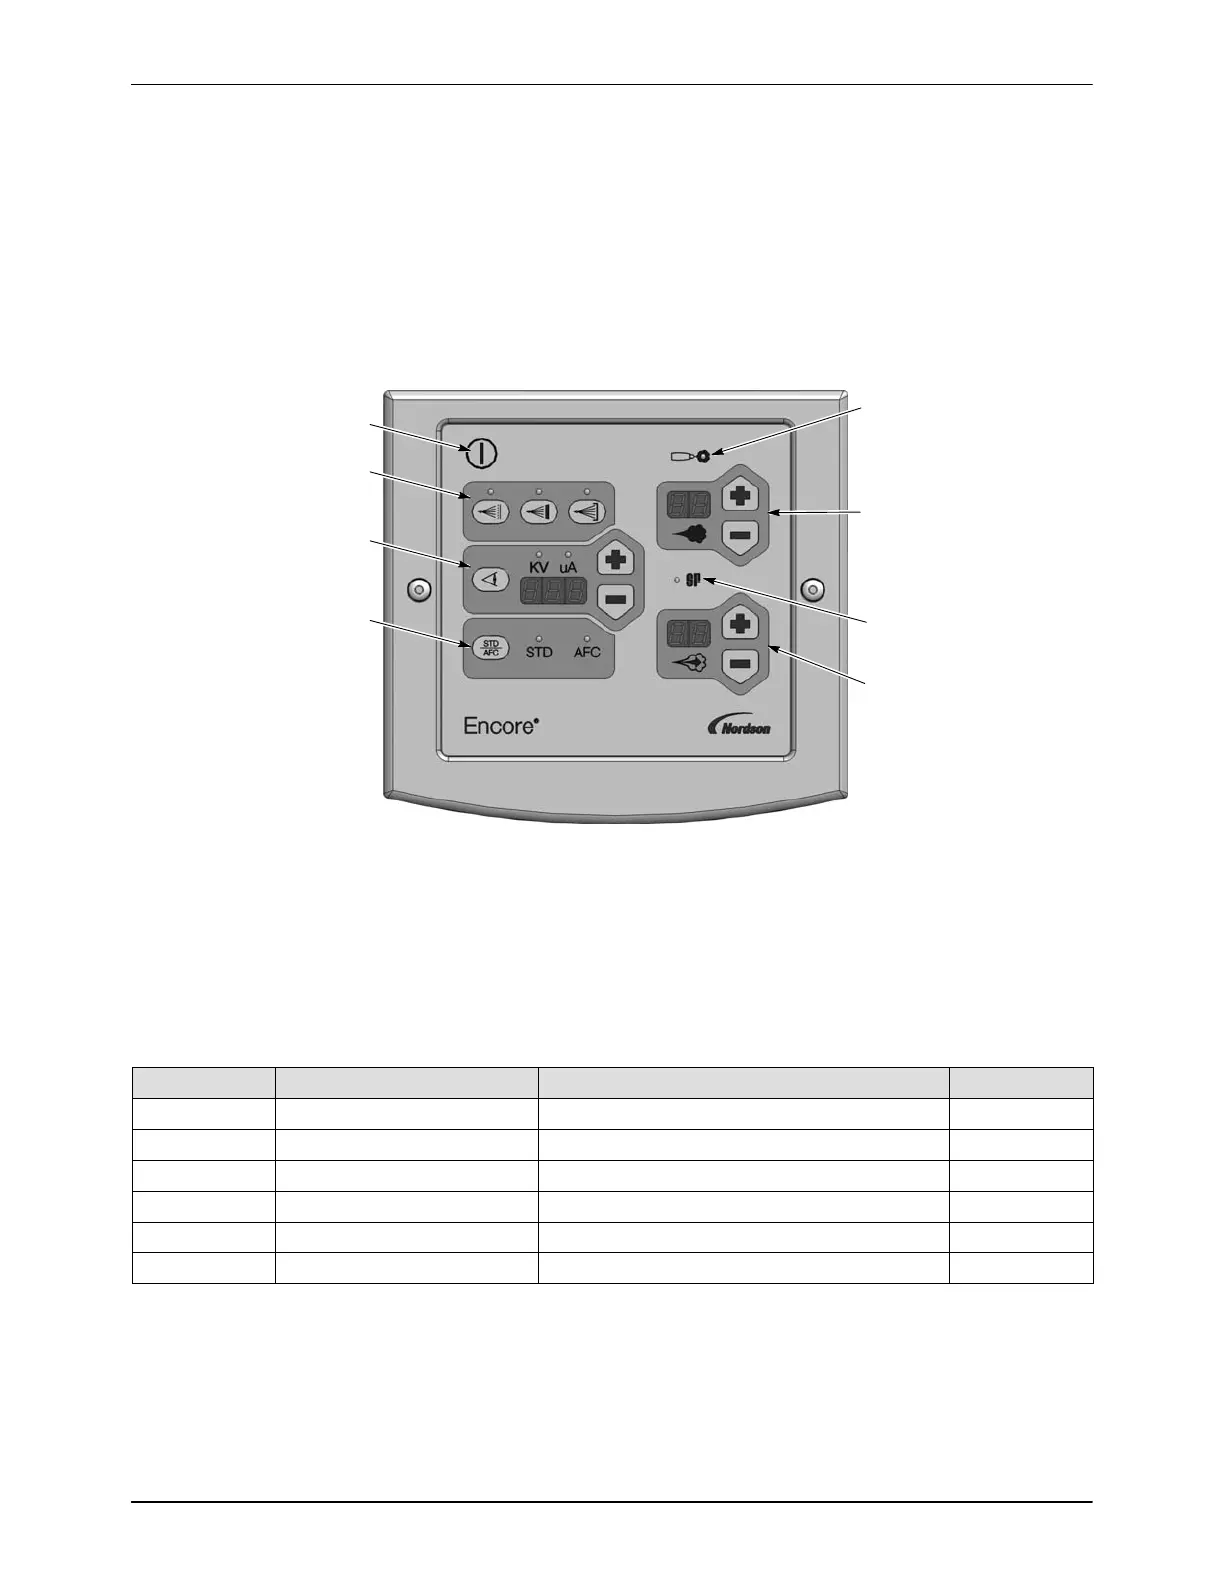
Atomizing Air
(Classic)
Total Flow
(Smart Flow)
Setting/Display
Smart Coat Settings
KV/μA Setting/Display
KV/uA Selection
Control
Smart Flow
Mode Indicator
Flow-Rate Air
(Classic)
Powder Flow Rate
(Smart Flow)
Setting/Display
Enable/Disable
Trigger LED
Figure 3-8 Controller Interface
Function Settings
To change functions, press the Plus or Minus buttons on the kV/μA panel.
To change function values press the Plus or Minus buttons on the Flow Air
panel. Refer to the Operation section for explanations of the differences in
Electrostatic Control and Powder Flow Control modes.
Function No. Name Settings Default
1 Gun Type 0 = Encore 0
2 Fluidizing 0 = Hopper, 1 = Box, 3 = Disable 0
3 Electrostatic Control 0 = Custom, 1 = Classic 0
4 Powder Flow Control 0 = Smart, 1 = Classic 0
5 Cable Length 0 = 6 meters, 1 = 12 meters, 2 = 18 meters 0
6 Vibratory Box Delay on, 0−90 seconds (not used with PE guns) 30
Exiting Configuration Mode
To accept all function values and exit Configuration Mode, press the
Enable/Disable button. The controller can now be operated normally.