Oki Data CONFIDENTIAL
42930511TH Rev. 2 156 /
5.2 Adjustment After Replacing Parts
The following describes the adjustments necessary when replacing parts.
Color drift adjustment and correction is constantly necessary.
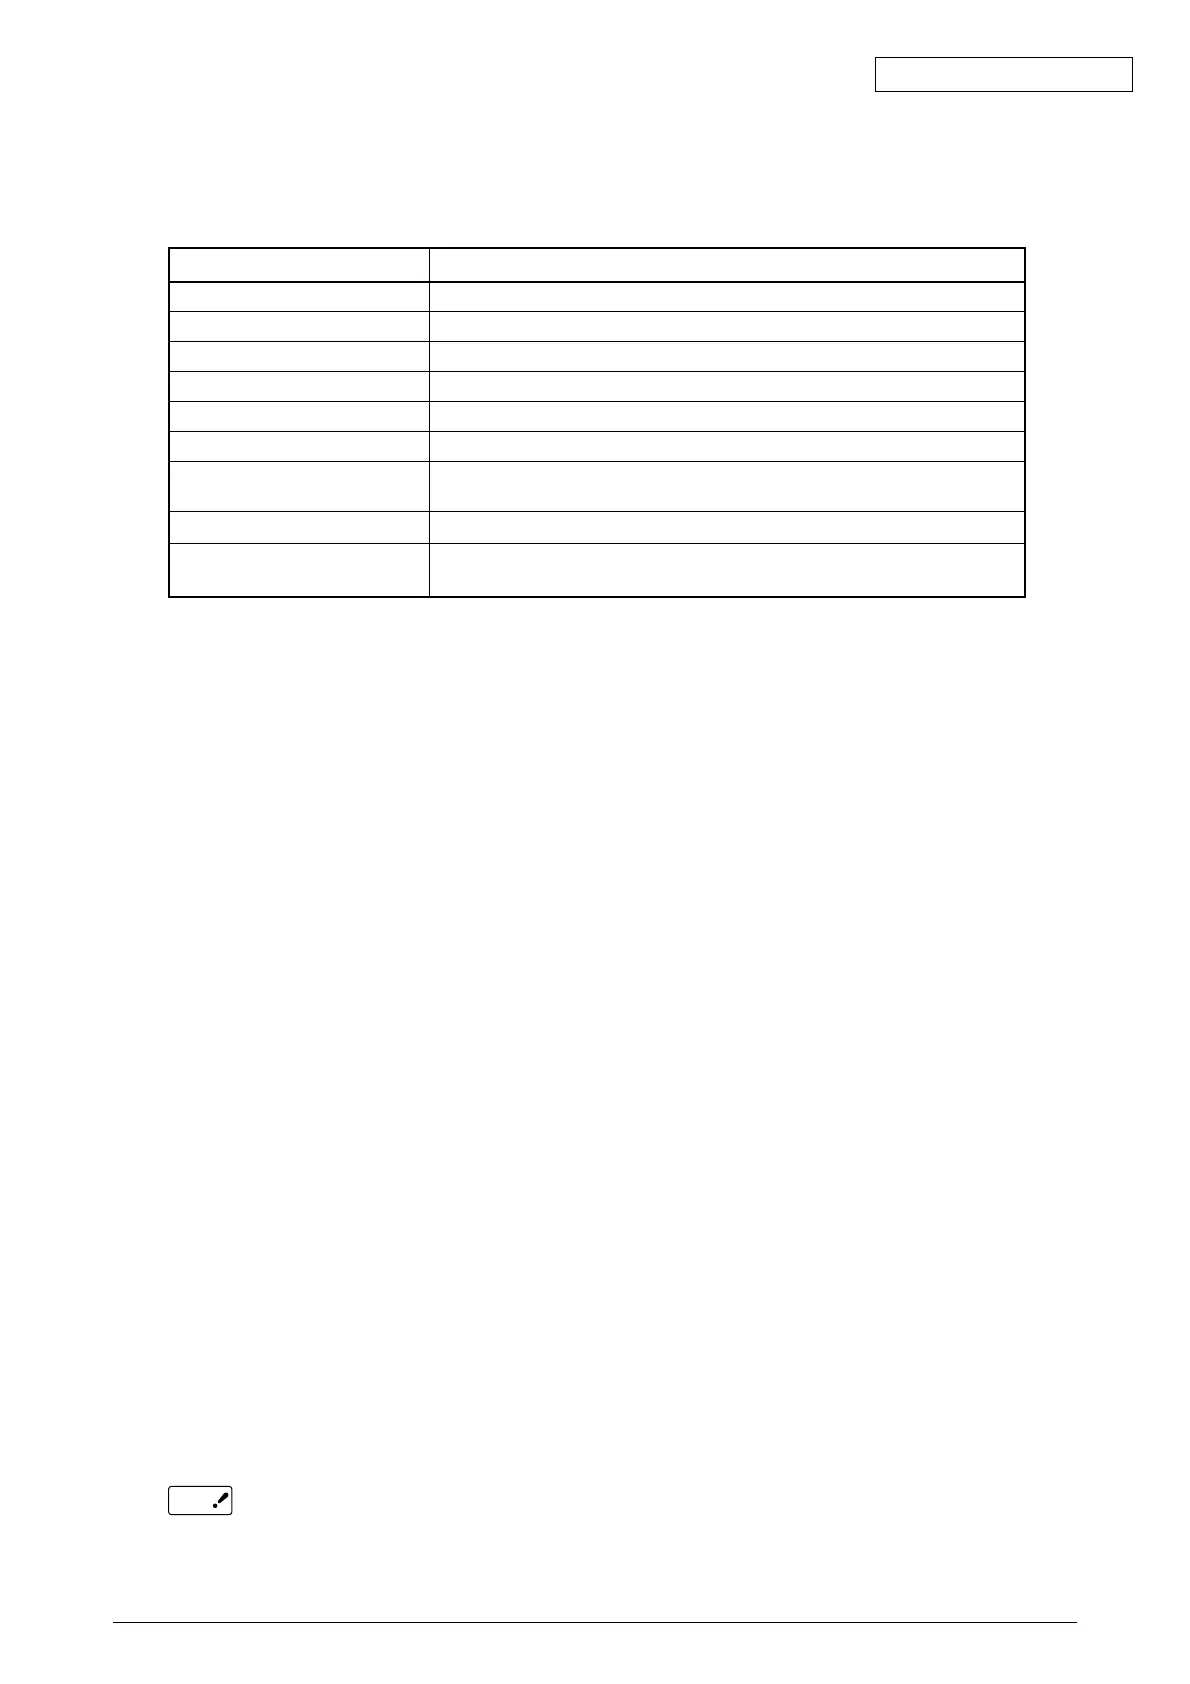
Replacement Parts
LED head
Drum Cartridge (Y, M, C, K)
Fuser Unit
Belt Cassette Assy
PU (S2V PCB)
CU (600dpi: HMO PCB)
CU (1200dpi: ASP PCB)
MLETB13 (HMK PCB)
Paper Thickness Sensor Assy
Adjustment Details
Unnecessary
Unnecessary
Unnecessary
Unnecessary
Assemble EEPROM used with the PCB before it was replaced. *Note 1
Assemble EEPROM used with the PCB before it was replaced. *Note 2
Assemble EEPROM, HDD Keychip and LAN Card used with the PCB
before it was replaced. *Note 3
Initialize the network information according to details described in Section 5.2.6.
Paper Thickness Detection Sensitivity Correction and Media Thickness
Detection Value Test
*Note 1: When using a new EEPROM for the PU (S2V PCB), the paper thickness detection sensitivity shall be corrected.
*Note 2: When a new EEPROM is used for the CU board of the 600-dpi system, adjust it to the customer s settings.
If the customer has registered files in the Flash, restore them. (Forms overlay and the like.)
*Note 3: When replacing the CU board, HDD, or EEPROM of the 1200-dpi system, follow the instructions given in the annexed table.
5.2.1 Precautions when Replacing the Engine Control PCB
When replacing the Engine Control PCB (SV2 PWB) remove the EEPROM from the old PCB. Then
mount it on the new PCB. (For Error other than Engine EEPROM Error)
If on the Operation Panel, a “SERVICE CALL XXX (Engine EEPROM Error)” is displayed, replace with
new EEPROM. In this case execute the procedures described in Section 5.2.2.
For ODA version
Be careful to change the engine-control substrate (S2V PWB) of 600 dpi device due to different
substrate to change based on a destination (due to different version of PU-FW).
Standard devide: S2V-11
Specified destination (for AB): S2V 18
5.2.2 Precautions Upon EEPROM Replacement
When replacing the Engine Control PCB (SV2 PWB), if the EEPROM was removed but not mounted
on the new PCB, or if the EEPROM is replaced with a new EEPROM, then the Version Read Function
(Fuse Cut) has become invalid. For this reason, there is a need to use the PJL command to switch
the Factory Mode to the Shipping Mode to activate the new EEPROM.
[Details]
1. To set the Shipping Mode, send the applicable PJL File to the printer.
2. To apply the setting, restart the printer or send a reboot command (PJL File) to the printer.
[Procedure]
Execute the following procedures from the MS-DOS prompt.
1. Copy/b Pjl_ship.bin prn
2. Copy/b Pjl_reboot.bin prn
or Turn OFF/ON power source.
[Necessary PjlFile]
1. Pjl_ship.bin
2. Pjl_reboot.bin
When replacing the EEPROM, the belt, toner, ID and other life information will be cleared.
This will result in an error in life management until the next unit replacement time. Be careful
of this difference. The count that is cleared with EEPROM replacement is as follows. Since
everything other than “Total Sheets Feed” will be cleared when each unit is replaced with
a new one, the error is resolved at this point.
Note