3 – 5
A
4
1
3
2
Figure 3.3.1 Figure 3.3.2
1
2
4
2
1
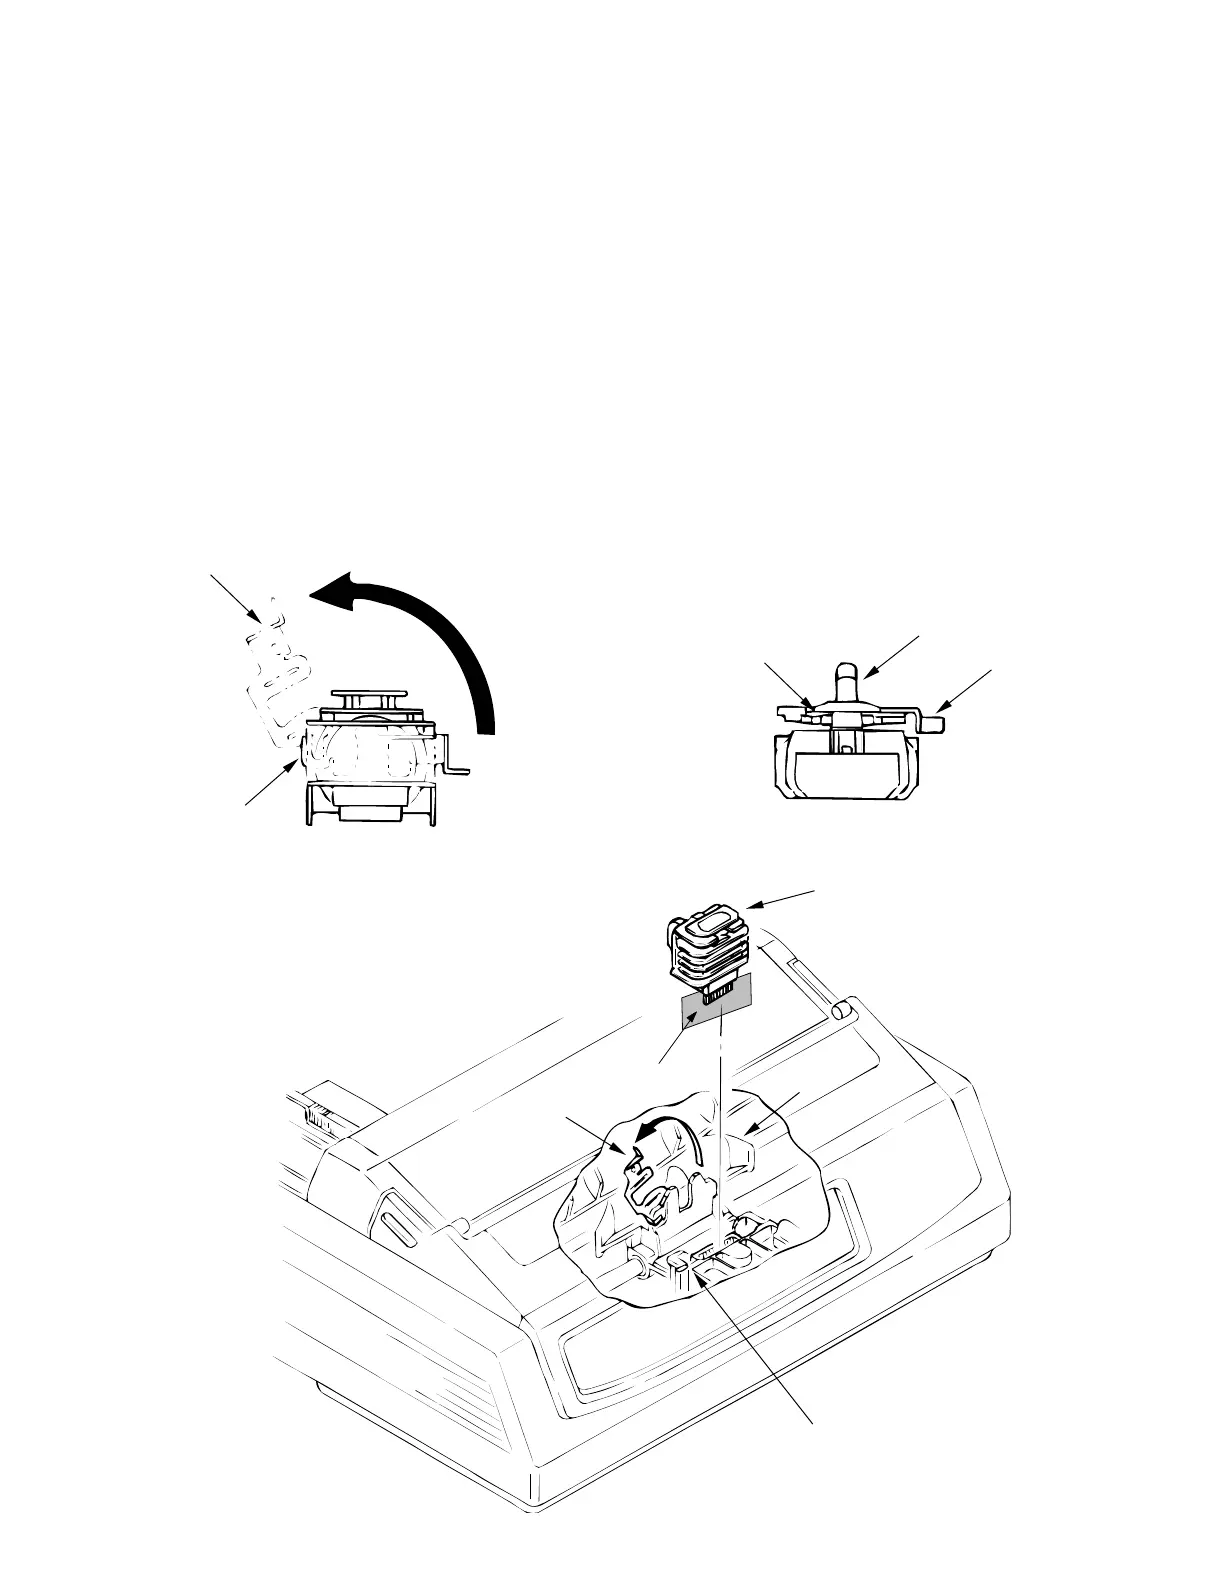
3.3.1 Printhead
(1) Open the access cover.
(2) Pull up and rotate the head clamp 1 to unclamp the printhead 2 as shown in fig. 3.3.1.
(3) Disconnect the printhead 2 from PC connector 3 and remove.
(4) To install, reverse the removal steps.
Notes on installation:
(1) Insert the printhead 2 into the PC connector 3 while pushing it against the carriage frame
4 .
(2) The head clamp 1 must be securely sandwiched between printhead 2 and carriage frame
4 as shown in fig. 3.3.2.
(3) Be sure to check the gap between platen and printhead (see 4).
(4) Be careful not to touch the print head while it is hot.
Important: There is a shim on the carriage frame 4, which hangs over the platen side of the
frame. Be sure to replace it correctly. Improper positioning of this shim will severely affect
the printhead gap.