7474
For procedures to replace the light guide mercury light
source, refer to the instruction manual provided with
the unit.
Applicable lamp SHI-130OL (made by Ushio Co.)
1
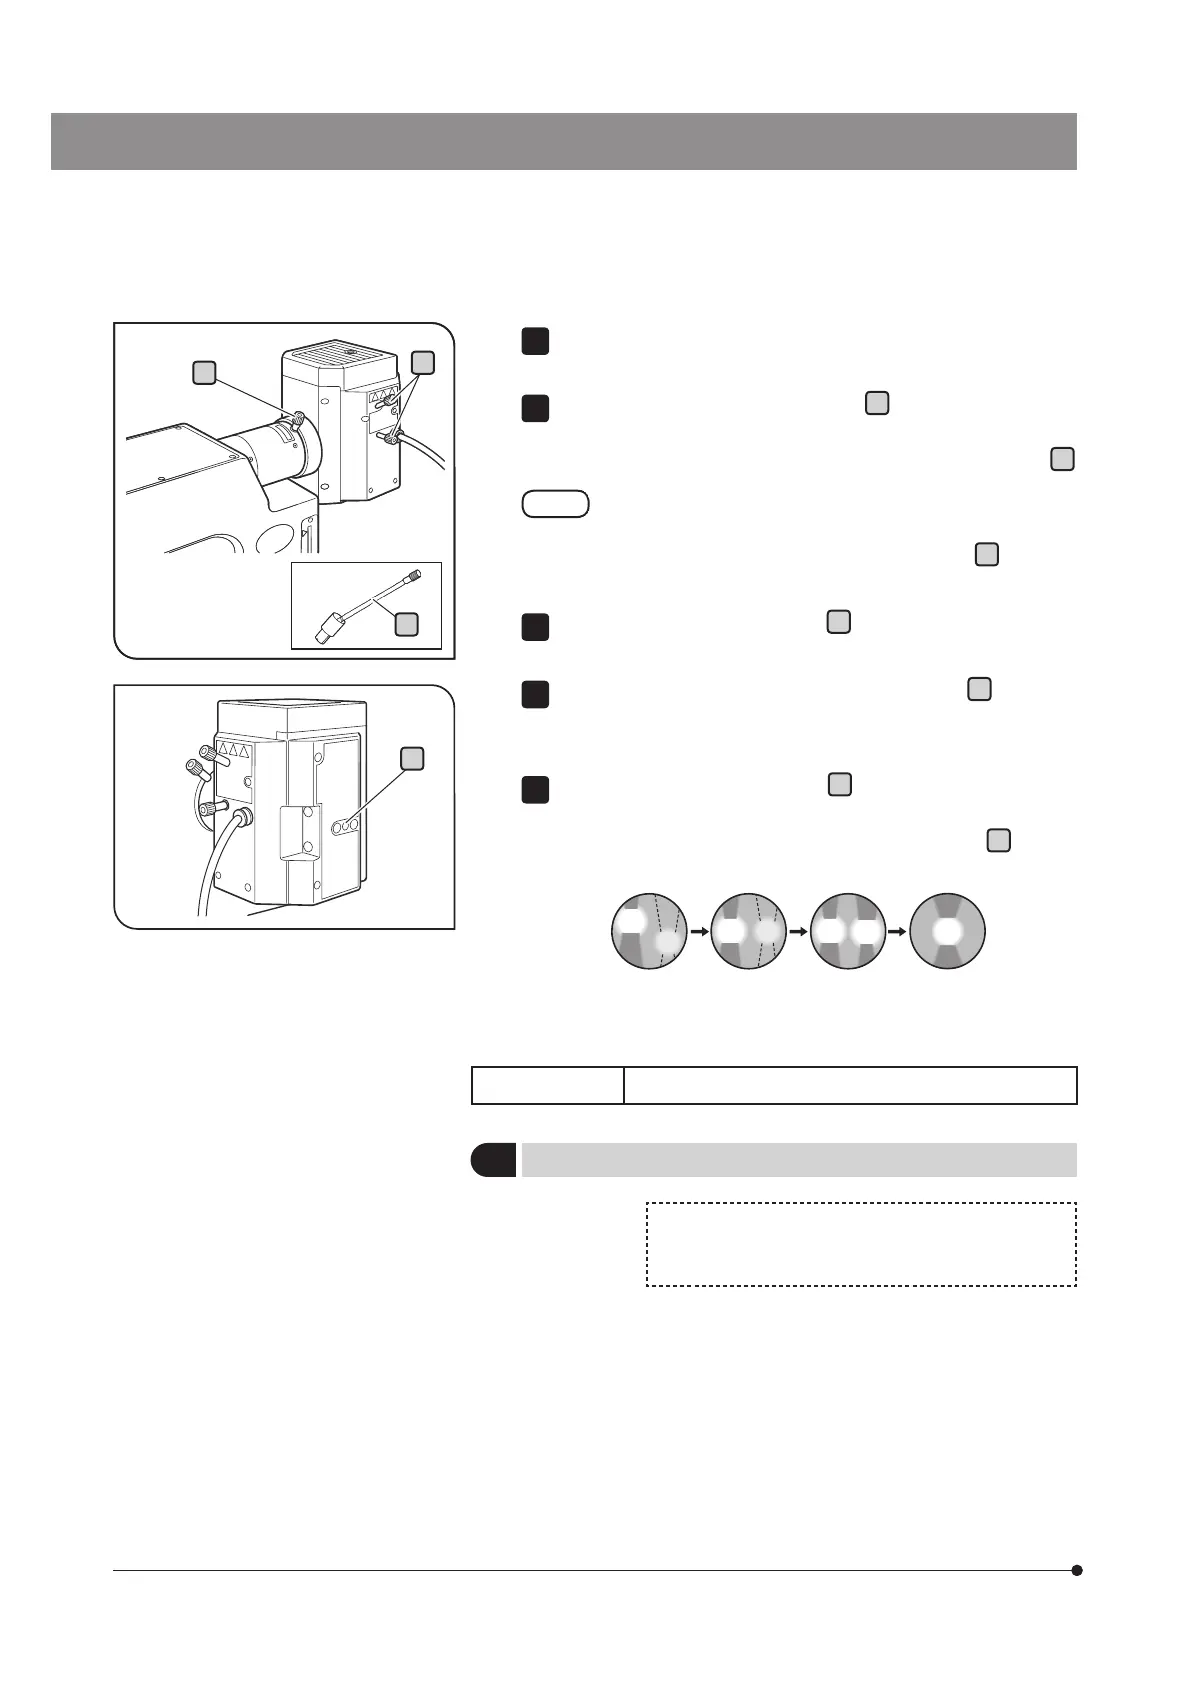
Replacing the light guide mercury light source
Push the aperture diaphragm open/close button and open the aperture
diaphragm.
Rotate the collector lens focusing knob
a
to project the arc image
on the U-CST. (Picture A)
If the arc image is not projected, rotate the burner centering knobs
b
.
If it is difficult to use the collector lens focusing knob of the
mercury lamp housing because it is placed at the back of the
microscope, insert the extension handle (U-CLA)
c
in the
knob and use the knob.
Rotate the burner centering knobs
b
to move the arc image to the
center of the right (left) half of the field of view. (Picture B)
Fit the Allen screwdriver into the mirror focusing screw
d
on the rear
of the lamp housing and rotate the screw to bring the mirror arc image
into focus. (Picture C)
Rotate the burner centering knobs
b
to overlay the arc image with
the mirror arc image. (Picture D)
During observation, rotate the collector lens focusing knob
a
to adjust
the observation field to become uniform.
A B C D
6
7
8
9
a
b
d
c