78
Preparing and Mounting Flat Connectors Section 4-3
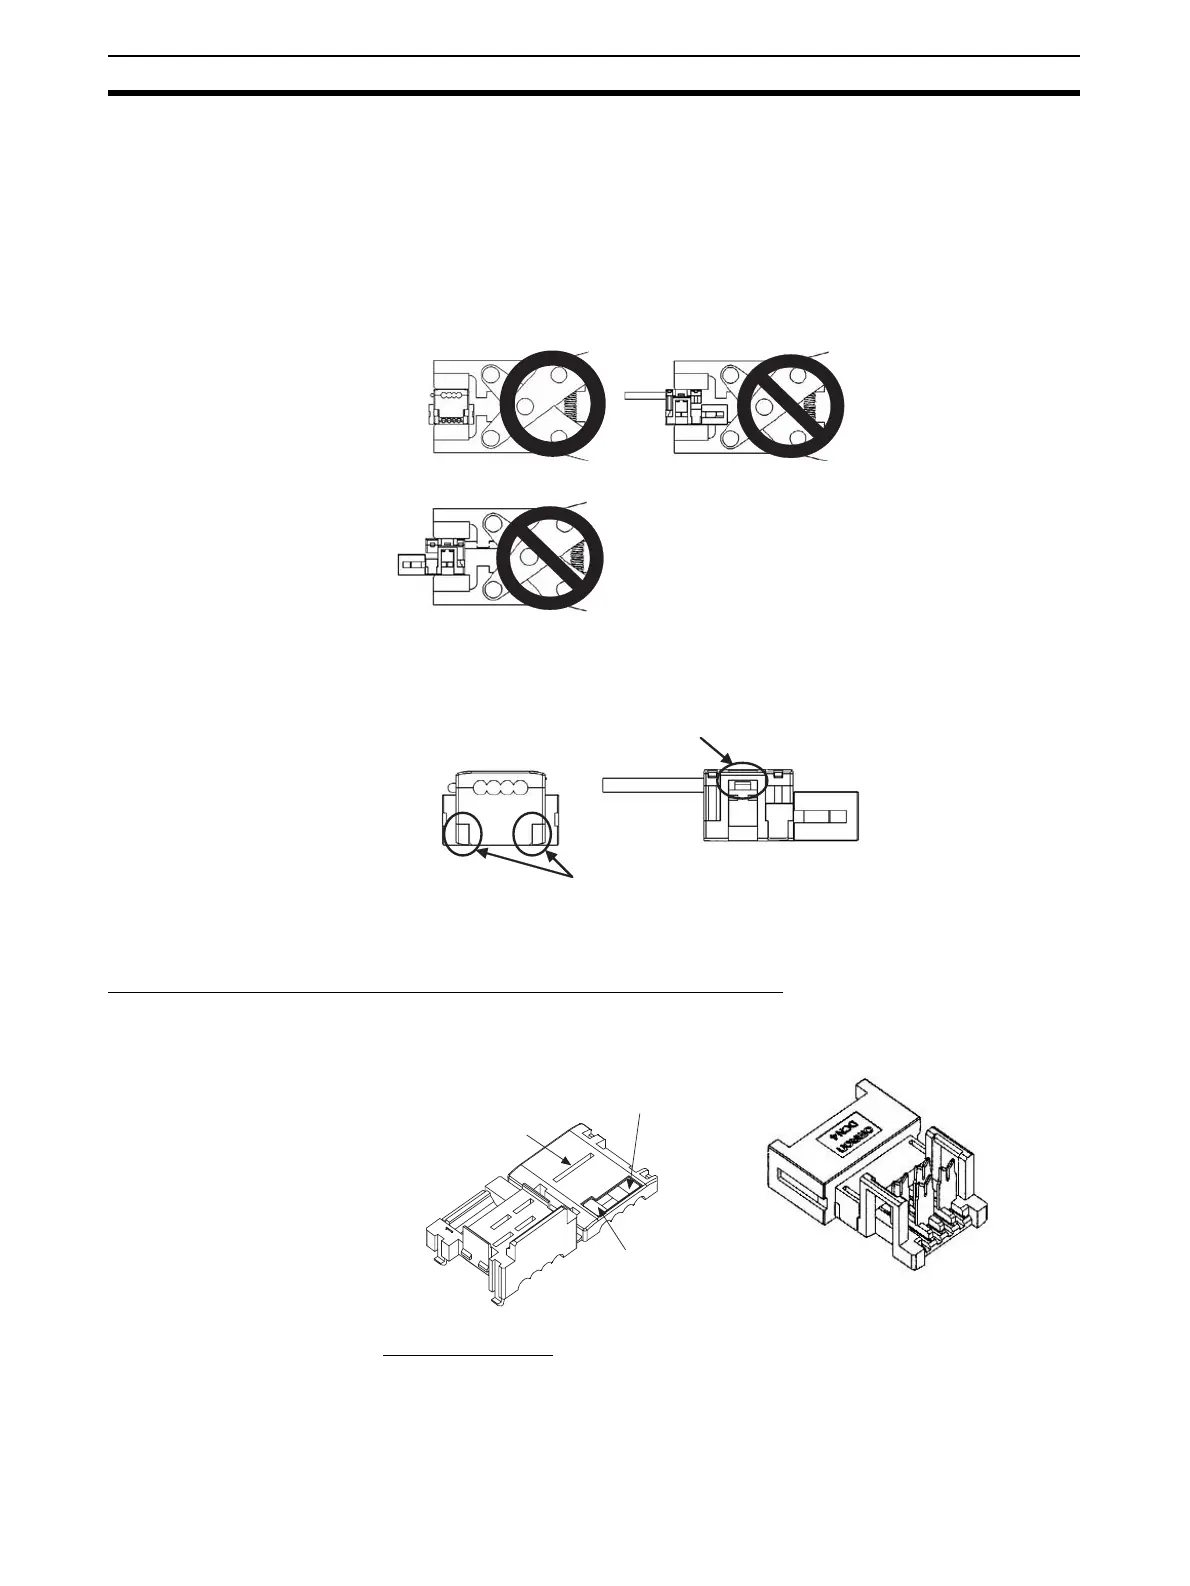
2. Squeeze firmly on the Pliers until the lock on the connector clicks into
place.
Note (a) Do not pressure-weld the connector cover at the edges.
(b) Do not pressure-weld the connector cover at the back of the pres-
sure-welding block.
(c) Set the connector in the correct orientation.
3. After attaching the cable, confirm that it is properly pressure-welded.
4-3-2 Flat Cable I
Preparing and Mounting DCN4-TR4 Flat Connector Sockets
■ Component Names
■ Cutting the Cable
This step is required only for extending the cable or connecting a Terminating
Resistor.
Cut the cable perpendicular to its length.
OK NG
NG
DCN4-TR4 Standard Flat Cable Trunk
Line Pressure-welded Connector
Be sure the connector is locked
on both the left and right sides.
Be sure there are no
aps here.
Cover Housing
Cable confirmation slot
Black
Cable labels (Black,
blue/green, white, and red)