EasyManua.ls Logo

OTARI MX-5050 - Fuse Replacement

OTARI MX-5050
146 pages
Print Icon
To Next Page IconTo Next Page
To Previous Page IconTo Previous Page
Loading...
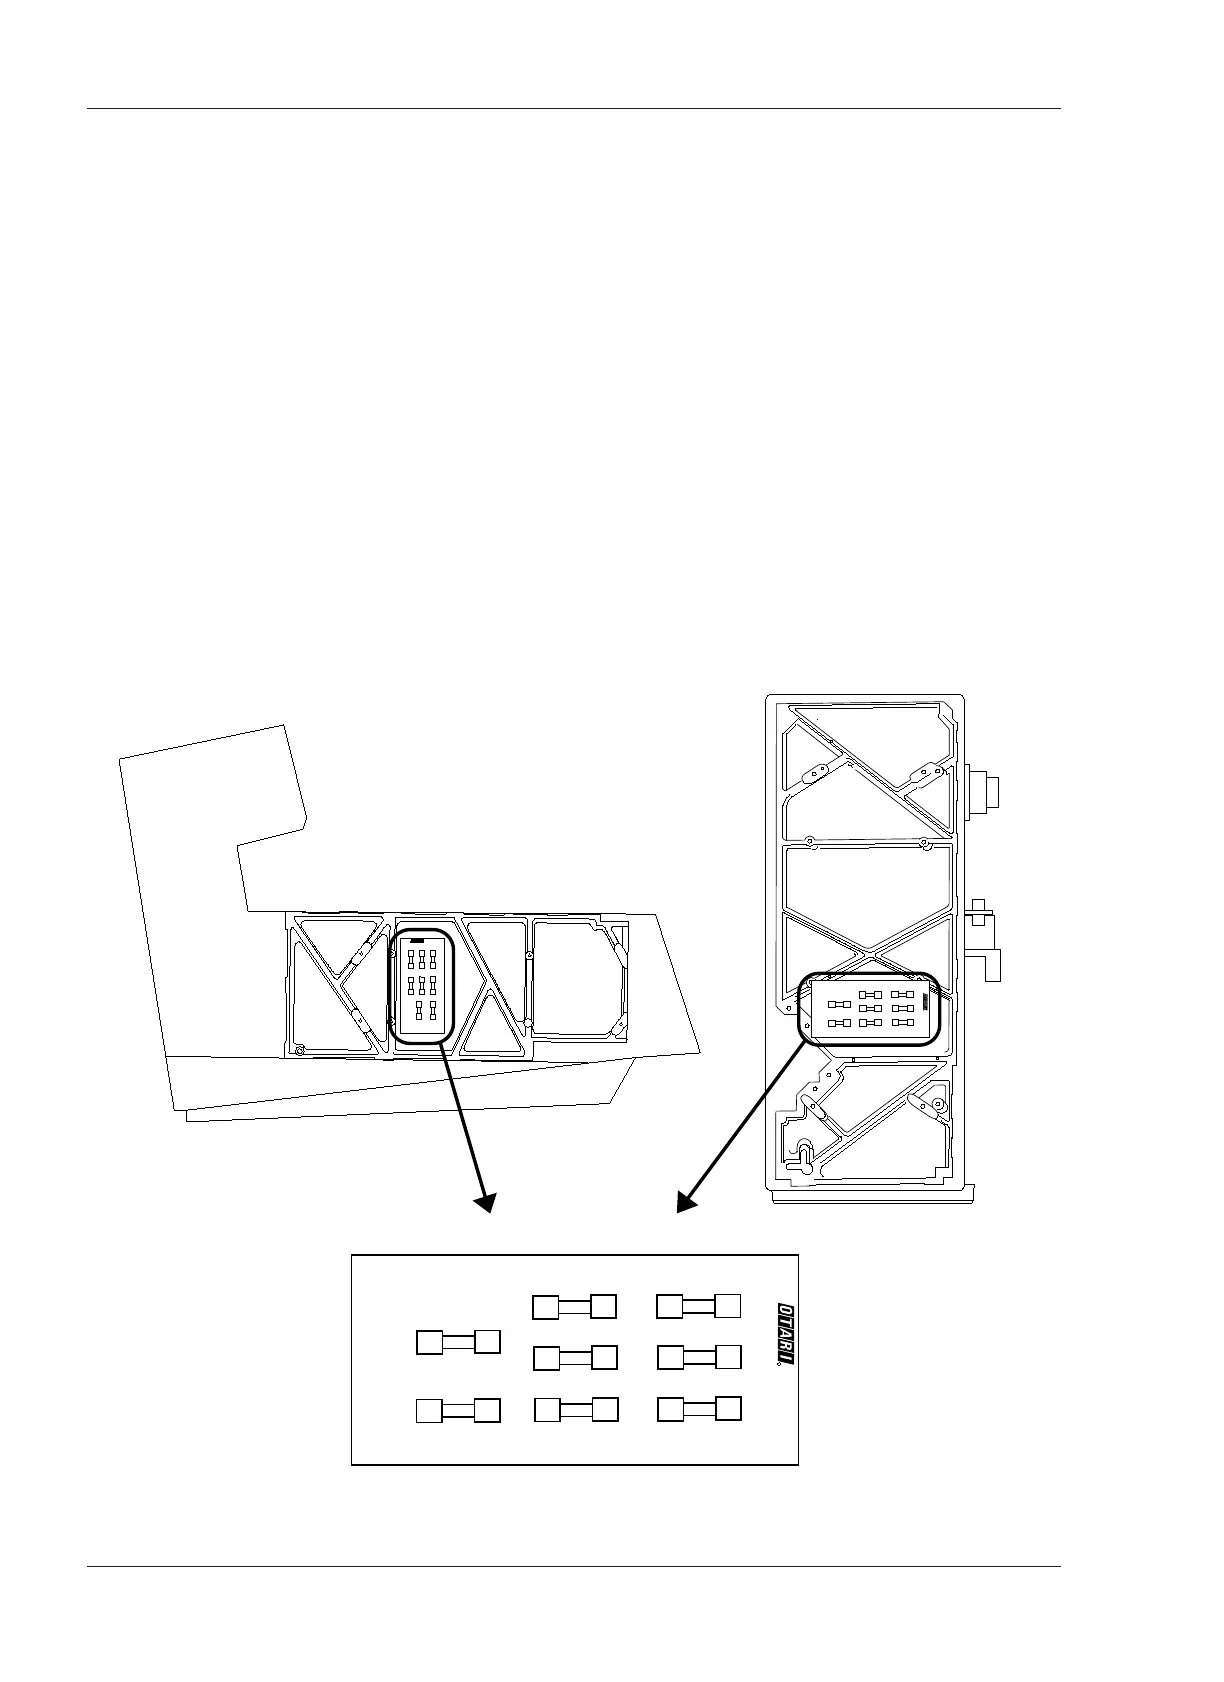
2.6 Fuse Replacement
If a fuse is blown, first check the cause of the blown fuse, then replace the
fuse with a new one as follows.
CAUTION: For continued protection against fire hazard, replace only with the
same type of fuse. Before replacing a fuse, disconnect the power cable from
the AC line.
First refer the Table 2-1 for information on the eight fuses.
Replacement of the Main Fuses
1. Remove the left side panel by removing the screws holding it.
2. Referring to the Figure 2-11, find the fuse location.
3. Locate the blown out fuse(s).
4. Replace the blown out fuse(s) with a new one(s).
Section 2 Installation
2 - 14
May 1992
MX-5050 Operation and Maintenance Manual
-18V
F3
+18V
F4
+5V
F5
+24V
F6
CAP. MOT
F7
VU LAMP
F8
2A
2A
3A
4A
5A
1A
R
COMP SIDE
F1
100 - 120 V 2A
200 - 240 V 1A
F2
REEL MOTOR
-18V
F3
+18V
F4
+5V
F5
+24V
F6
CAP. MOT
F7
VU LAMP
F8
2A
2A
2A
3A
4A
5A
1A
R
COMP SIDE
!
AC LIVE
PB-7VCA
F1
100 - 120 V 2A
200 - 240 V 1A
F2
REEL MOTOR
-18V
F3
+18V
F4
+5V
F5
+24V
F6
CAP. MOT
F7
VU LAMP
F8
2A
2A
2A
3A
4A
5A
1A
R
COMP SIDE
!
AC LIVE
PB-7VCA
F1
100 - 120 V 2A
200 - 240 V 1A
F2
REEL MOTOR
2A
!
AC LIVE
PB-7VCA
MKIV-2
BIII
Figure 2-12
Fuse Location

Table of Contents

Other manuals for OTARI MX-5050

Related product manuals