DIS-2
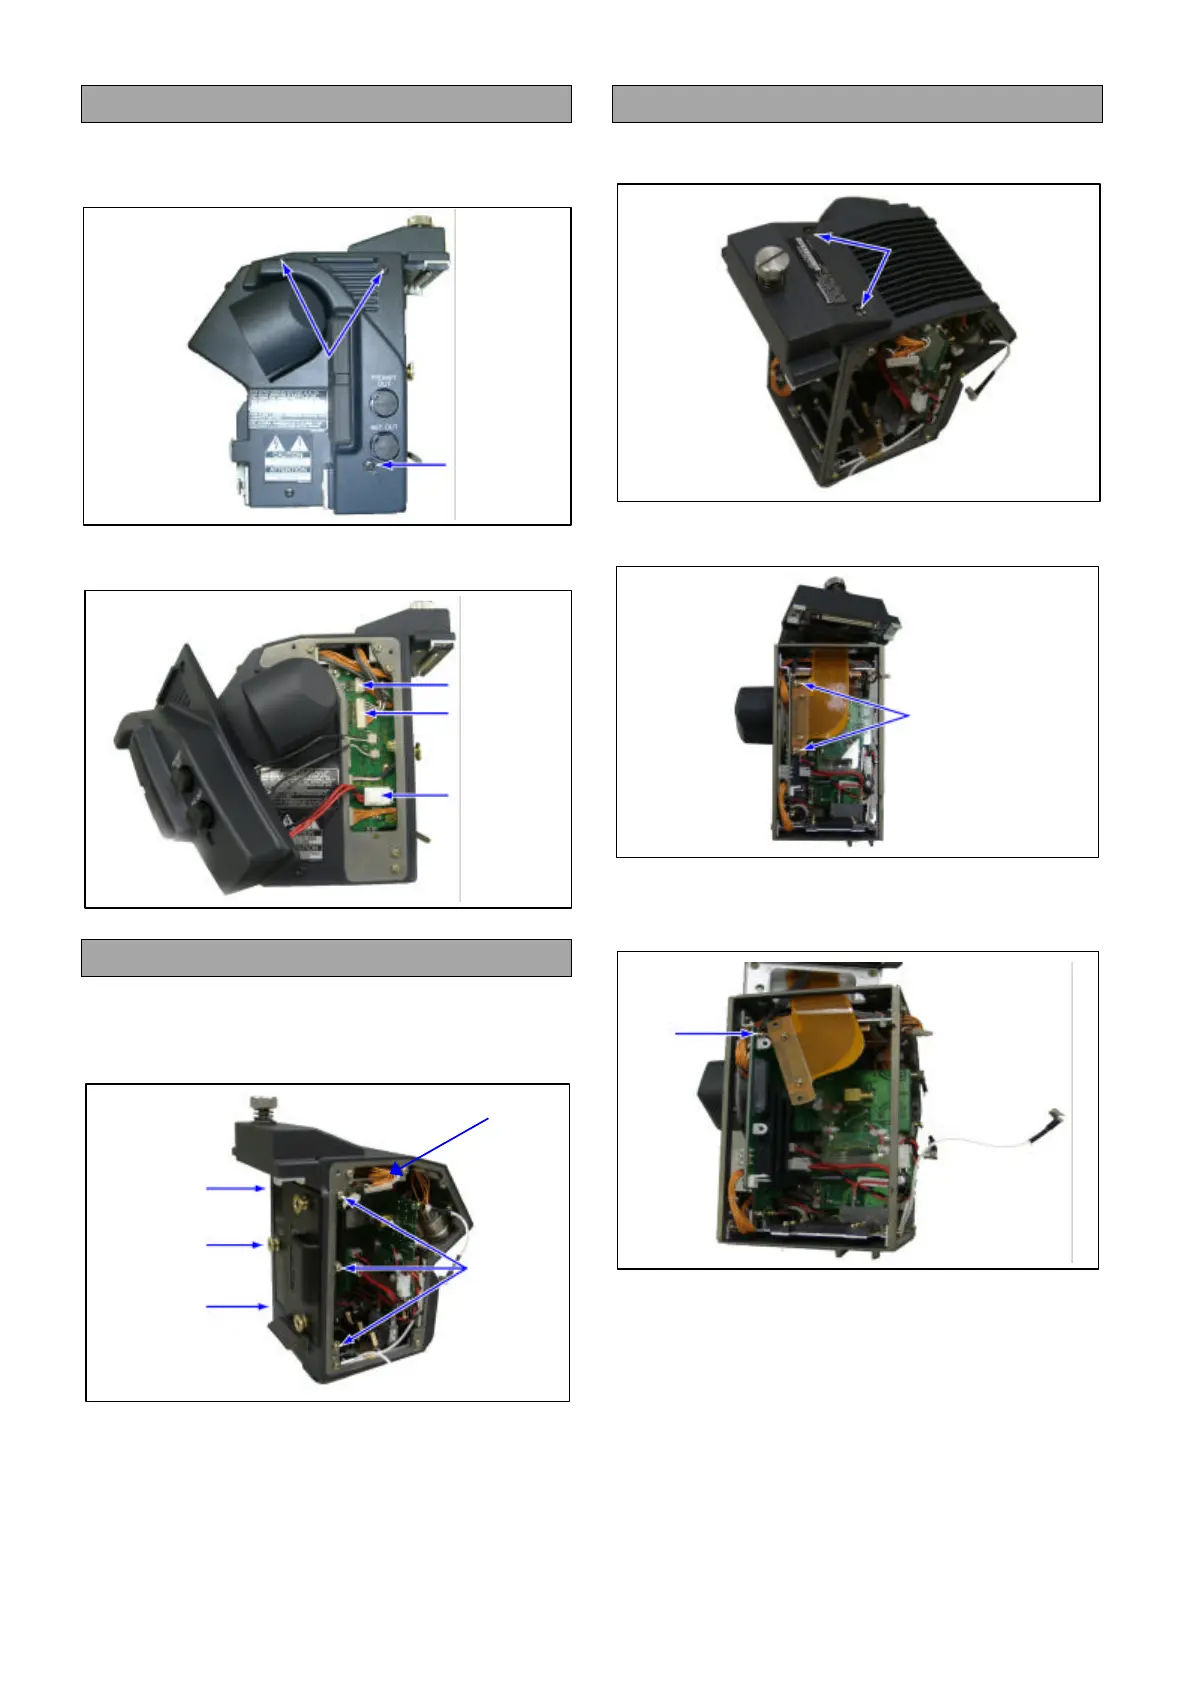
4. Removal of the Left Side Case
1. Unscrew the screw (E).
2. Unscrew the 2 screws (F).
3. Disconnect the connector (P10,11,EXT DC IN),
and remove the Left Side Panel.
5. Removal of the Back Case
1. Unscrew the 5 screws (G) and screw (H).
2. Disconnect the connector (P2), and remove the
Back Case.
6. Removal of the Connection Case
1. Unscrew the 2 screws (I).
2. Unscrew the 2 screws (J) and disconnect the
connector.
3. Unscrew the screw (K) and disconnect the GND
line.
4. Remove the Connection Case carefully.
Note : Assemble procedures are reverse of the
disassemble procedures.
P2
(E)
(F)
(P11)
(P10)
EXT DC IN
(G)
(G)
(G)
(H)
(I)
(K)
(J)



 To Next Page