You can connect directly to a PictBridge-
compatible printer for printing.
Set-up:
• Connect the camera to the AC
adaptor (DMW-AC5PP, sold separately).
(Alternatively, use a sufficiently-charged
battery.)
• Card :Insert card
Built-in memory: :Remove card
(Copy clipboard pictures
to the card (R65))
• Adjust settings on your printer (print quality,
etc.) as required.
• Set mode dial to any setting other than
CLIPBOARD.
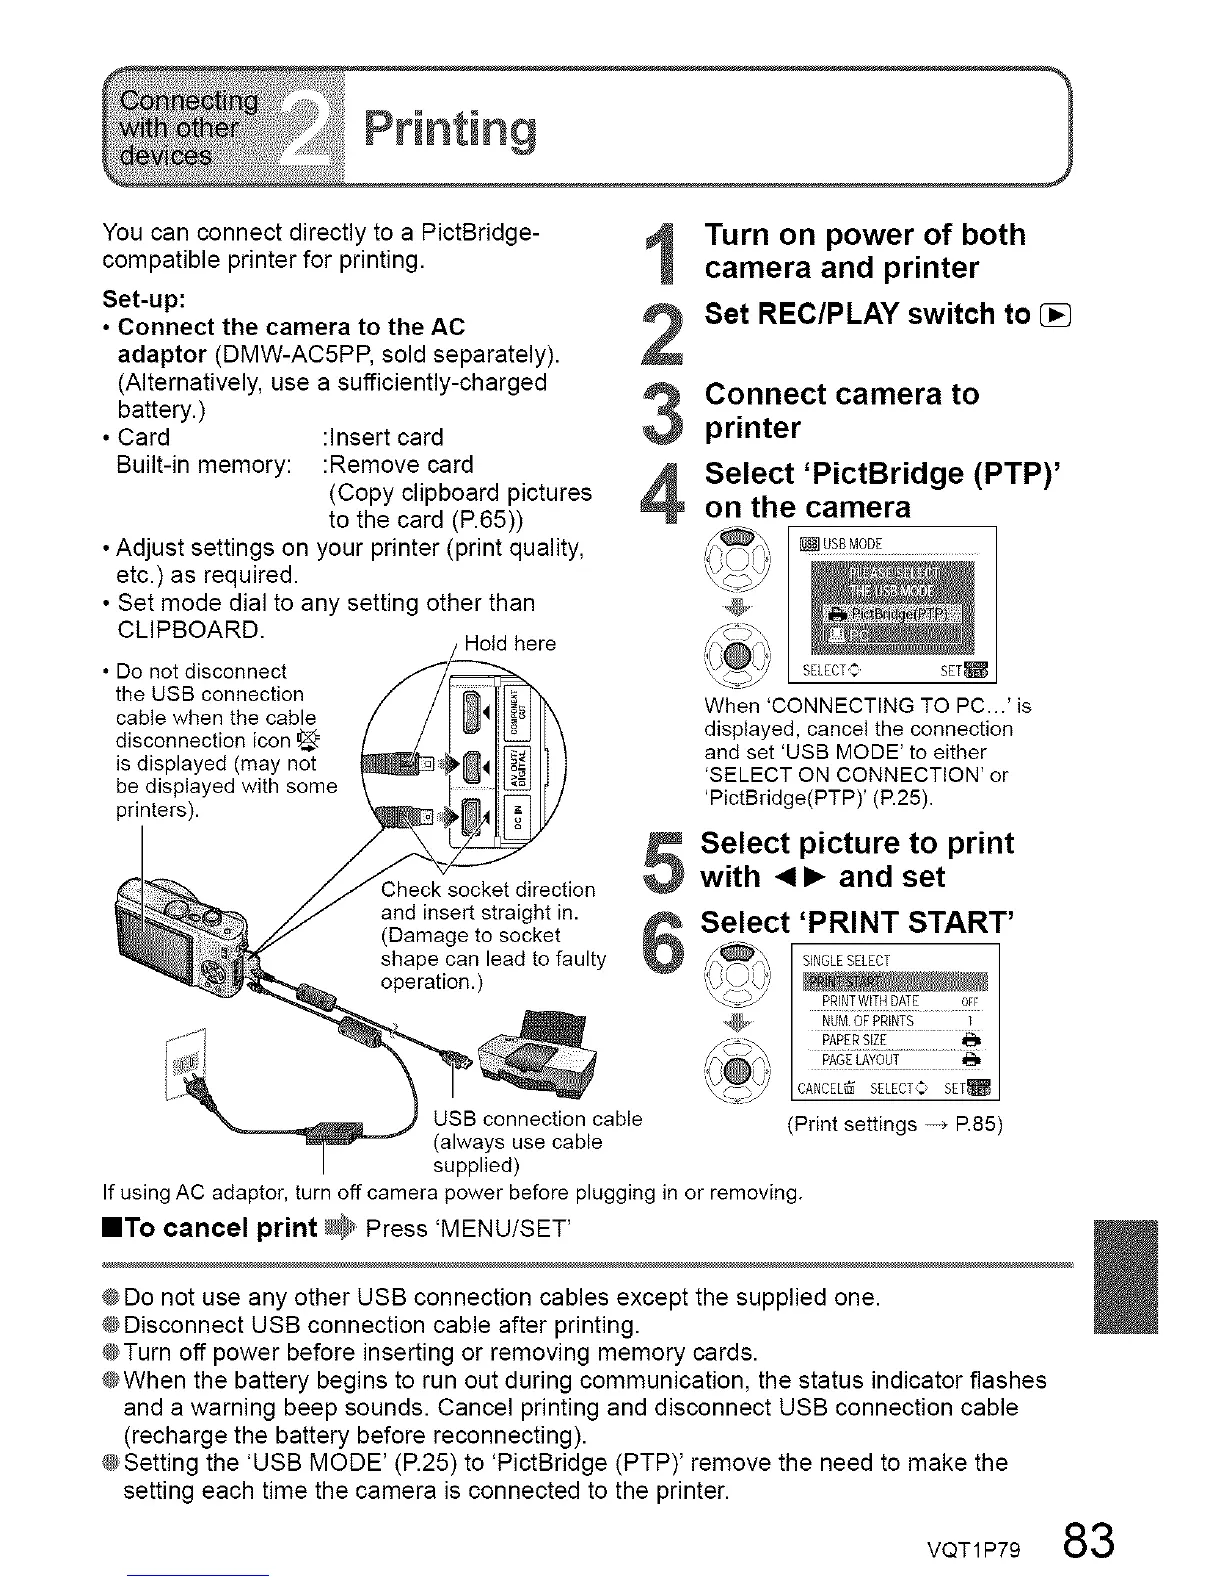
• Do not disconnect
the USB connection
cable when the cable
disconnection icon _
is displayed (may not
be displayed with some
printers).
here
1
2
3
Check socket direction
and insert straight in.
(Damage to socket
b
shape can lead to faulty
operation.)
USB connection cable
(always use cable
supplied)
Turn on power of both
camera and printer
Set REC/PLAY switch to
Connect camera to
printer
Select 'PictBridge (PTP)'
on the camera
_Z []0soM00E
,Gf-_ _,_ ............................
",) t _@
SELECTS, SET_
When 'CONNECTING TO PC...' is
displayed, cancel the connection
and set 'USB MODE' to either
'SELECT ON CONNECTION' or
'PictBridge(PTP)' (R25).
Select picture to print
with 4 I_ and set
Select 'PRINT START'
,,,,@J_j
_@_/ / PRENTwETHDATE °_F /
i/N2 I :::::::::::::::::::::::::::::
'_.,_' LCANCEL_SELECT:SET_]
(Print settings -_ R85)
If using AC adaptor, turn off camera power before plugging in or removing.
roTe cancel print _. Press 'MENUISET'
@Do not use any other USB connection cables except the supplied one.
@Disconnect USB connection cable after printing.
@Turn off power before inserting or removing memory cards.
@When the battery begins to run out during communication, the status indicator flashes
and a warning beep sounds. Cancel printing and disconnect USB connection cable
(recharge the battery before reconnecting).
@Setting the 'USB MODE' (R25) to 'PictBridge (PTP)' remove the need to make the
setting each time the camera is connected to the printer.
VQT1 P79
83
 Loading...