Chapter 3 Basic Operations — Projecting
48 - ENGLISH
Switching the input by displaying the input selection screen
The input for projection can be selected by displaying the input selection screen using the <INPUT SELECT>
button on the control panel.
1) Press the <INPUT SELECT> button on the control panel.
f The input selection screen is displayed.
INPUT SELECT
COMPUTER1
COMPUTER2
VIDEO
DVI-D
HDMI1
HDMI2
DIGITAL LINK
SELECT
SET
ENTER
2) Press as to select the input for projection, and press the <ENTER> button.
Note
f The input can also be switched by pressing the <INPUT SELECT> button while the input selection screen is displayed.
The input will switch each time you press the <INPUT SELECT> button.
f If the optional DIGITAL LINK output supported device (Model No.: ET-YFB100G, ET-YFB200G) is connected to the projector, the input
selection menu for the DIGITAL LINK output supported device is displayed when the <ENTER> button is pressed while the DIGITAL LINK
input is selected in the input selection screen.
f If the optional DIGITAL LINK output supported device (Model No.: ET-YFB100G, ET-YFB200G) is connected to the projector, the DIGITAL
LINK logo and the input name selected in the DIGITAL LINK output supported device are displayed in the display section of the [DIGITAL
LINK] in the input selection screen.
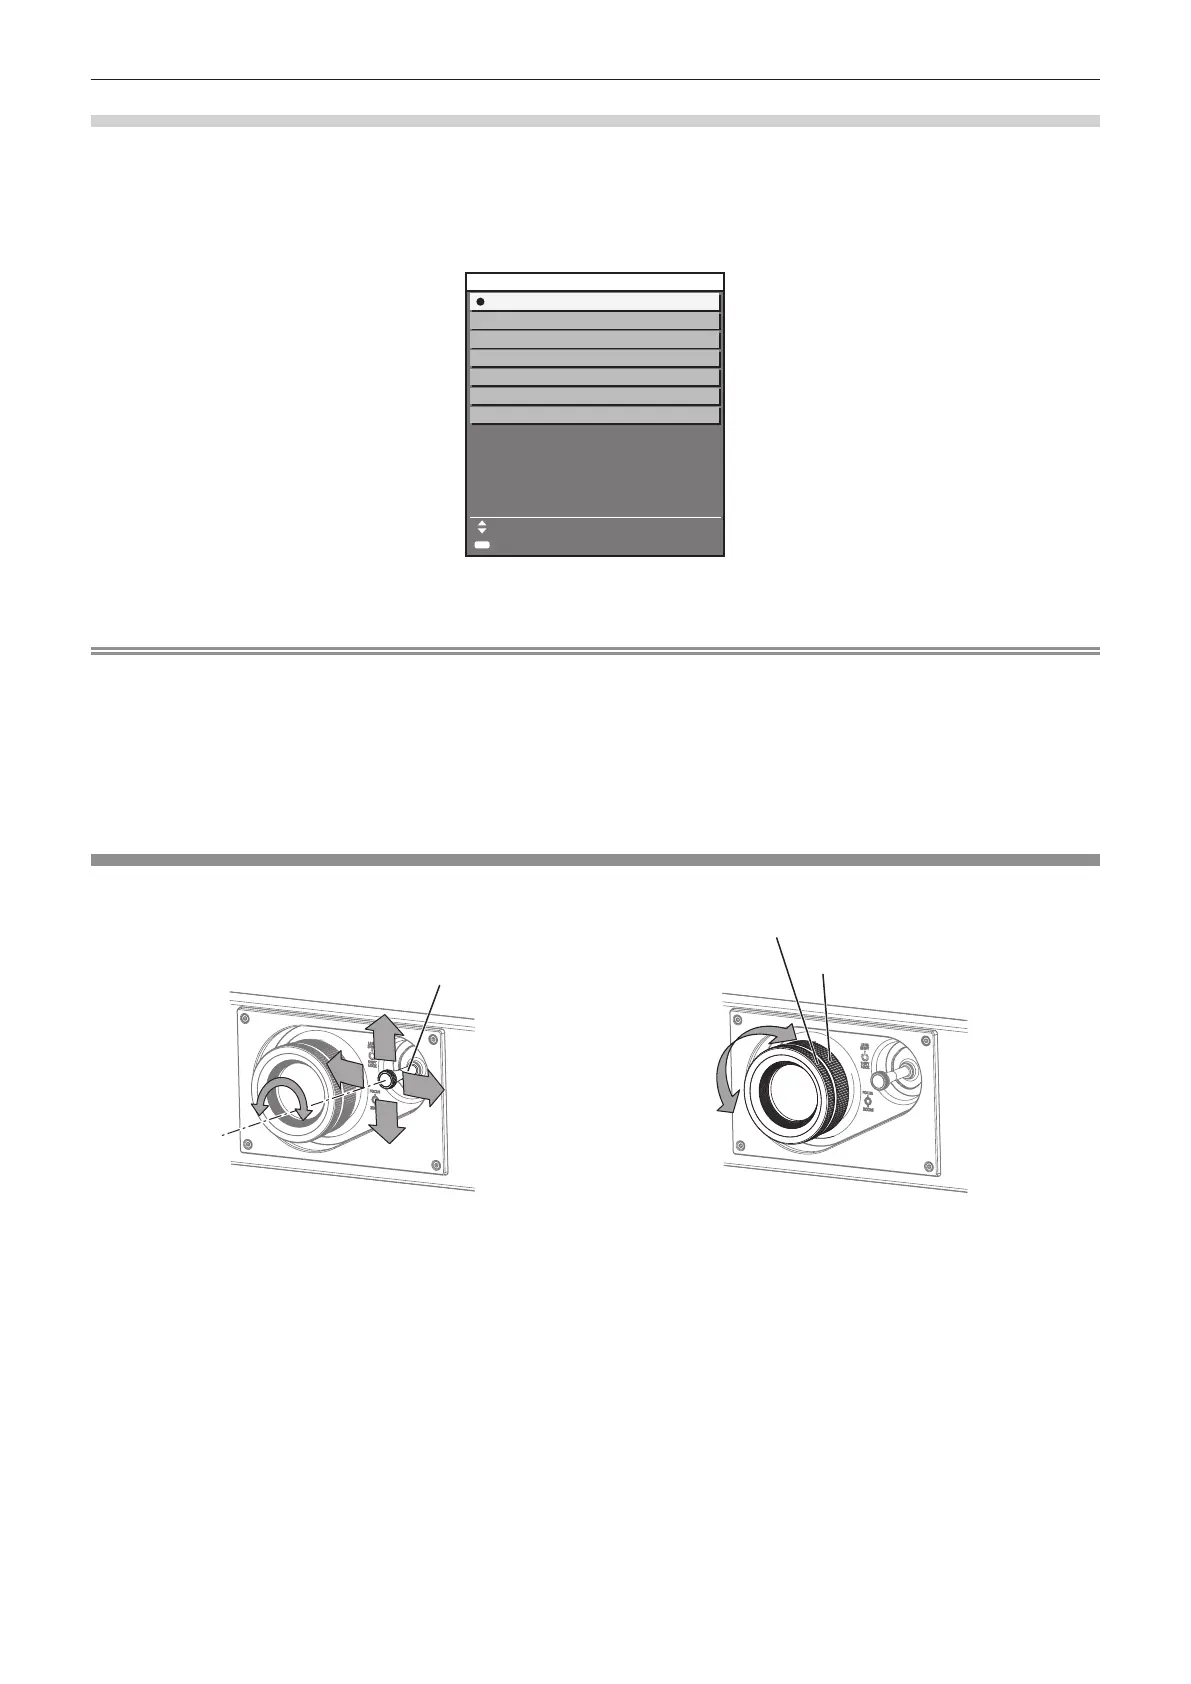
Adjusting the image
Adjust the position, size, and focus of the projected image.
Lens shift lever
Zoom ring
Focus ring
Fig. 1 Fig. 2
1) Adjust the projection angle.
f Install the projector on a at surface so that the front of the projector is parallel to the screen surface,
making the projected image rectangular.
f If the projector is tilted downward than the screen, extend the adjustable feet so that the projected image
becomes rectangular.
f Refer to “Adjusting adjustable feet” (x page 33) for details.
2) Turn the lens shift lever counterclockwise and release the fixing of the lens shift lever.
3) Adjust the lens shift. (Fig. 1)
f Adjust the position of the projected image by operating the lens shift lever.
f Refer to “Adjustment range by the lens position shift (optical shift)” (x page 49) for details.
4) Turn the lens shift lever clockwise to fix.

 Loading...


