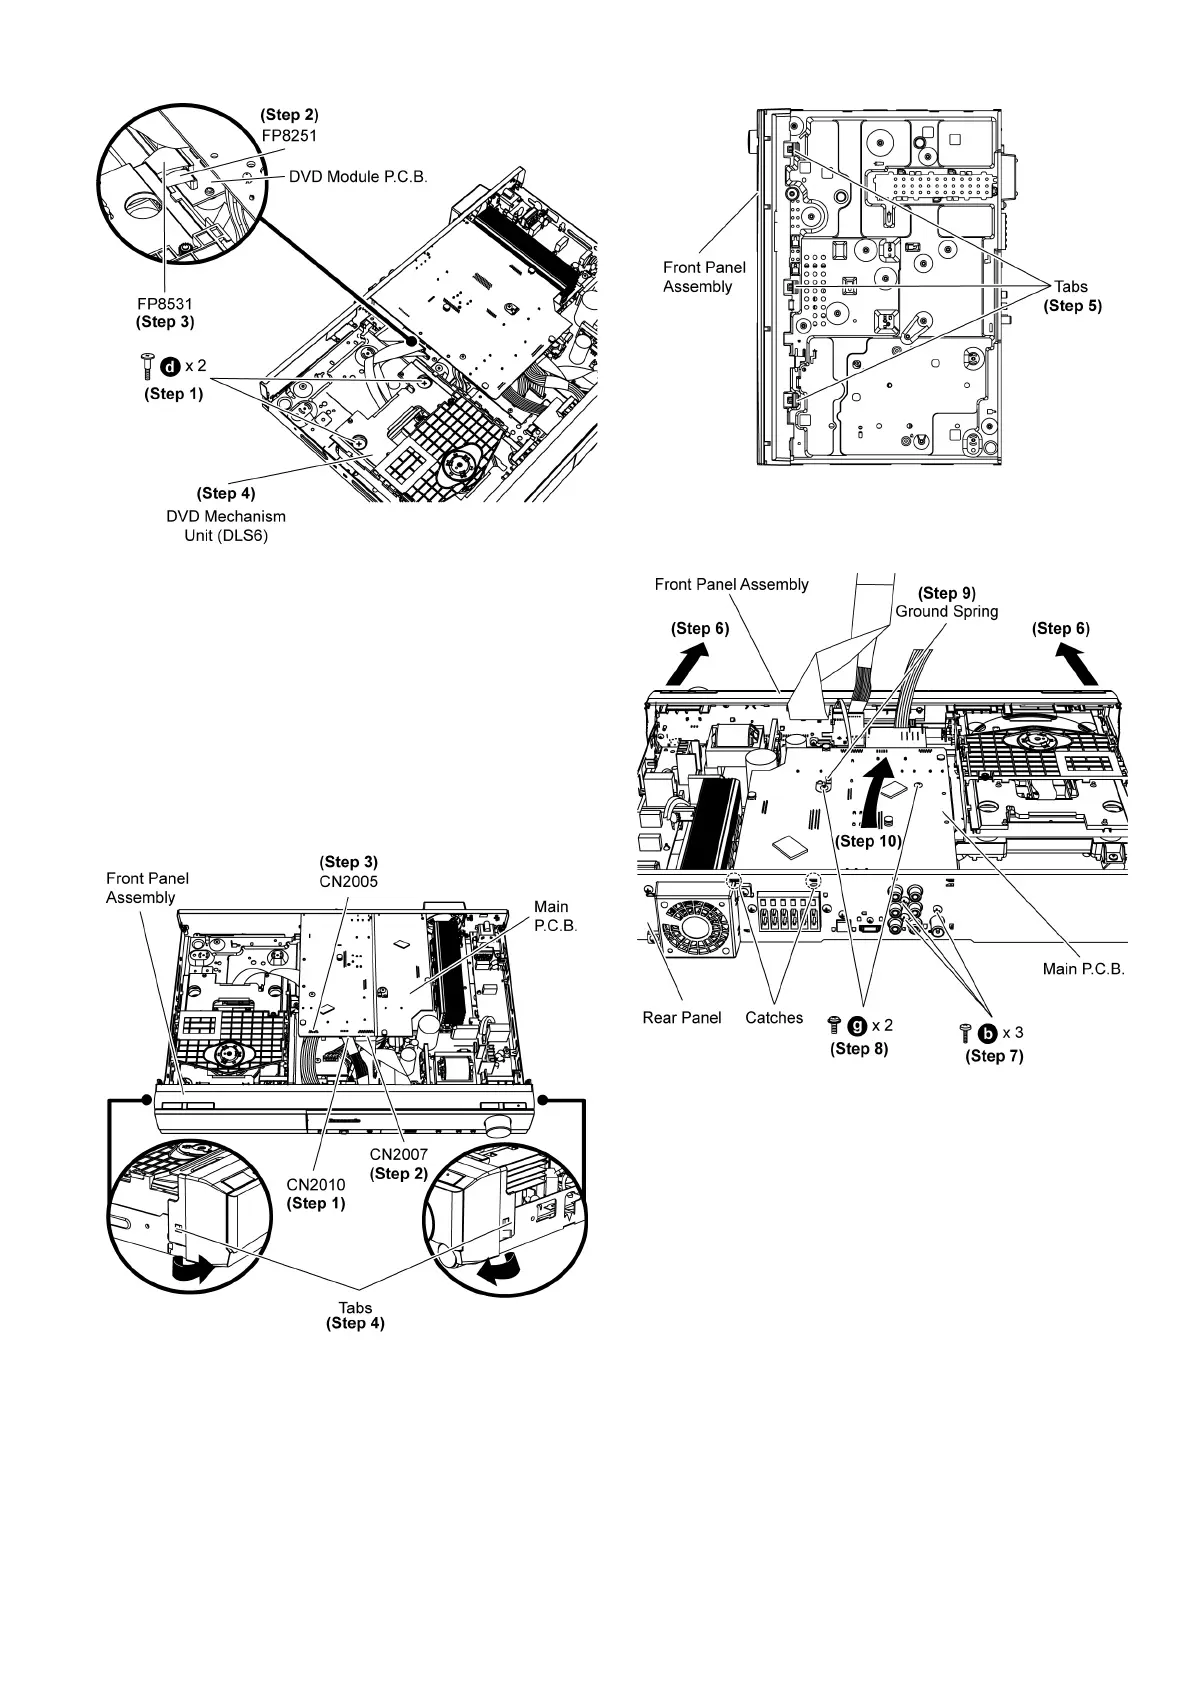
51
Step 1 Remove 2 screws from DVD Mechanism Unit (DLS6).
Step 2 Detach 7P FFC at the connector (FP8251) on DVD
Module P.C.B.
Step 3 Detach 26P FFC at the connector (FP8531) on DVD
Module P.C.B.
Step 4 Remove the DVD Mechanism Unit (DLS6).
9.6. Disassembly of Front Panel
Assembly
• Follow (Step 1) to (Step 3) of Item 9.3.
Step 1 Detach 7P cable at the connector (CN2010) on Main
P.C .B .
Step 2 Detach 19P FFC at the connector (CN2007) on Main
P.C .B .
Step 3 Detach 10P wire at the connector (CN2005) on Main
P.C .B .
Step 4 Release the tabs at each side of the front panel assem-
bly in the direction of arrow.
Step 5 Release the tabs at the bottom of the front panel assem-
bly.
Caution: Do not exert strong force when releasing the tabs.
Step 6 Detach the front panel assembly slightly forward in the
direction of arrows.
Step 7 Remove 3 screws at the rear panel.
Step 8 Remove 2 screws on the Main P.C.B.
Step 9 Remove 1 ground spring on the Main P.C.B.
Caution 1: Keep the 1 ground spring in safe place. Avoid
denting it. Place it back during assembling.
Step 10 Detach Main P.C.B. from rear panel in the direction of
arrow.
 Loading...