59
(IC5200).
Step 3 Remove 2CH BTL Power Amplifier IC (IC5200) from
Analog Amp P.C.B.
Caution: During replacement of the part, avoid touching
the heatsink. It may lead to injuries.
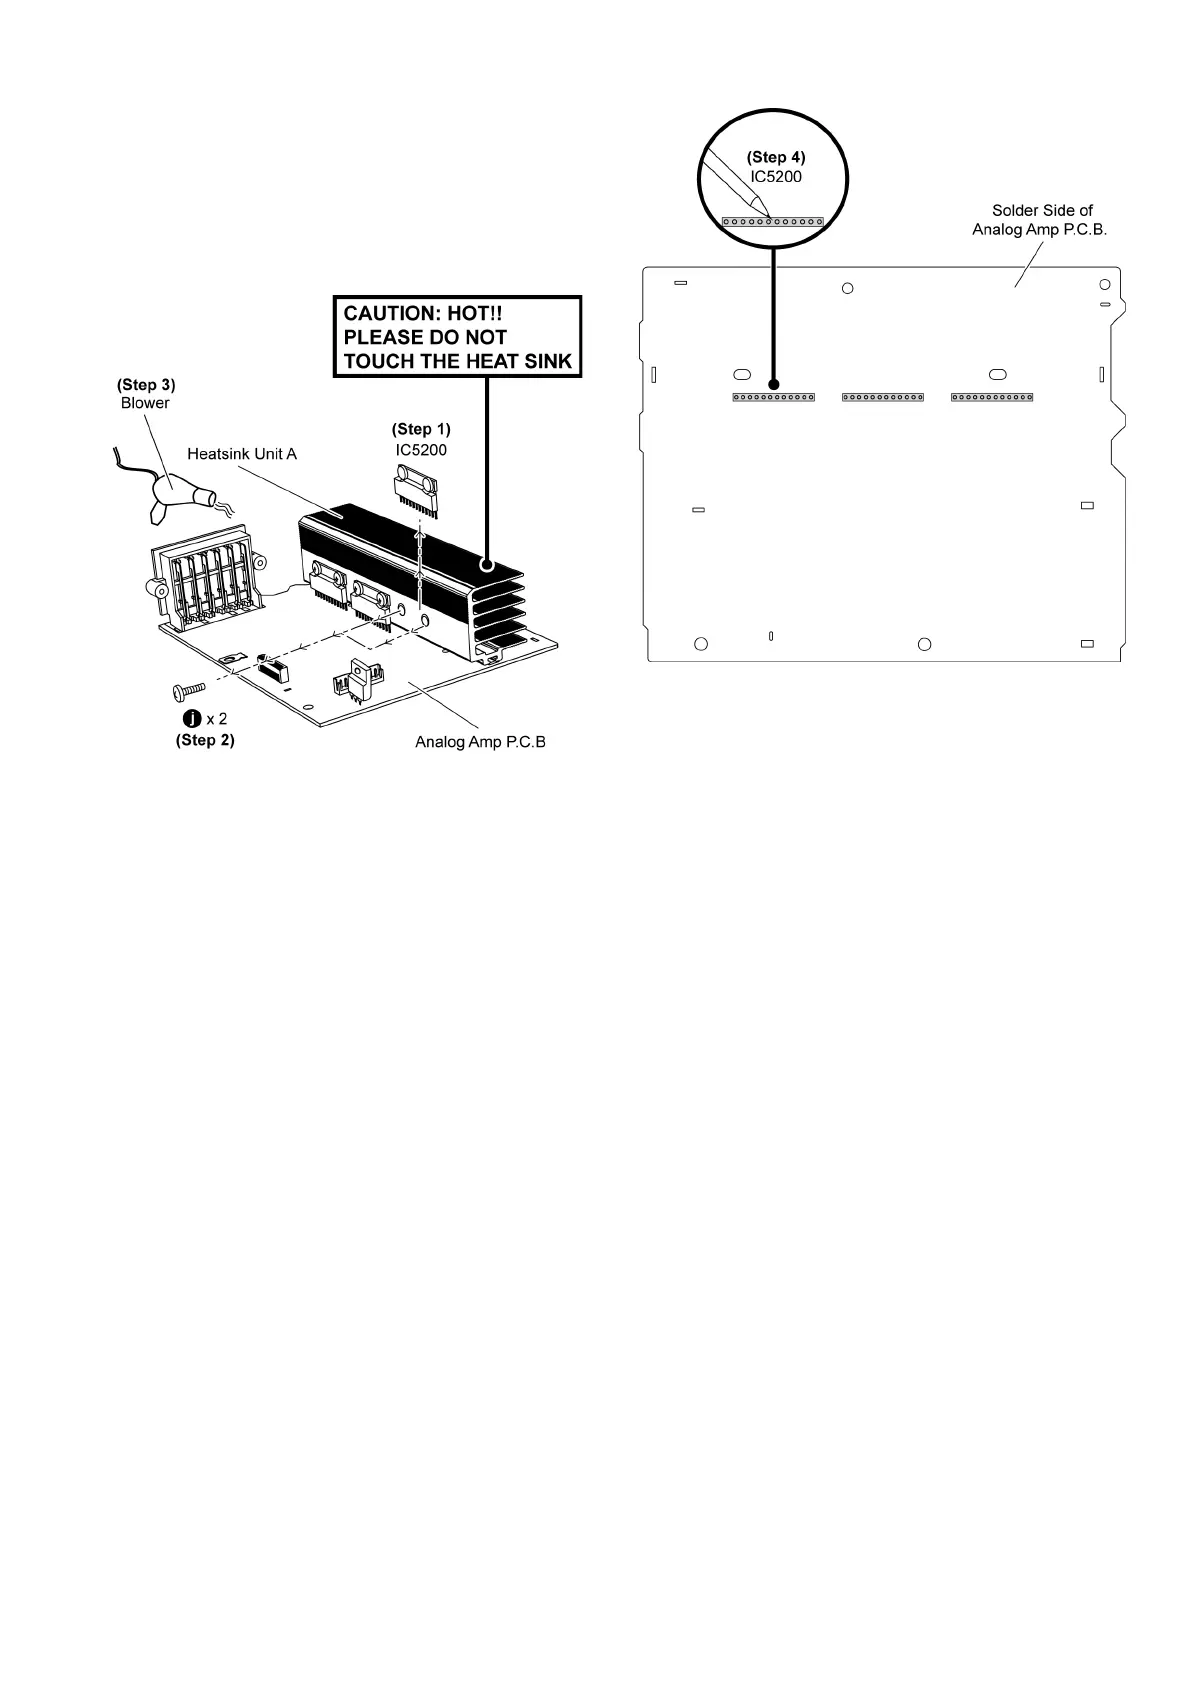
9.15.2. Assembly of 2CH BTL Power
Amplifier IC (IC5200)
Step 1 Mount 2CH BTL Power Amplifier IC (IC5200) on Analog
Amp P.C.B.
Caution: Ensure pins of the 2CH BTL Power Amplifier IC
(IC5200) are properly seated and soldered on Analog Amp
P.C.B.
Step 2 Screw the 2CH BTL Power Amplifier IC (IC5200) to
heatsink unit A.
Step 3 Use a blower to remove the minute particles that might
be caused after the process of the screwing 2CH BTL Power
Amplifier IC (IC5200) to the heatsink unit A.
Step 4 Solder pins of the 2CH BTL Power Amplifier IC (IC5200)
on the solder side of Analog Amp P.C.B.
9.16. Replacement of 2CH BTL
Power Amplifier IC (IC5300)
9.16.1. Disassembly of 2CH BTL Power
Amplifier IC (IC5300)
• Follow (Step 1) to (Step 3) of Item 9.3.
• Follow (Step 1) to (Step 3) of Item 9.6.
• Follow (Step 7) to (Step 9) of Item 9.6.
• Follow (Step 2) to (Step 11) of Item 9.13.