57
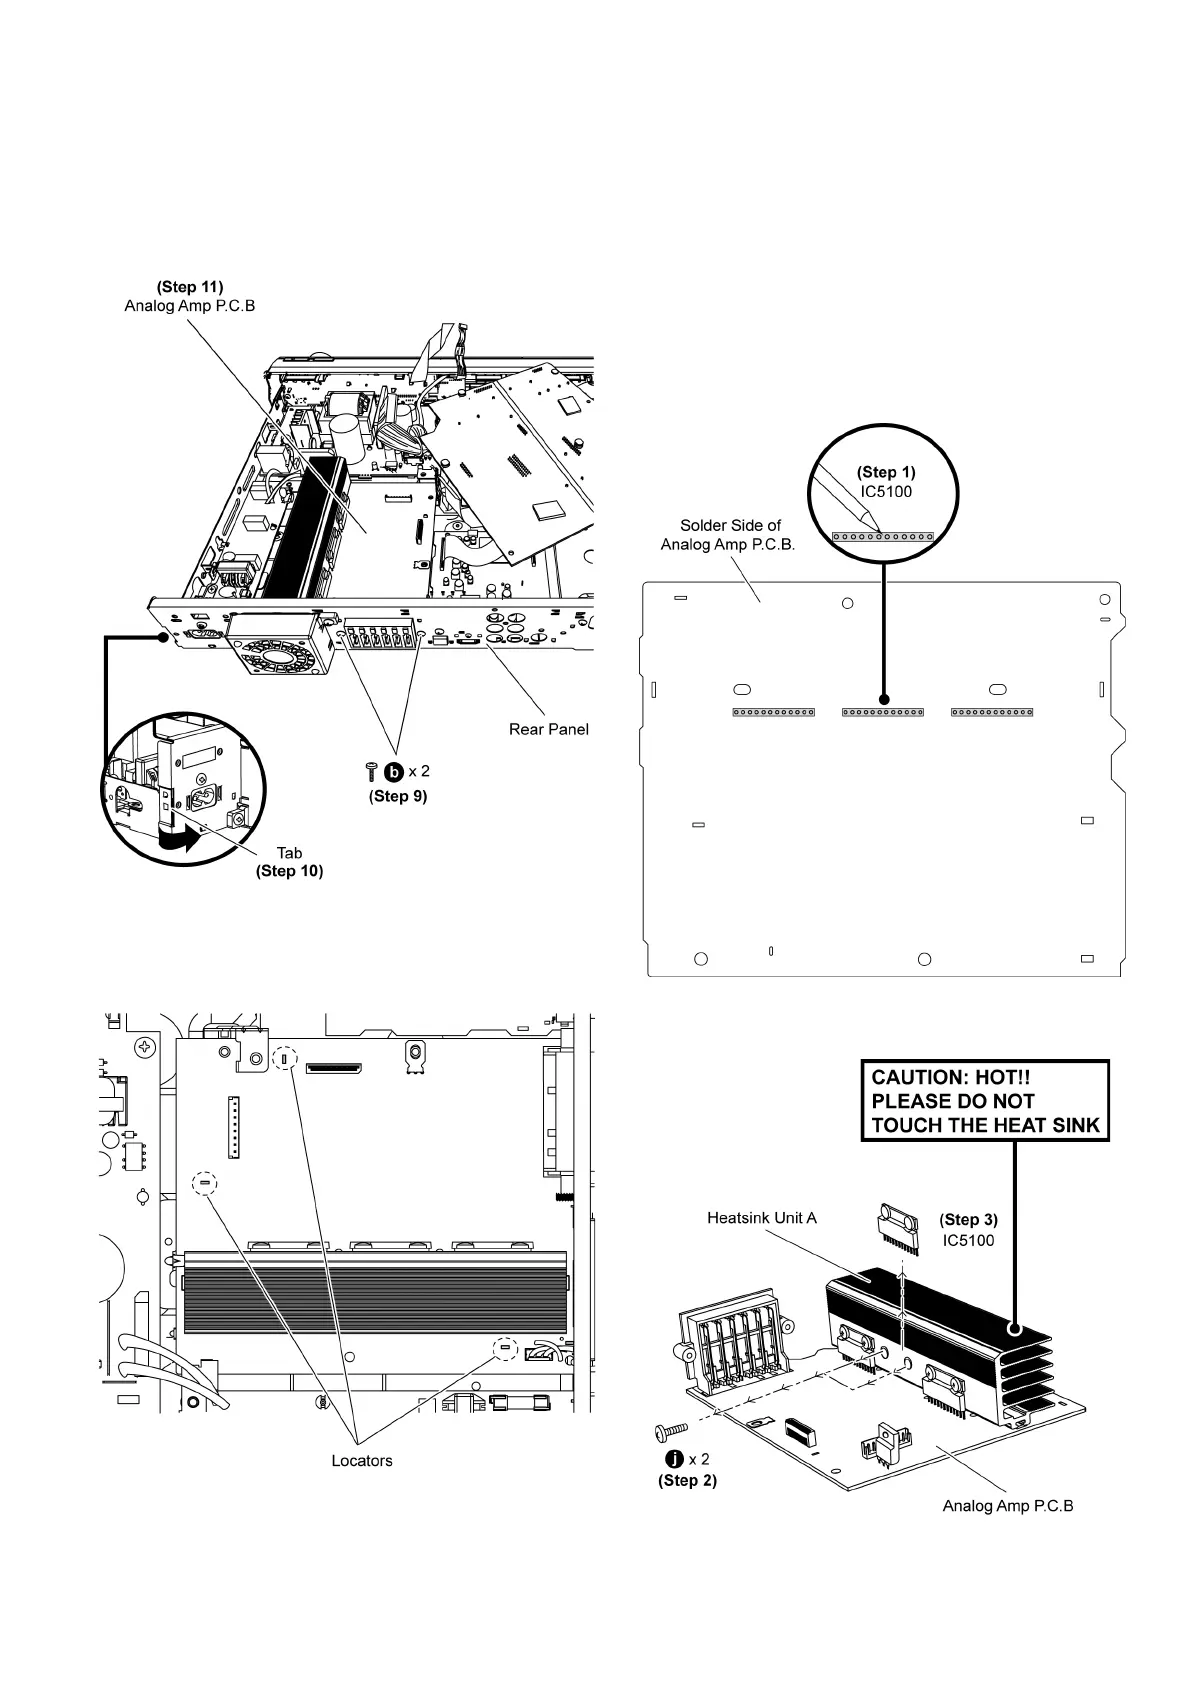
Step 5 Remove 3 screws on Analog Amp P.C.B.
Step 6 Detach 17P FFC at the connector (CN5050) on Analog
Amp P.C.B.
Step 7 Detach 4P cable at the connector (CN5051) on Analog
Amp P.C.B.
Step 8 Twist the wire clamper to detach 3P cable at the con-
nector (CN5704) on Analog Amp P.C.B.
Step 9 Remove 2 screws at the rear panel.
Step 10 Release the tab of the rear panel in the direction of
arrow.
Step 11 Remove Analog Amp P.C.B.
Caution: During assembling, ensure the P.C.B. is seated
properly at the locators.
9.14. Replacement of 2CH BTL
Power Amplifier IC (IC5100)
9.14.1. Disassembly of 2CH BTL Power
Amplifier IC (IC5100)
• Follow (Step 1) to (Step 3) of Item 9.3.
• Follow (Step 1) to (Step 3) of Item 9.6.
• Follow (Step 7) to (Step 10) of Item 9.6.
• Follow (Step 1) to (Step 11) of Item 9.13.
Step 1 Desolder pins of the 2CH BTL Power Amplifier IC
(IC5100) on the solder side of Analog Amp P.C.B.
Step 2 Remove 2 screws on 2CH BTL Power Amplifier IC
(IC5100).