53
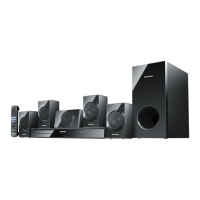
Caution: During assembling, ensure the 3P wire that is sol-
der to Power Button P.C.B at location (H6803) is properly
inserted into the U-Slot Ribs.
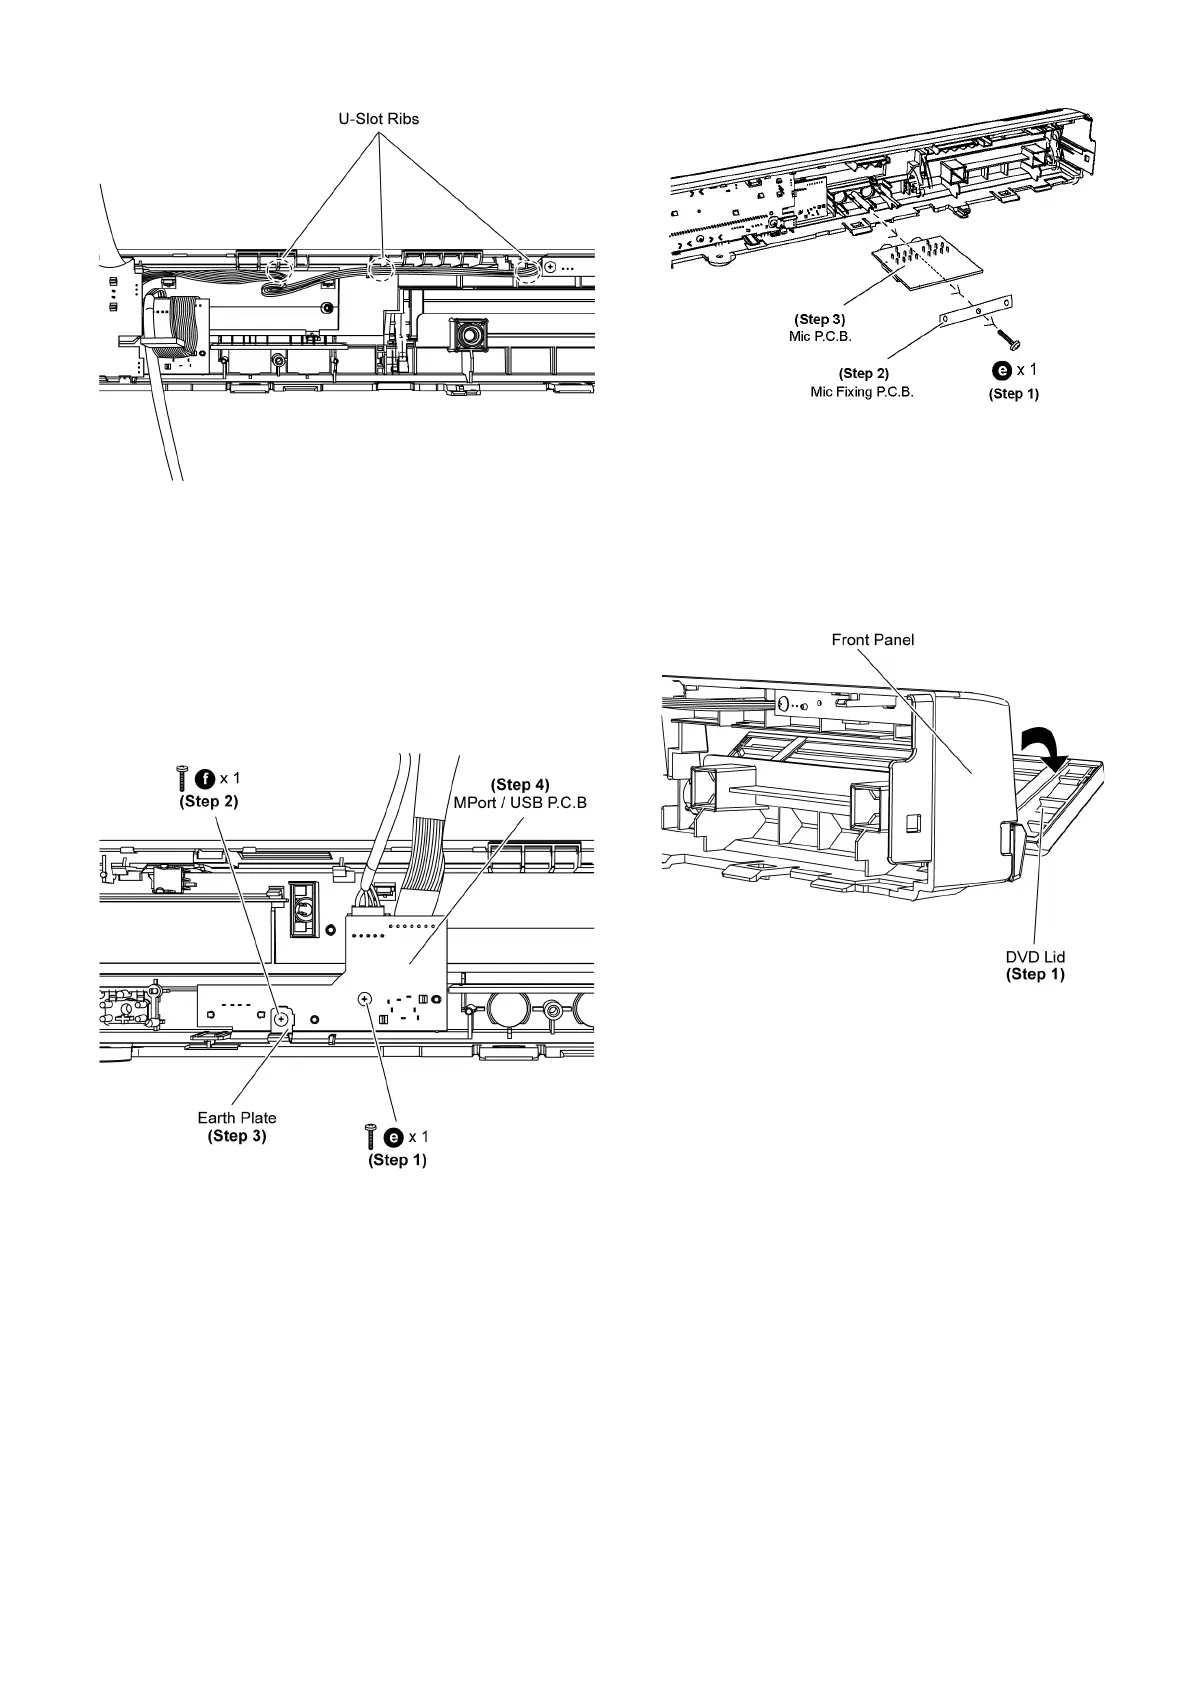
9.8. Disassembly of MPort / USB
P. C. B .
• Follow (Step 1) to (Step 3) of Item 9.3.
• Follow (Step 1) to (Step 14) of Item 9.6.
• Follow (Step 1) to (Step 4) of Item 9.7.
Step 1 Remove 1 screw (without washer) on MPort/USB P.C.B.
Step 2 Remove 1 screw (with washer) on MPort/USB P.C.B.
Step 3 Remove Earth Plate on MPort/USB P.C.B.
Step 4 Remove MPort/USB P.C.B.
9.9. Disassembly of Mic P.C.B.
• Follow (Step 1) to (Step 3) of Item 9.3.
• Follow (Step 1) to (Step 14) of Item 9.6.
• Follow (Step 1) to (Step 4) of Item 9.7.
Step 1 Remove 1 screw on Mic Fixing P.C.B.
Step 2 Remove Mic Fixing P.C.B.
Step 3 Remove Mic P.C.B.
9.10. Disassembly of DVD Lid
• Follow (Step 1) to (Step 3) of Item 9.3.
• Follow (Step 1) to (Step 14) of Item 9.6.
Step 1 Open the DVD lid in the direction of arrow, until it is
aligned parallel with the front panel assembly.