60
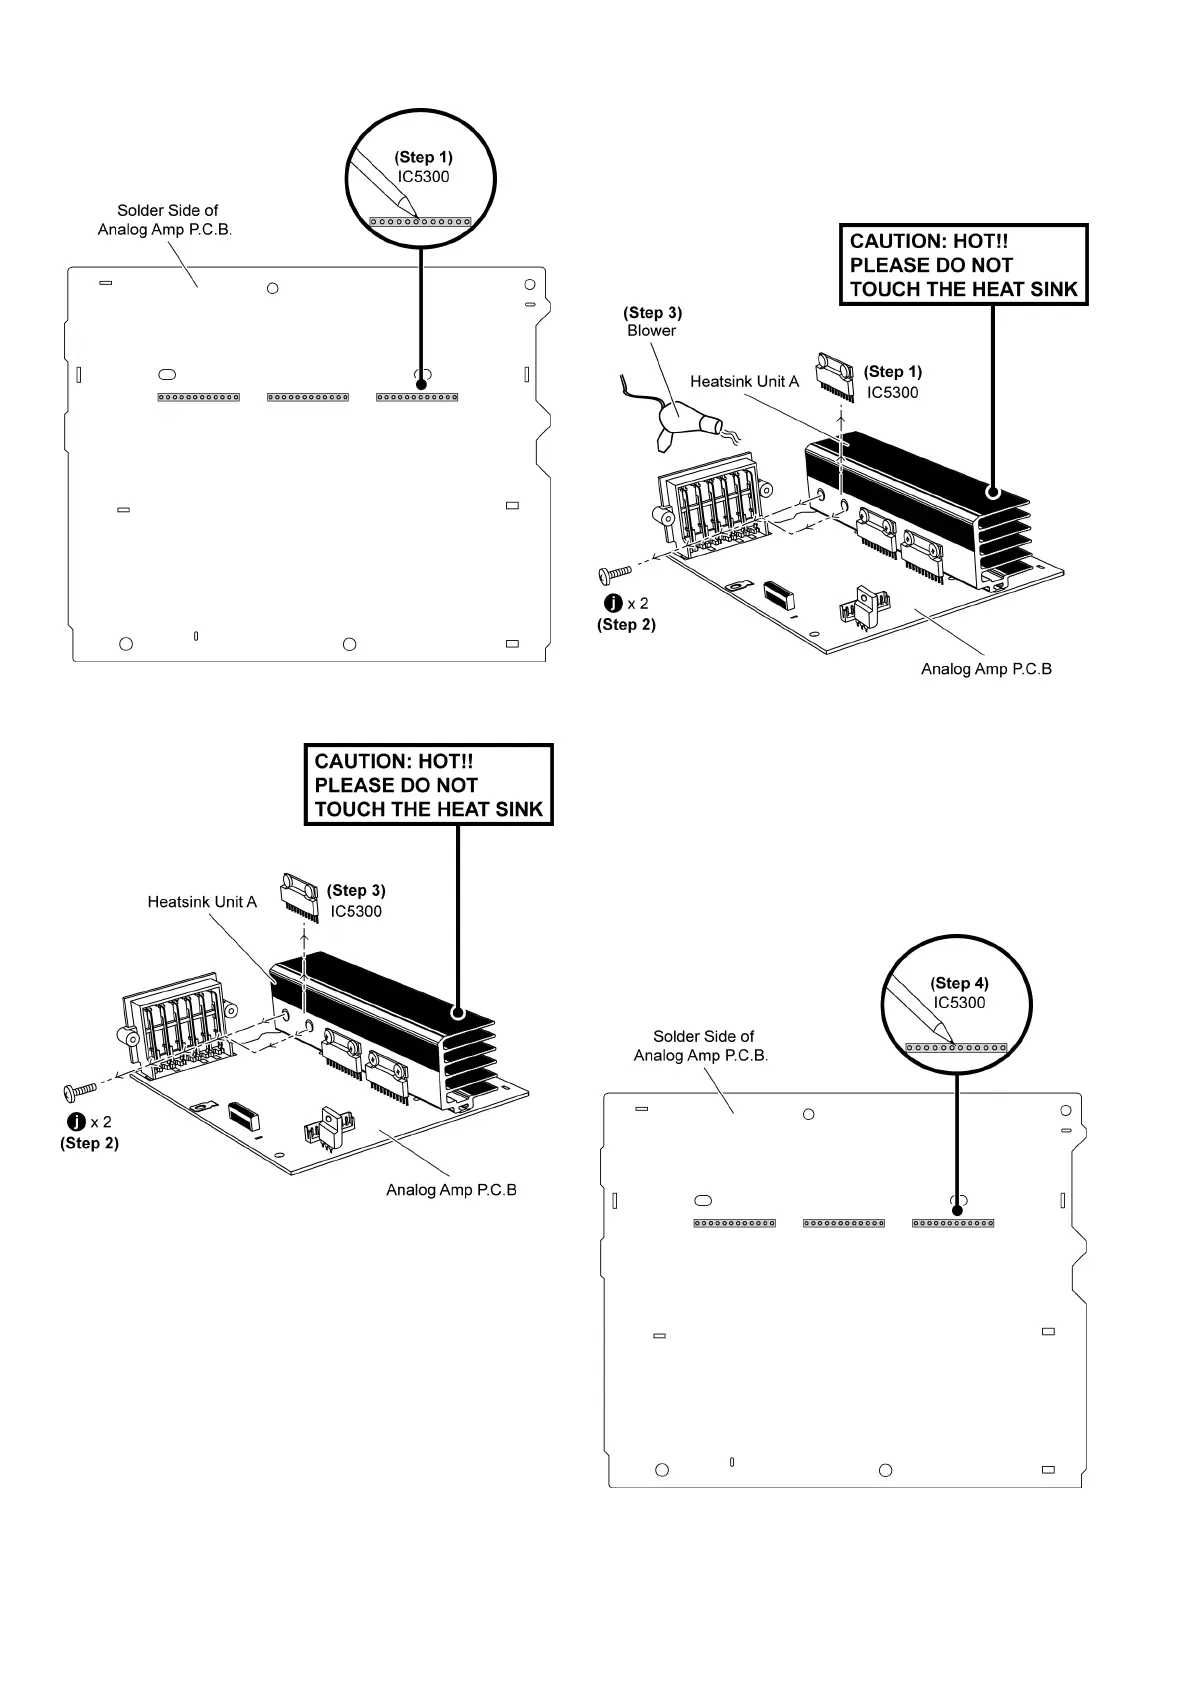
Step 1 Desolder pins of the 2CH BTL Power Amplifier IC
(IC5300) on the solder side of Analog Amp P.C.B.
Step 2 Remove 2 screws on 2CH BTL Power Amplifier IC
(IC5300).
Step 3 Remove 2CH BTL Power Amplifier IC (IC5300) from
Analog Amp P.C.B.
Caution: During replacement of the part, avoid touching
the heatsink. It may lead to injuries.
9.16.2. Assembly of 2CH BTL Power
Amplifier IC (IC5300)
Step 1 Mount 2CH BTL Power Amplifier IC (IC5300) on Analog
Amp P.C.B.
Caution: Ensure pins of the 2CH BTL Power Amplifier IC
(IC5300) are properly seated and soldered on Analog Amp
P.C.B.
Step 2 Screw the 2CH BTL Power Amplifier IC (IC5300) to
heatsink unit A.
Step 3 Use a blower to remove the minute particles that might
be caused after the process of the screwing 2CH BTL Power
Amplifier IC (IC5300) to the heatsink unit A.
Step 4 Solder pins of the 2CH BTL Power Amplifier IC (IC5300)
on the solder side of Analog Amp P.C.B.