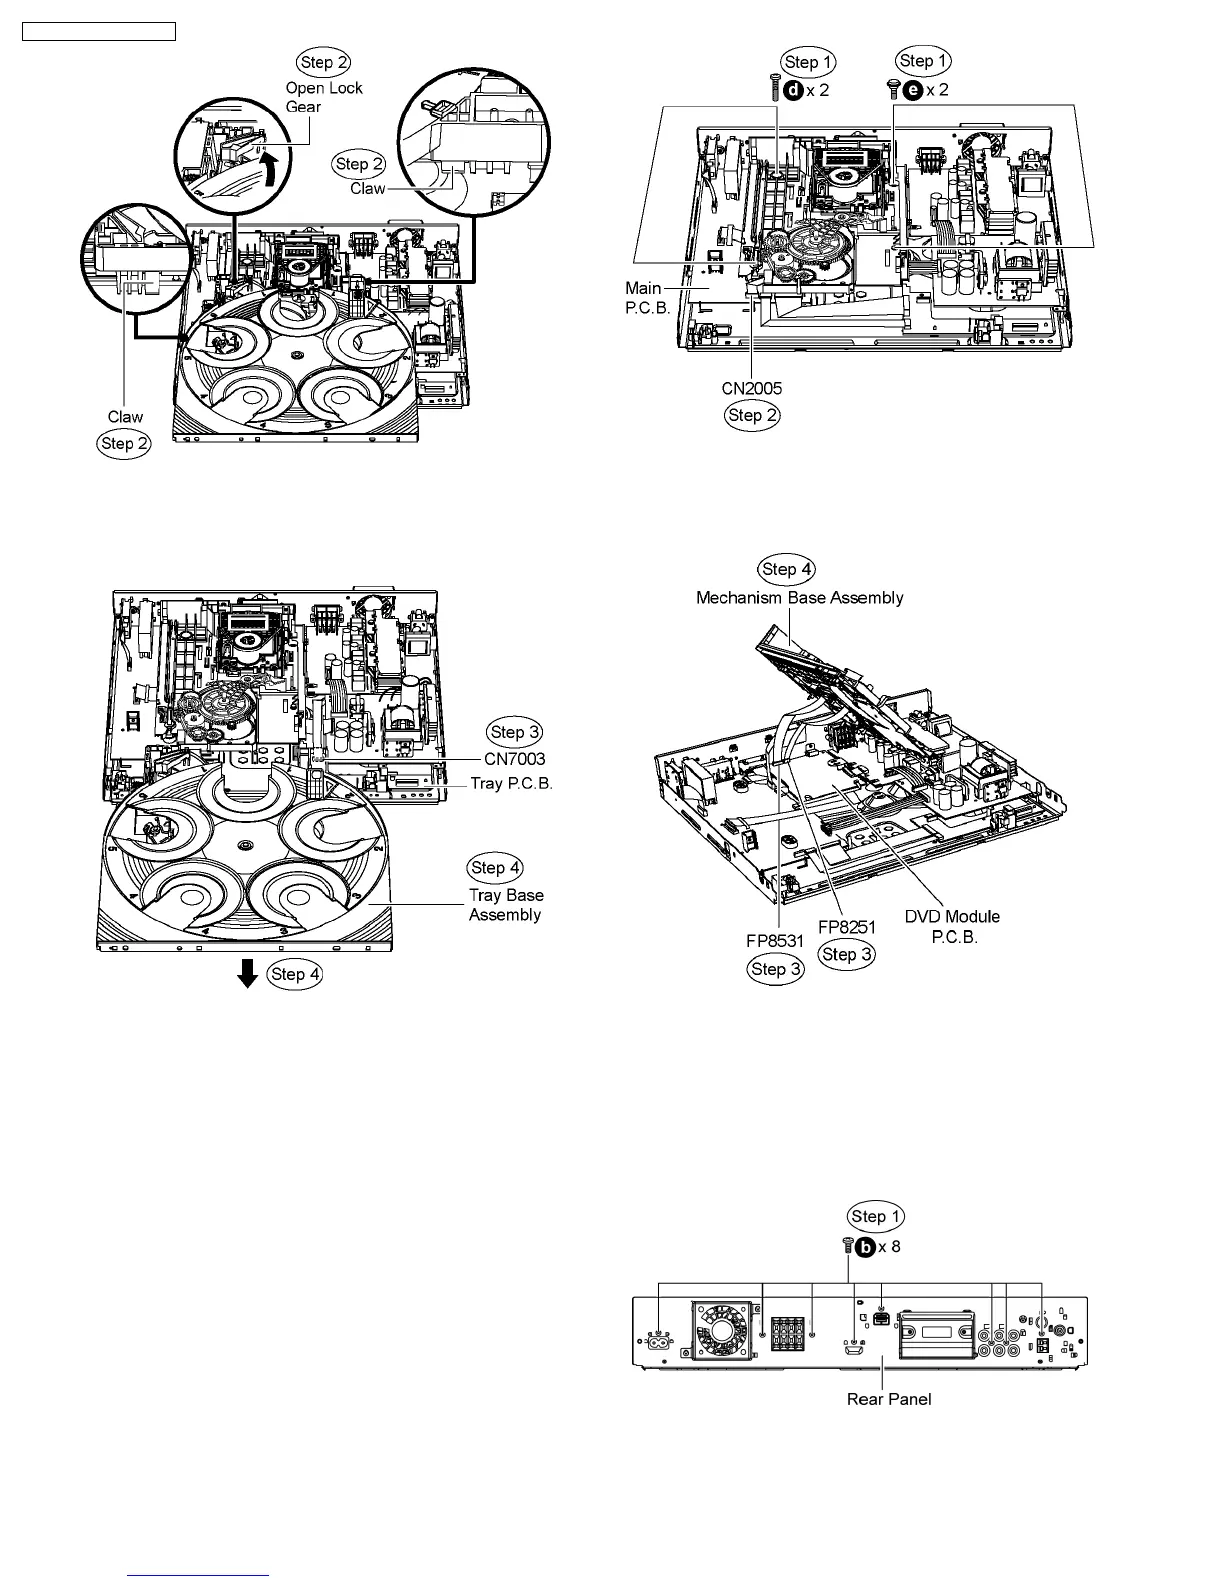
Step 3 Detach FFC cable from the connector (CN7003) on
Tray P.C.B.
Step 4 Remove the tray base assembly in the direction of the
arrow.
Caution: Avoid using excessive strong force when
removing the tray base assembly.
10.8. Disassembly of Mechanism
Base Assembly
·
Follow (Step 1) to (Step 3) of Item 10.3.
·
Follow (Step 1) to (Step 3) of Item 10.4.
·
Follow (Step 1) to (Step 4) of Item 10.5.
·
Follow (Step 1) to (Step 4) of Item 10.7.
Step 1 Remove 2 screws from each side of the mechanism
base assembly.
Caution: Take note of the screw type used. During
assembling, use the correct screw type and at the correct
location.
Step 2 Detach FFC cable from the connector (CN2005) on
Main P.C.B.
Step 3 Lift up the right side of the mechanism unit to detach
FFC cables from the connectors (FP8251 & FP8531) on DVD
Module P.C.B.
Step 4 Remove the mechanism base assembly.
Caution: Do not use strong or excessive force to avoid
damage to FFC cables.
10.9. Disassembly of Rear Panel
·
Follow (Step 1) to (Step 3) of Item 10.3.
Step 1 Remove 8 screws from the rear panel.
Step 2 Remove the wire clamp to detach FFC cable from the
connector (CN5501, fan unit) on D-Amp P.C.B.
Step 3 Detach FFC cable from connector (CN2012) on Main
58
SA-PT750P / SA-PT750PC