12 Service Positions
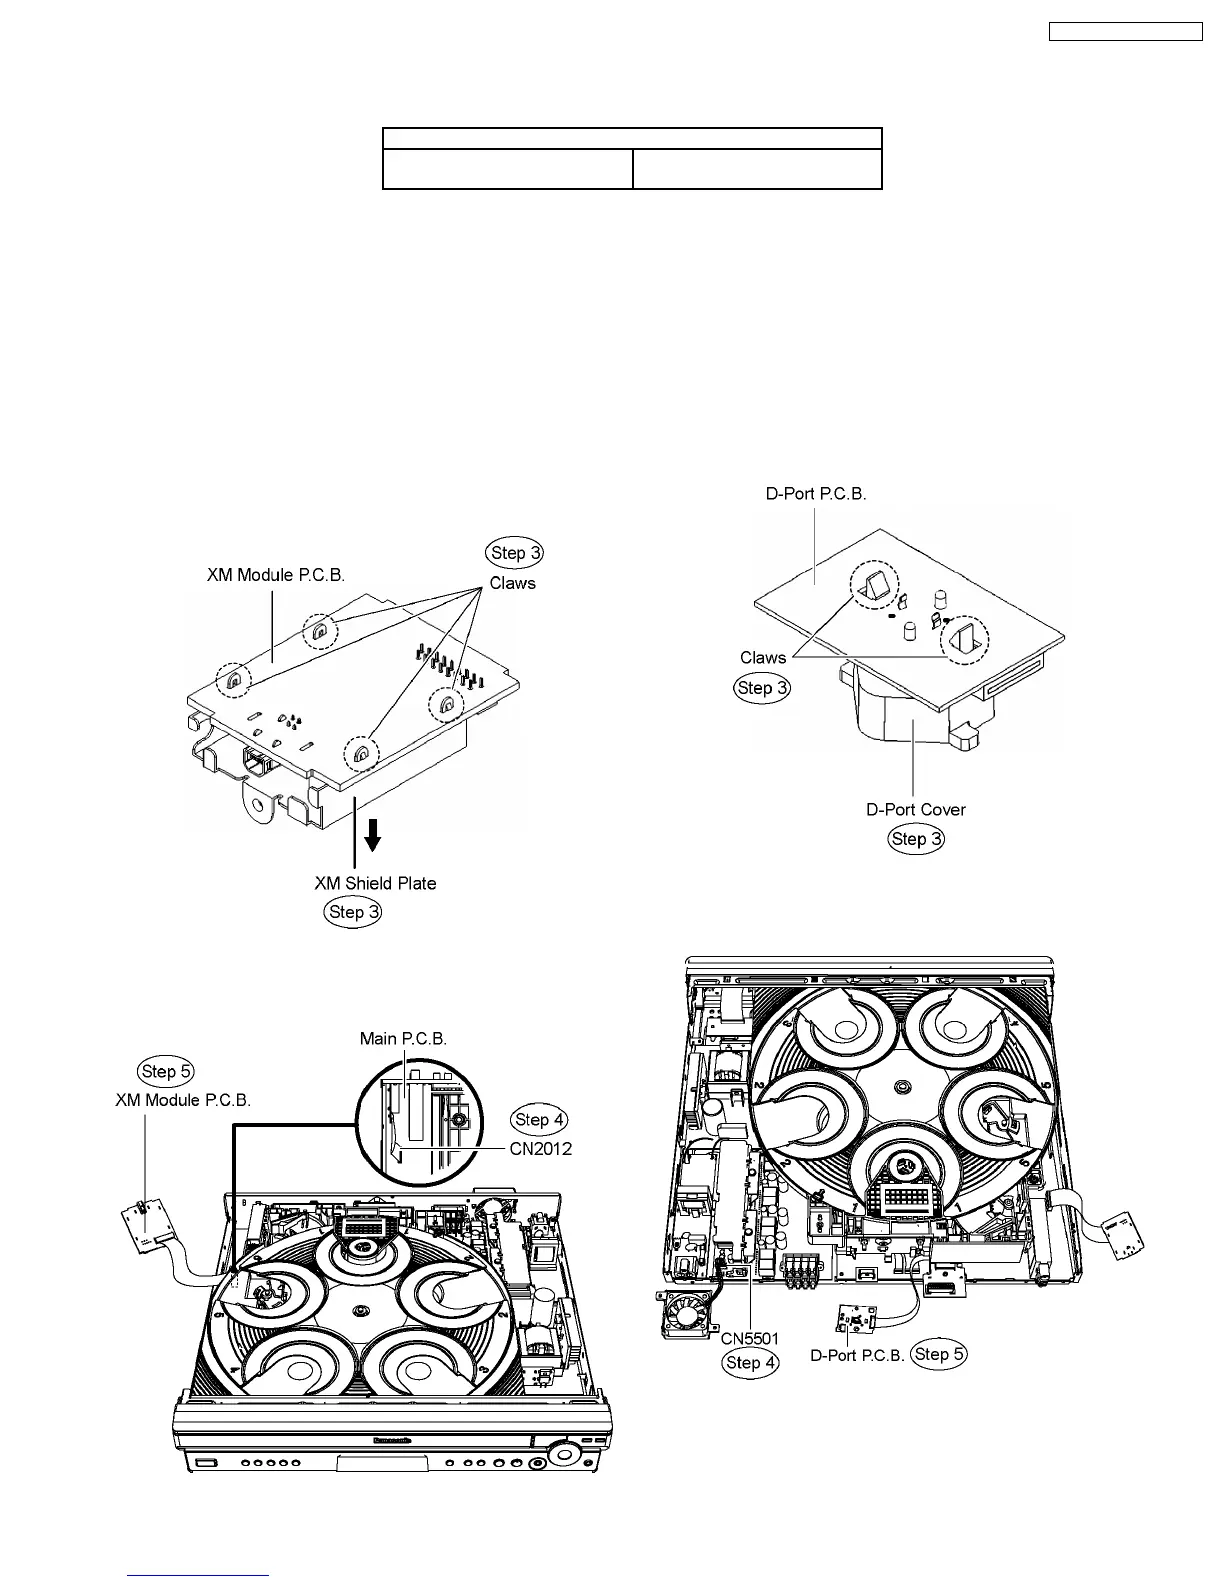
12.1. Checking & Repair XM Module
P.C.B.
Step 1 Disassemble the top cabinet.
Step 2 Disassemble XM Module P.C.B.
Note: Refer to items in Chapter 10 for disassembly procedures
of respective Part & P.C.B.
Step 3 Desolder the the claws of the XM shield plate and then
remove it from XM Module P.C.B. in the direction of arrow.
Step 4 Connect FFC cable at the connector (CN2012).
Step 5 Turn over XM Module P.C.B. and place it according to
the diagram shown below.
12.2. Checking & Repair D-Port
P.C.B.
Step 1 Disassemble the top cabinet.
Step 2 Disassemble the rear panel.
Note: Refer to items in Chapter 10 for disassembly procedures
of respective Part & P.C.B.
Step 3 Remove the D-Port cover by releasing the claws from
D-Port P.C.B.
Step 4 Connect FFC cable at the connector (CN5501).
Step 5 Turn over D-Port P.C.B. and place it according to the
diagram shown below.
12.3. Checking & Repair Panel
P.C.B. & Key P.C.B.
Step 1 Disassemble the top cabinet.
11 Service Fixture and Tools
Prepare service tools before proccess service position.
Service Tools
Loading Motor P.C.B. - Main
P.C.B.
REEX0633 (11 pin)
73
SA-PT750P / SA-PT750PC