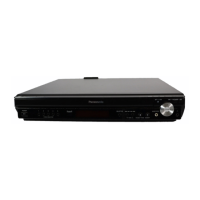
Step 7 Remove SMPS & AC-Inlet P.C.B.
Caution: Be careful of power heatsinks located on D-Amp
P.C.B., which has high temperature after prolonged use,
when removing it.
10.19. Disassembly of D-Port P.C.B.
·
Follow (Step 1) to (Step 3) of Item 10.3.
·
Follow (Step 1) to (Step 3) of Item 10.4.
·
Follow (Step 1) to (Step 4) of Item 10.5.
·
Follow (Step 1) to (Step 4) of Item 10.7.
·
Follow (Step 1) to (Step 4) of Item 10.8.
Step 1 Remove 1 screw from the rear panel.
Step 2 Detach FFC cable from the connector (CN2008) on
Main P.C.B.
Step 3 Remove D-Port P.C.B.
10.20. Disassembly of Switch
Regulator IC (IC5701)
·
Follow (Step 1) to (Step 3) of Item 10.3.
·
Follow (Step 1) to (Step 3) of Item 10.4.
·
Follow (Step 1) to (Step 4) of Item 10.5.
·
Follow (Step 1) to (Step 4) of Item 10.7.
·
Follow (Step 1) to (Step 7) of Item 10.18.
Step 1 Desolder pins of the switch regulator IC (IC5701) on the
back side of SMPS P.C.B.
Step 2 Remove 1 screw.
Step 3 Remove the switch regulator IC (IC5701) from the
heatsink unit B.
64
SA-PT750P / SA-PT750PC