10.12. Disassembly of Tray P.C.B.
·
Follow (Step 1) to (Step 3) of Item 10.3.
·
Follow (Step 1) to (Step 3) of Item 10.4.
·
Follow (Step 1) to (Step 4) of Item 10.5.
·
Follow (Step 1) to (Step 4) of Item 10.7.
·
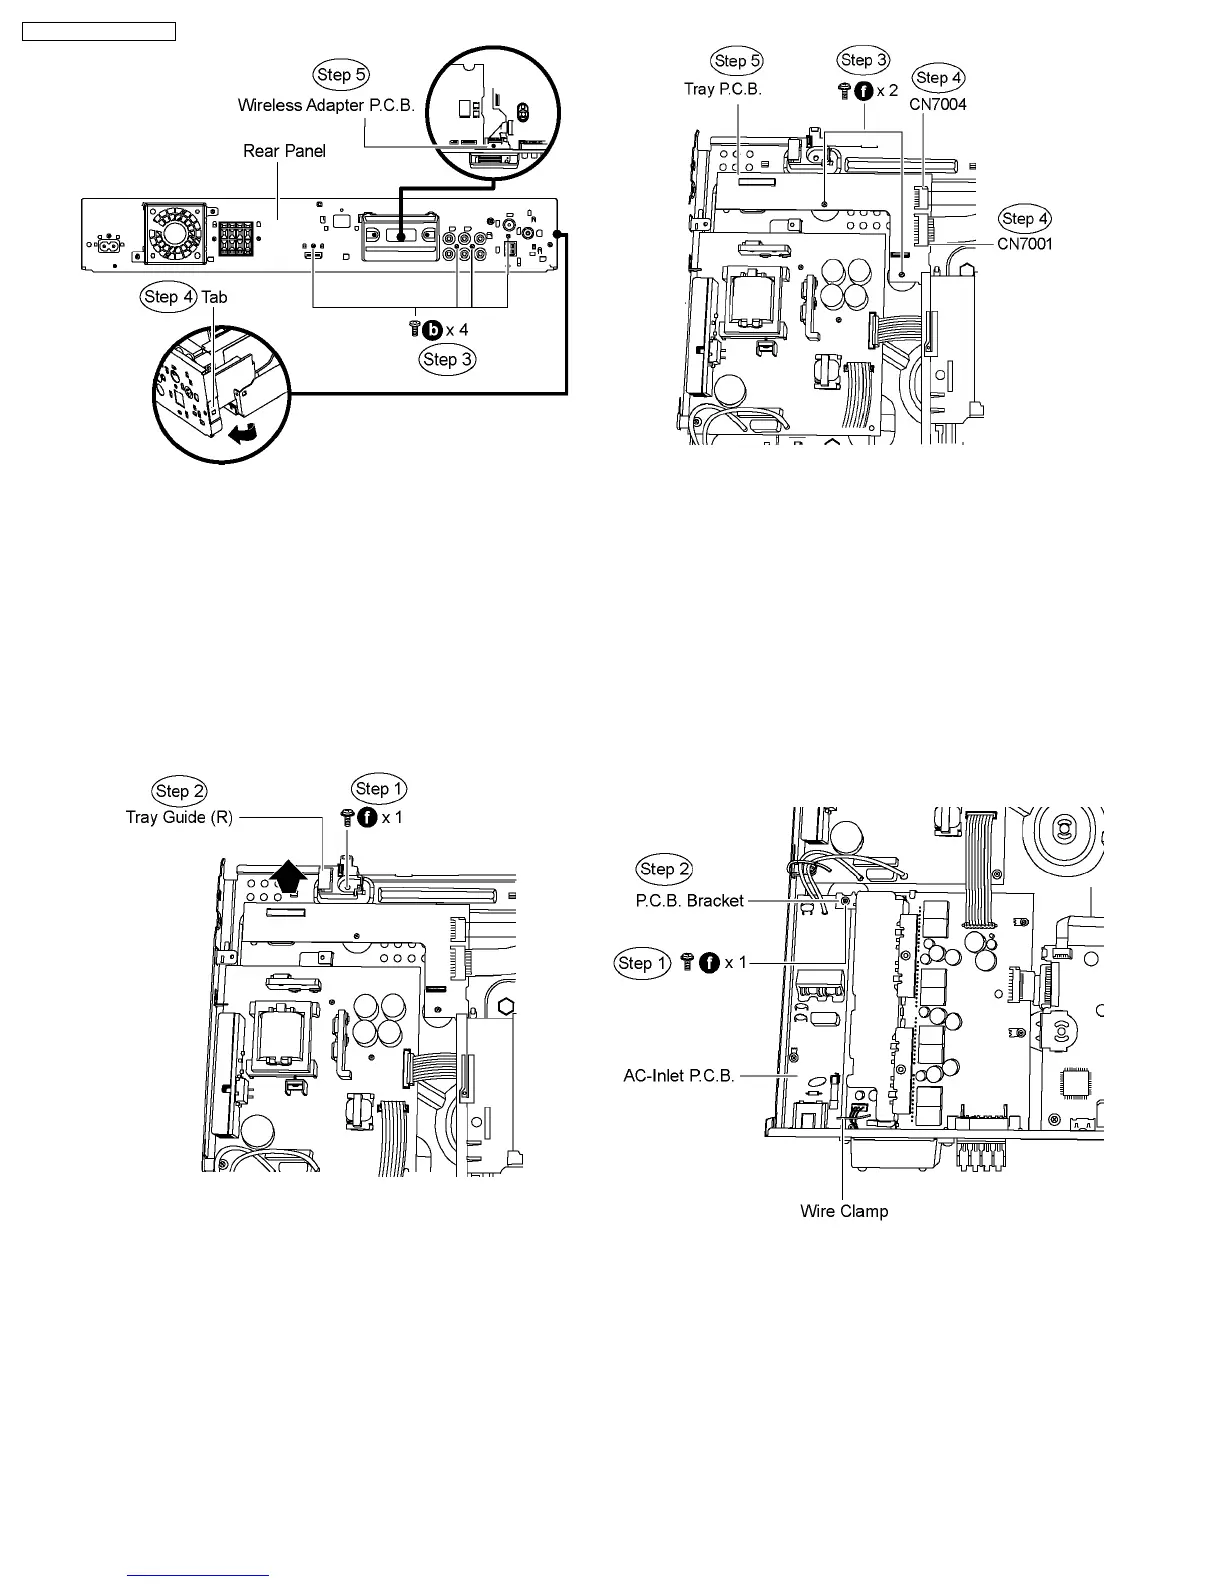
Disassembly of Tray Guide (R)
Step 1 Remove 1 screw.
Step 2 Remove the tray guide (R) in the direction of the arrow.
·
Disassembly of Tray P.C.B.
Step 3 Remove 2 screws
Step 4 Detach FFC cable from the connectors (CN7001 &
CN7004) on Tray P.C.B.
Step 5 Remove Tray P.C.B.
10.13. Disassembly of D-Amp P.C.B
·
Follow (Step 1) to (Step 3) of Item 10.3.
·
Follow (Step 1) to (Step 3) of Item 10.4.
·
Follow (Step 1) to (Step 4) of Item 10.5.
·
Follow (Step 1) to (Step 4) of Item 10.7.
·
Follow (Step 1) to (Step 4) of Item 10.8.
·
Disassembly of P.C.B. Bracket
Step 1 Remove 1 screw from AC-Inlet P.C.B.
Step 2 Remove the P.C.B. bracket.
·
Disassembly of D-Amp P.C.B.
Step 3 Remove 3 screws from D-Amp P.C.B.
Step 4 Detach FFC cable from the connectors (CN2009) on
Main P.C.B., and (CN5801) on SMPS P.C.B.
Step 5 Remove the wire clamp to detach FFC cable from the
connector (CN5501) on D-Amp P.C.B.
60
SA-PT750P / SA-PT750PC