P350 Operation Manual 22
3.4 Menu layout & navigation
The menu provides access to all features and settings.
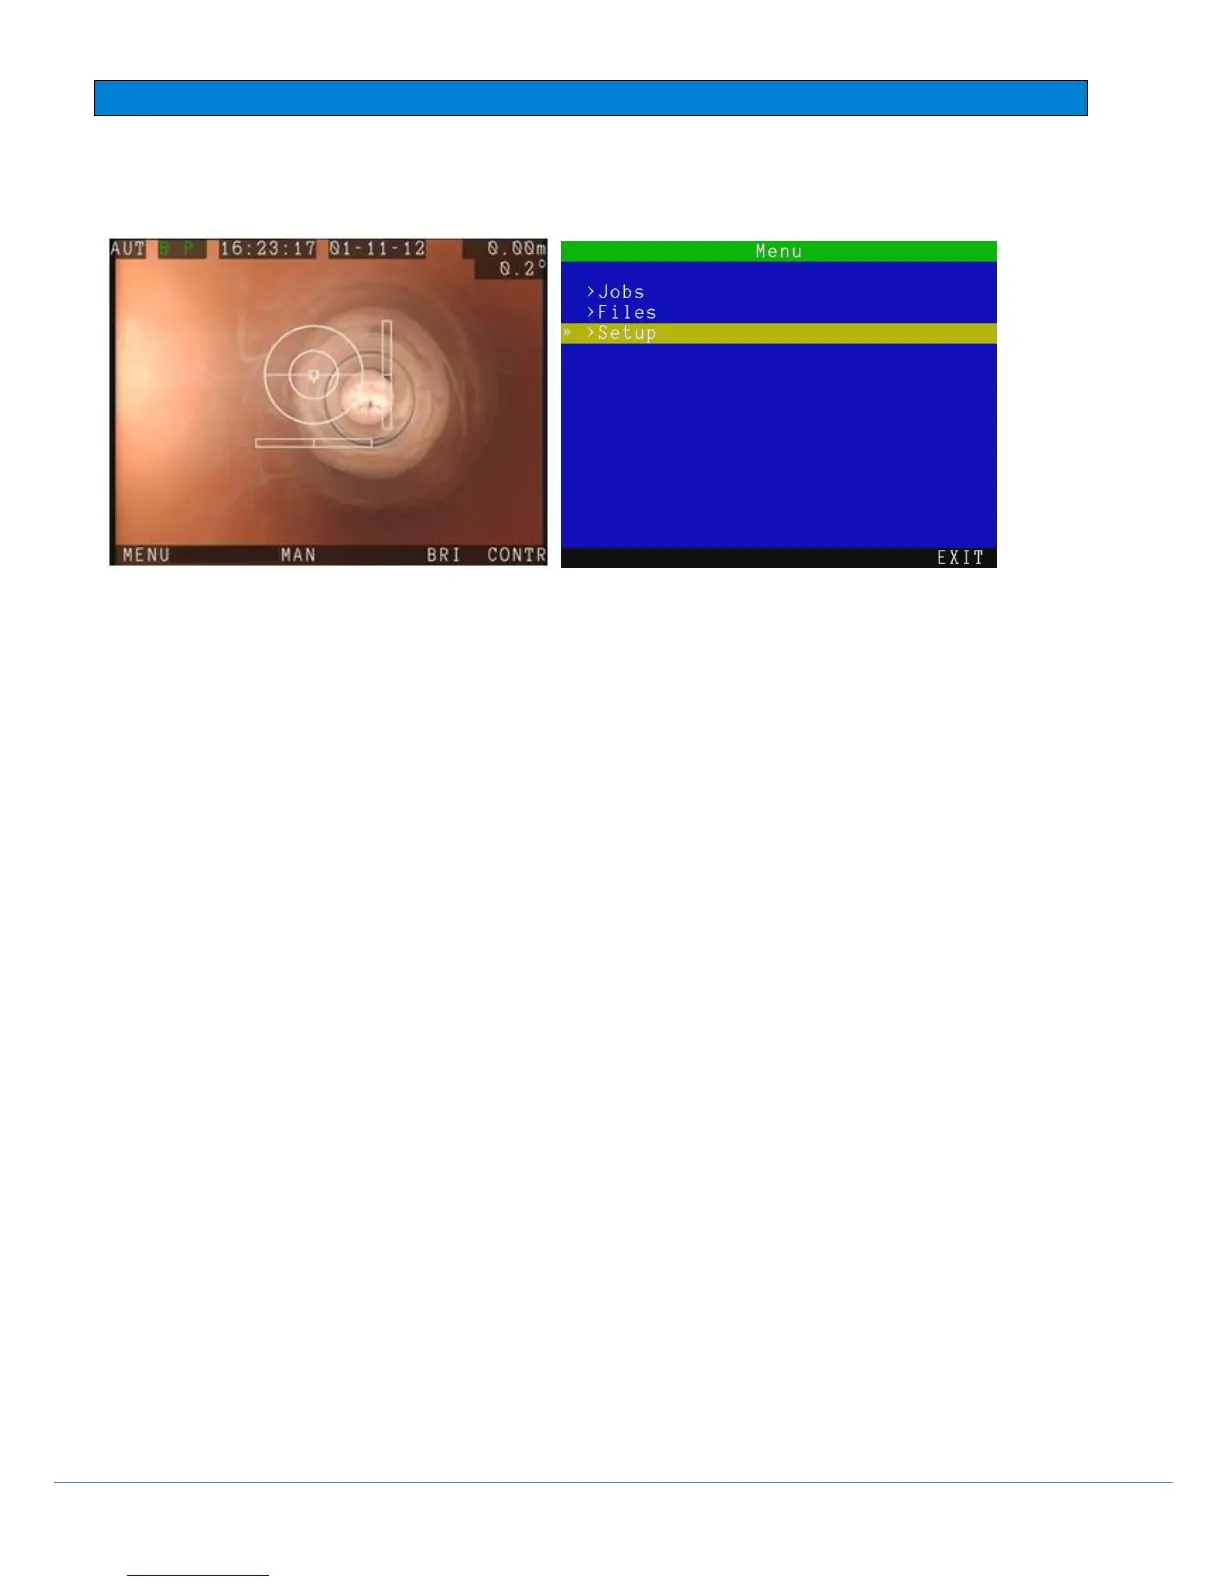
Figure 3.3: Main OSD screen Figure 3.4 The general menu window
General navigation
From the main OSD screen above,
F1 enters the general menu.
F3 switches between MAN and AUTO drum mode. Current mode is displayed on the top left.
F5 and F6 control the BRIGHTNESS and CONTRAST. Press the left or right arrows to adjust the setting slider
and OK or ENTER to save.
The P350 software is based on the Main OSD screen and a number of general menu screen from which you will be
able to setup and customize the P350 flexitrax system
To navigate the main OSD screen use the function keys on the keyboard or keypad.
To navigate other screens use the up and down (▲ and ▼) arrow keys to scroll up and down through the menu.
Press OK or the ► key to enter a submenu or to make a choice (where required)..
Press the ◄ arrow to return to the previous screen.
If the menu disappears, the on-screen timeout might be enabled; press any function key to bring it back. Check the
controller settings section for further details on this feature.
NOTE: You can also use the keyboard ENTER, ESC, Function and arrow keys to navigate and select options in the
menu.
Entering text with the keyboard
In text windows, you can enter any available character and use navigation keys such as Home, End and the arrow
keys to position the cursor.
1. To delete all text to the left of the cursor, select DEL <.
2. To delete all text to the right of the cursor, select DEL >.
3. Press Esc to undo your changes and exit.
4. Press Enter to save your changes.