PEC Plus user manual Finishing the installation
31040003 25
Finishing the installation
After installing and connecting equipment to your PEC Plus, you are ready to finish the installation.
Before you start configuring your PEC Plus, you need to verify the connections and close the PEC
Plus.
Verifying your connections
Make sure the configuration worksheets in Appendix E correspond to the way the equipment is
connected to your PEC Plus.
It is very important that the connections and the worksheets are the same, because the next step
after closing the cover is to tell your PEC Plus which equipment is connected to each terminal. It is
important so you can be sure you are controlling the equipment you think you are controlling.
Closing the cover
After you have finished connecting all equipment, wiring, and cables to your PEC Plus, it’s time to
verify the wires are connected properly and the close the cover.
1. Make sure all the wires are properly connected to the correct terminals.
2. Make sure the voltage selection switch is in the correct setting.
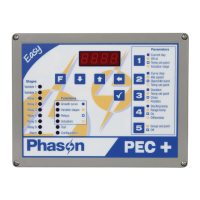
3. Make sure the display cable is properly connected. For more information, read PEC Plus layout
on page 13.
4. Place the cover on the control.
5. Switch on the power to your PEC Plus.
When you switch on the power to your PEC Plus, the display should show the temperature. If
the PEC Plus display does not come on, go back to step 1. If the display shows an alarm
message and or the LED for ALARM is lit, read Programming alarm settings on page 58.
6. Insert the four screws into the cover and then tighten them.
Do not over tighten the screws. Avoid using power screwdrivers or drills.