Chapter 5: Monitoring and maintaining your PEC Plus Phason
72 2009-06-15
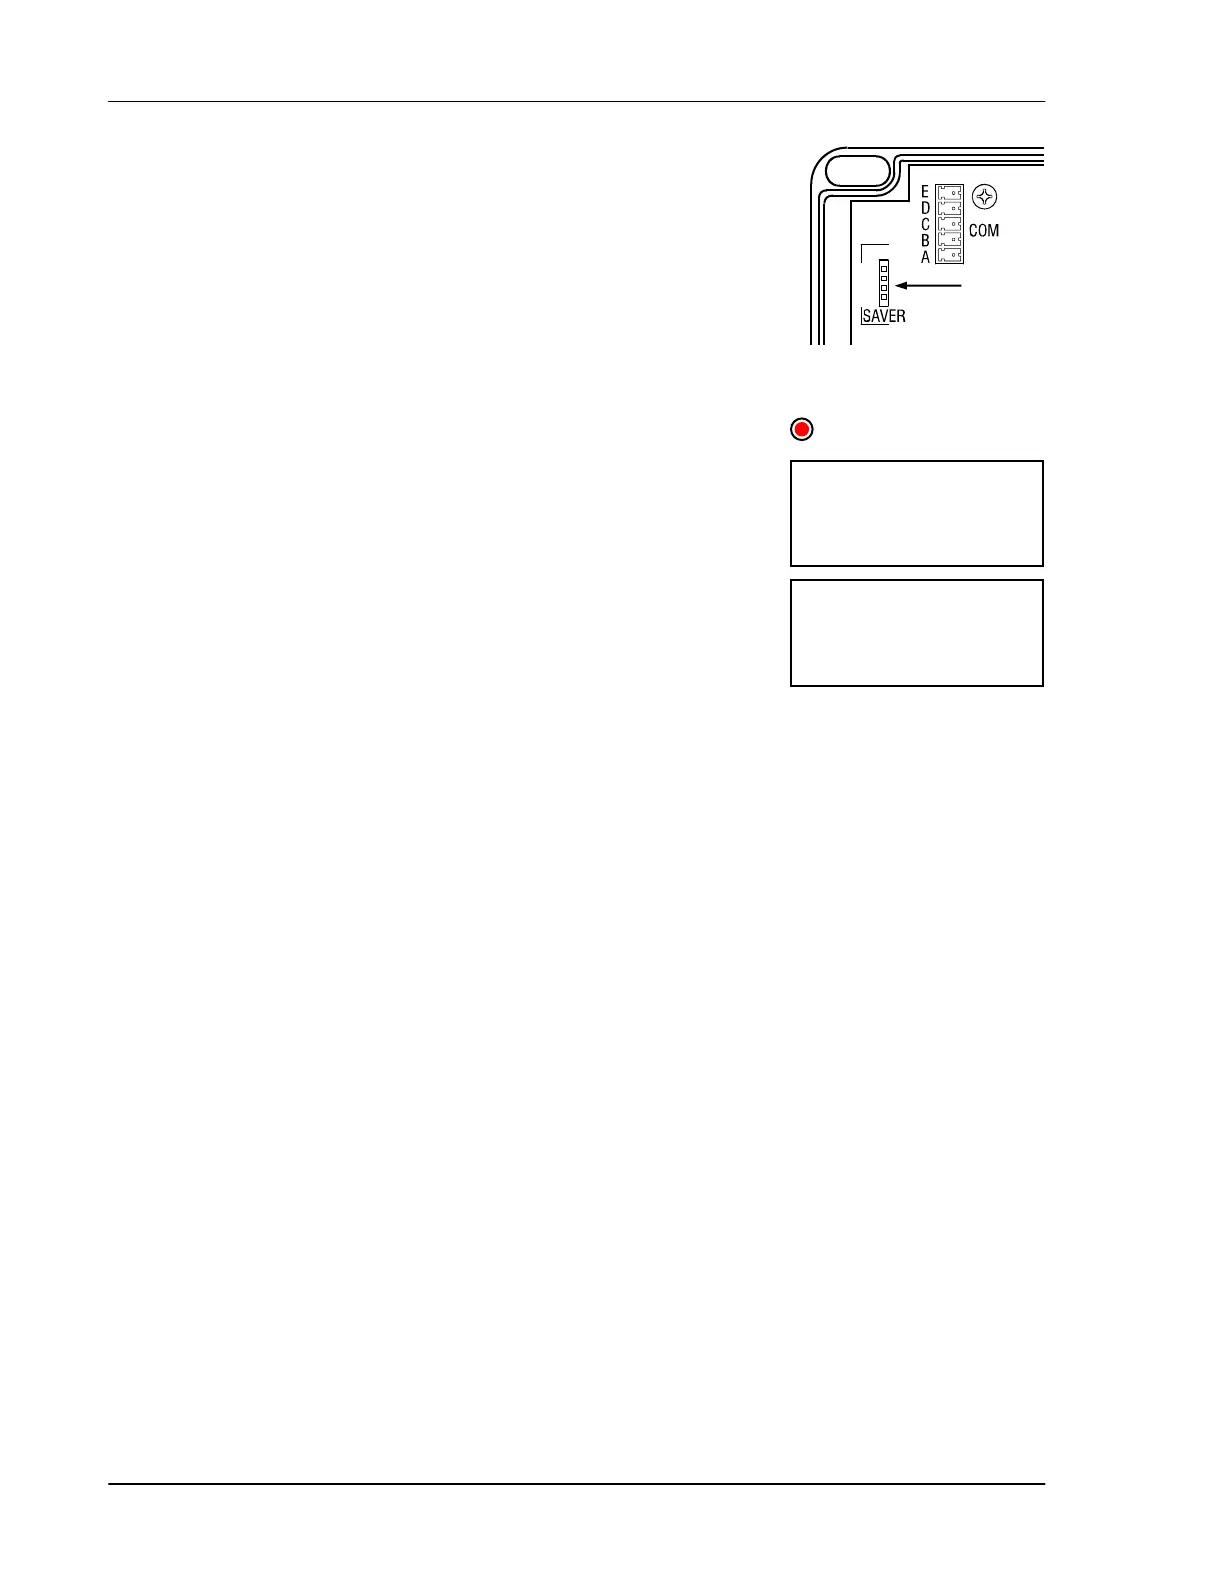
The inside of the PEC Plus cover is where you connect the PEC+
Updater. The cover label must face the right when you plug the updater
into the socket.
To update the firmware using the “power on” method
1. Loosen the four screws in the PEC Plus enclosure and then gently
remove the cover. Make sure not to disconnect the ribbon cable.
2. Insert the PEC+ Updater into the connector marked SAVER on
the inside top-left of the cover.
3. Press
Function until the LED for CONFIGURATION is lit.
4. Press
Up or Down until updt is displayed and then press Select.
The display shows no.
5. Press Up or Down to change the no to yes and then press Select.
The PEC Plus updates its firmware. During the update, the display
is blank and the control beeps.
When the update is complete, the display shows ---- for a couple
seconds and then shows the ambient temperature.
6. Remove the PEC+ Updater.
7. Verify that the control functions properly.
8. Replace the cover and then tighten the four screws.
To update the firmware using the “power off” method
1. Loosen the four screws in the PEC Plus enclosure and then gently remove the cover. Make sure
not to disconnect the ribbon cable.
2. Insert the PEC+ Updater into the connector marked SAVER on the inside top-left of the cover.
3. Switch off the power to the PEC Plus for at least five seconds.
4. Switch on the power to the PEC Plus.
The PEC Plus updates its firmware. During the update, the display is blank and the control
beeps.
When the update is complete, the display shows ---- for a couple seconds and then shows the
ambient temperature.
5. Remove the PEC+ Updater.
6. Verify that the control functions properly.
7. Replace the cover and then tighten the four screws.
here
Updt
CONFIGURATION
No