10 PianoDisc Installation Guide
228CFX - PianoCD - iQ
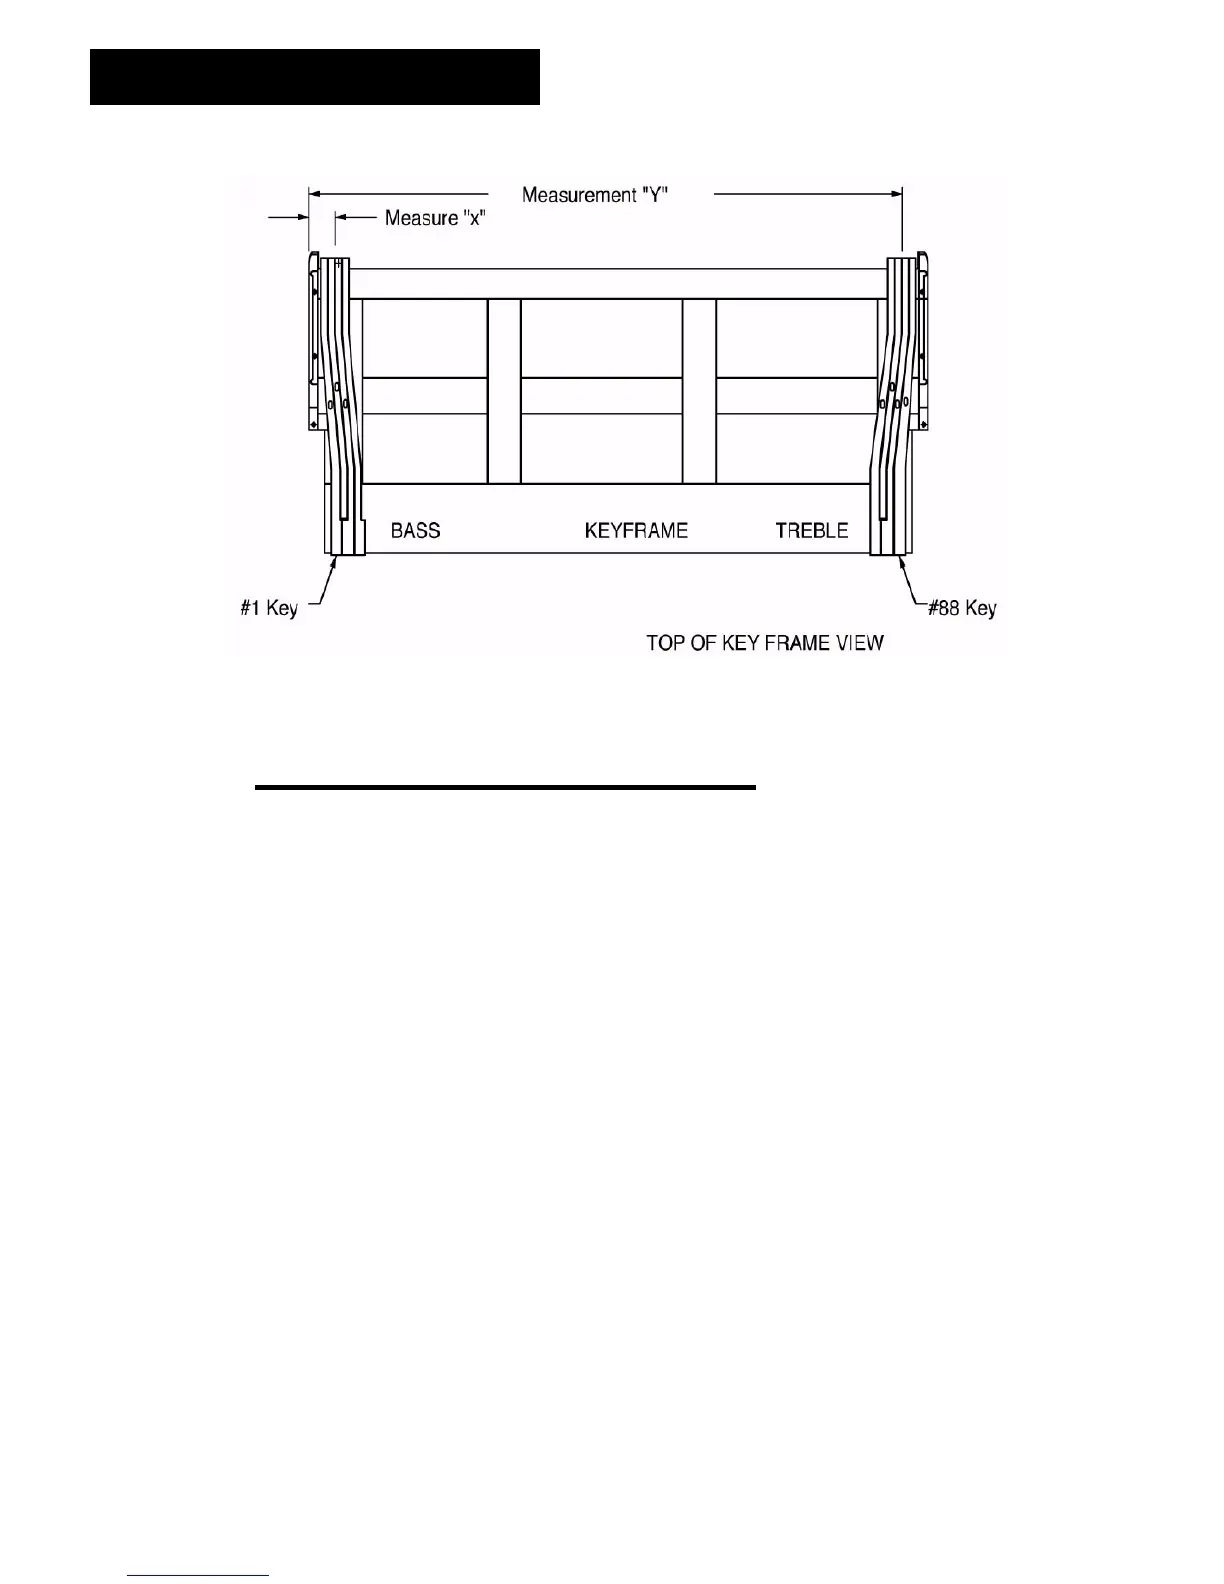
Figure 1B
Step 2: Measure the key groups
A. Establish the key groups. The front of the keys are evenly spaced in one
continuous line: left to right, numbered 1 through 88. The stack is typically
divided into four groups. The group at the left, the bass, has the largest
hammers. This is Group 1. The mid-range group in the center of the
keyboard is Group 2. Moving to the right is the low treble area, Group 3.
Group 4 is the high treble area at the right end of the keyboard with the
smallest hammers. The small open spaces between these groups are
called “breaks”. (Figure 2A)
B. Place and mark the rail blanks. Position solenoid rail blank on damper lift
felt centering rail bracket locations for best support (Figure 2C)
C. Mark the starting and ending point on the rail (first and last keys of that
section) (Figure 2B)
D. Always start with short stem solenoid for the first key and only mark the
long stem solenoid locations.