16 PianoDisc Installation Guide
228CFX - PianoCD - iQ
Step 6: Trace the keyframe
Steps 6-11 – a convenient time saving tip
On some pianos it is possible to remove the keybed, giving you easier access
to the inside of the piano. Removal of the keybed often makes steps 6 through
11 much easier, since you would be able to perform these steps from the
INSIDE of the keybed.
DO NOT attempt to remove the keybed until you have referred to Appendix A,
since some keybeds are not removable. A list of piano makes with easily
removable keybeds will be found in Appendix A.
A. Replace the keyframe in the piano.
Note: Do not re-attach the keys or the stack when replacing the keyframe.
Secure the key blocks.
B. With a pencil, outline on the keybed the cut just made in the back edge of
the keyframe.
Step 7: Transfer your measurements
A. Remove the keyframe from the piano.
B. Transfer the keyframe cut outline from the top
(inside) to the bottom (outside) of the keybed,
where you will have access to it with a saw. Do
this by measuring from each end of the line
drawn in the previous step to the front top edge
of the keybed, down the thickness of the keybed
and then back the same distance on the bottom
of the keybed.
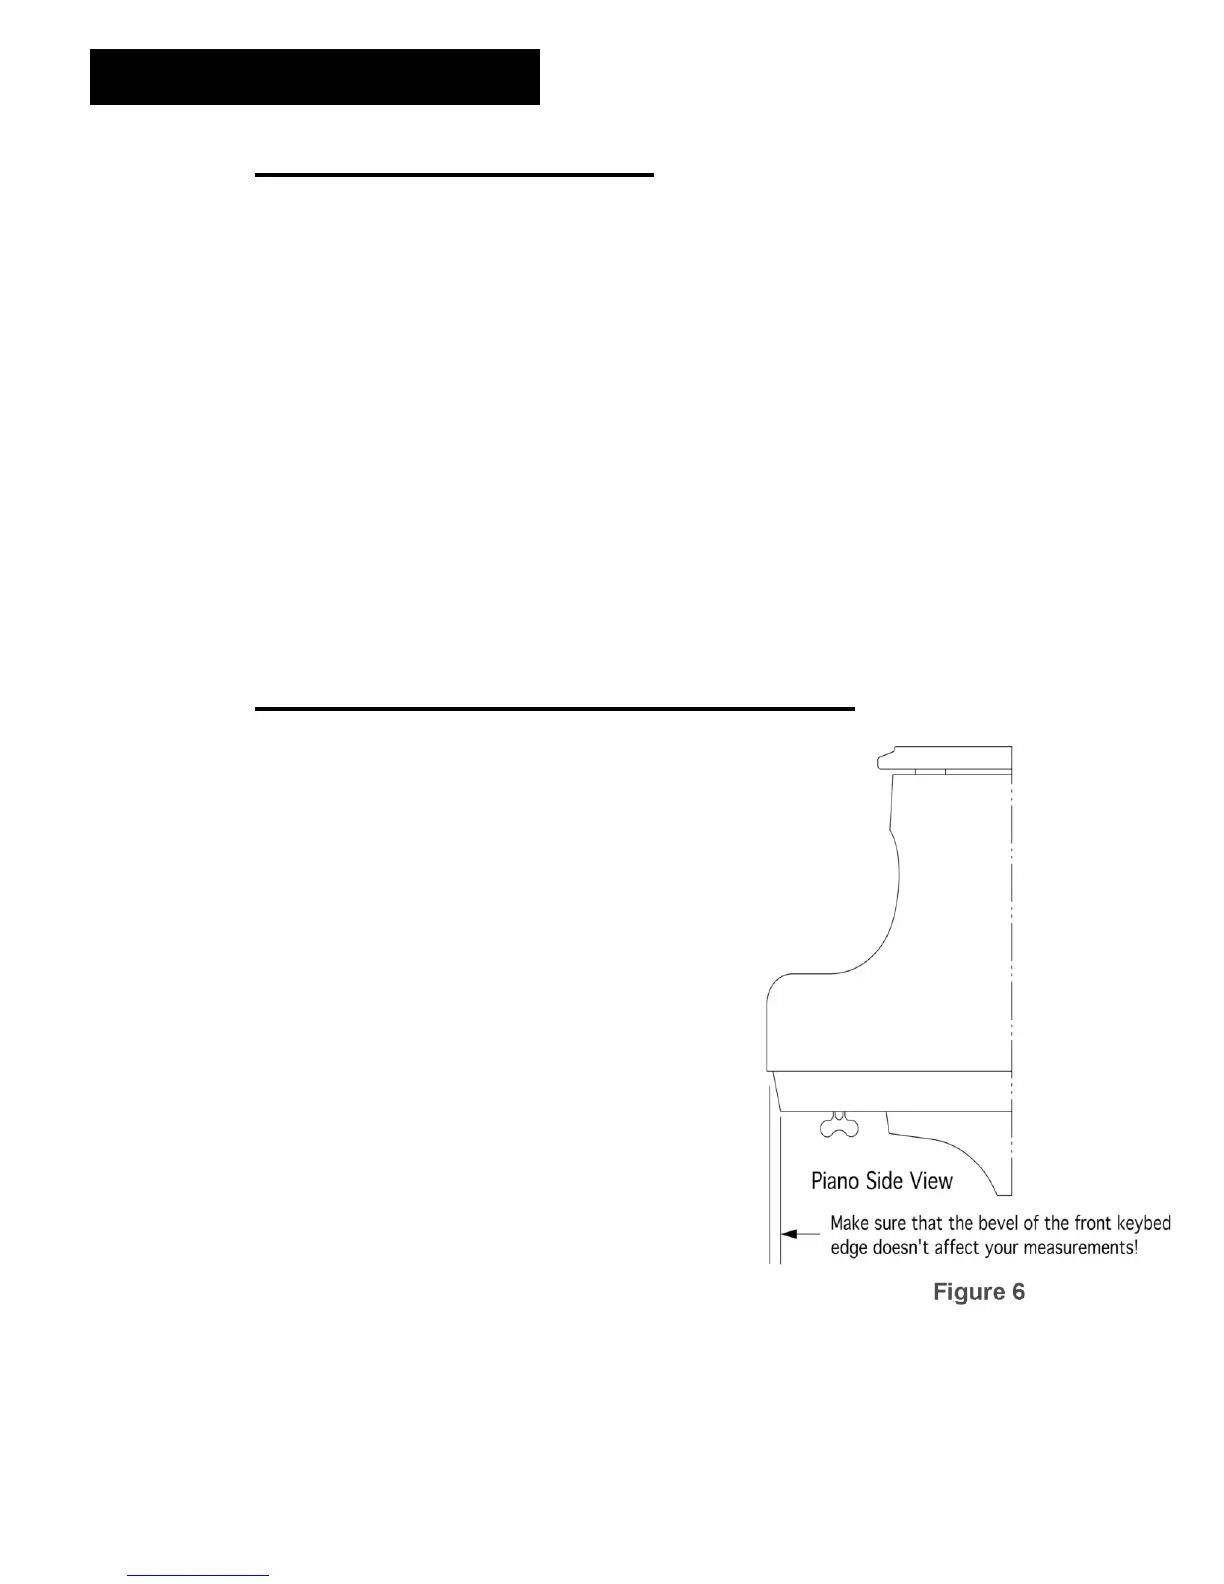
CAUTION: On some pianos, the front edge of
the keybed does not form a 90° angle. MAKE
SURE you account for this when you transfer
your measurements from the inside of the
keybed to the outside. (See Fig. 6)
C. Check the accuracy of the transfer by drilling a
1/8” (3 mm) hole at each end of the line, being
sure to drill at a 90 ° angle with the keybed. Look
inside to see if the holes hit the original line.
Make adjustments if necessary.
Note: It is necessary at this time to determine if the keybed needs
reinforcement. If so, an additional 1/8” (3mm) of keybed needs to be removed