14 PianoDisc Installation Guide
228CFX - PianoCD - iQ
Step 4: Keyframe bedding
A. Before cutting the keyframe, determine if the material removed will
change the keyframe bedding. In some pianos the keyframe has a raised
edge on the material to be removed.
There may also be keybed recessed areas. The material removed from the
keyframe and keybed could change the keyframe bedding and cause many
adjustments to be affected. A simple procedure of adding wood shim to the
key frame will eliminate time consuming adjustments.
Determine if additional support is necessary. Measure from the back
edge of keyframe to the keyframe cut line. Tilt the keyframe vertically,
looking at the bottom side and now transfer measurement to the bottom
side plus 1/4” (6 mm). (See Fig.3) If there is still 1/8” (3 mm) or more
support left on the keyframe, then no additional support is necessary.
(Continue to Step 5)
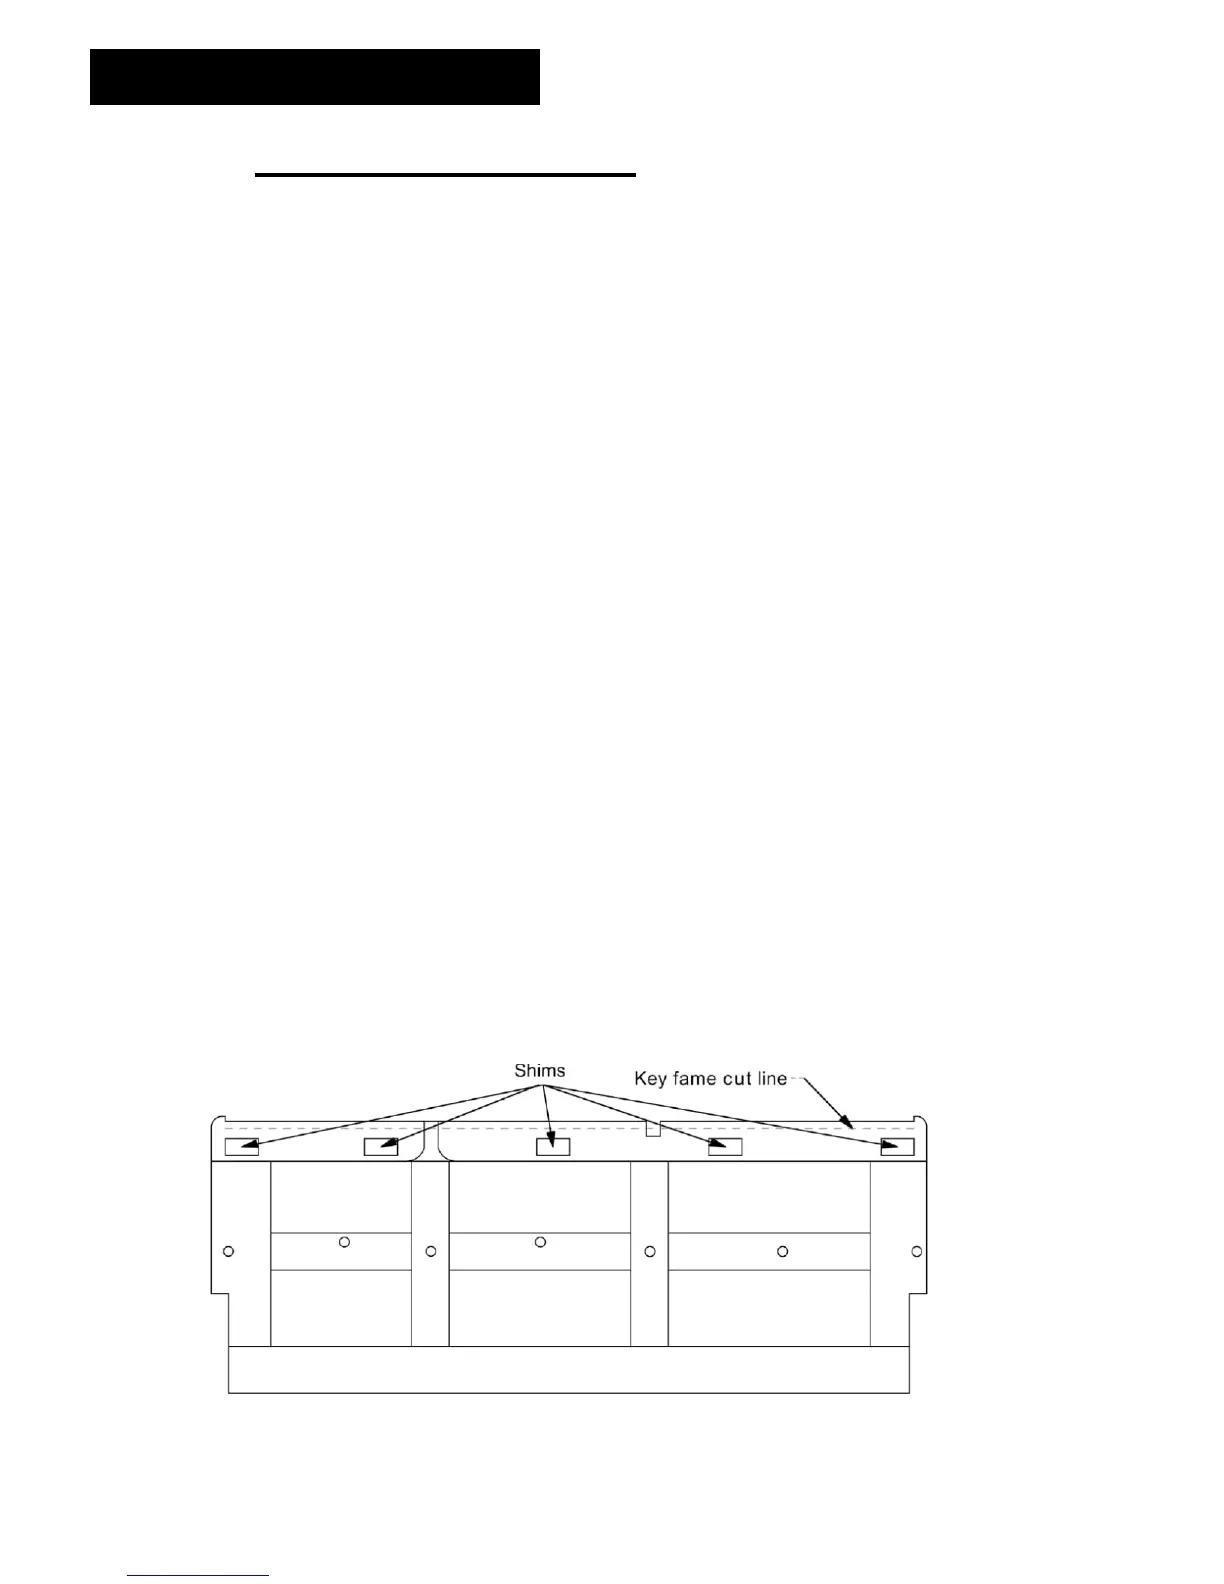
B. Shimming the keyframe. If shimming is necessary, you must locate where
to place the shim and how thick the shim must be. Looking at Figure 4, you
will see a view of the bottom of the keyframe. The dotted line represents the
keyframe cut line that was transferred from the top. Notice the 5 shims are
placed 1/4” (6 mm) from the dotted line. This is because the 1/4” (6 mm)
portion is in the slot location.
• Place a straight edge across the bottom of the keyframe. (front rail to rest rail)
• Choose the appropriate thickness of shim stock to fill the void at the selected
location. If the shim stock is thicker, that is ok; it can be sanded to the correct
height.
• Cut 5 pieces of shim stock 1” x 2” (26 mm x 51mm).
• Evenly space the shim on the bottom of the keyframe and glue the shims into
place. (see Figure 4)
• After the shims are dry, place the straight edge across the bottom of the
keyframe and check the shim height. Sand the shims, if necessary, to the correct
height.
Figure 4