20 PianoDisc Installation Guide
228CFX - PianoCD - iQ
Step 9: Drill the keybed
A. Measure the thickness of the keybed.
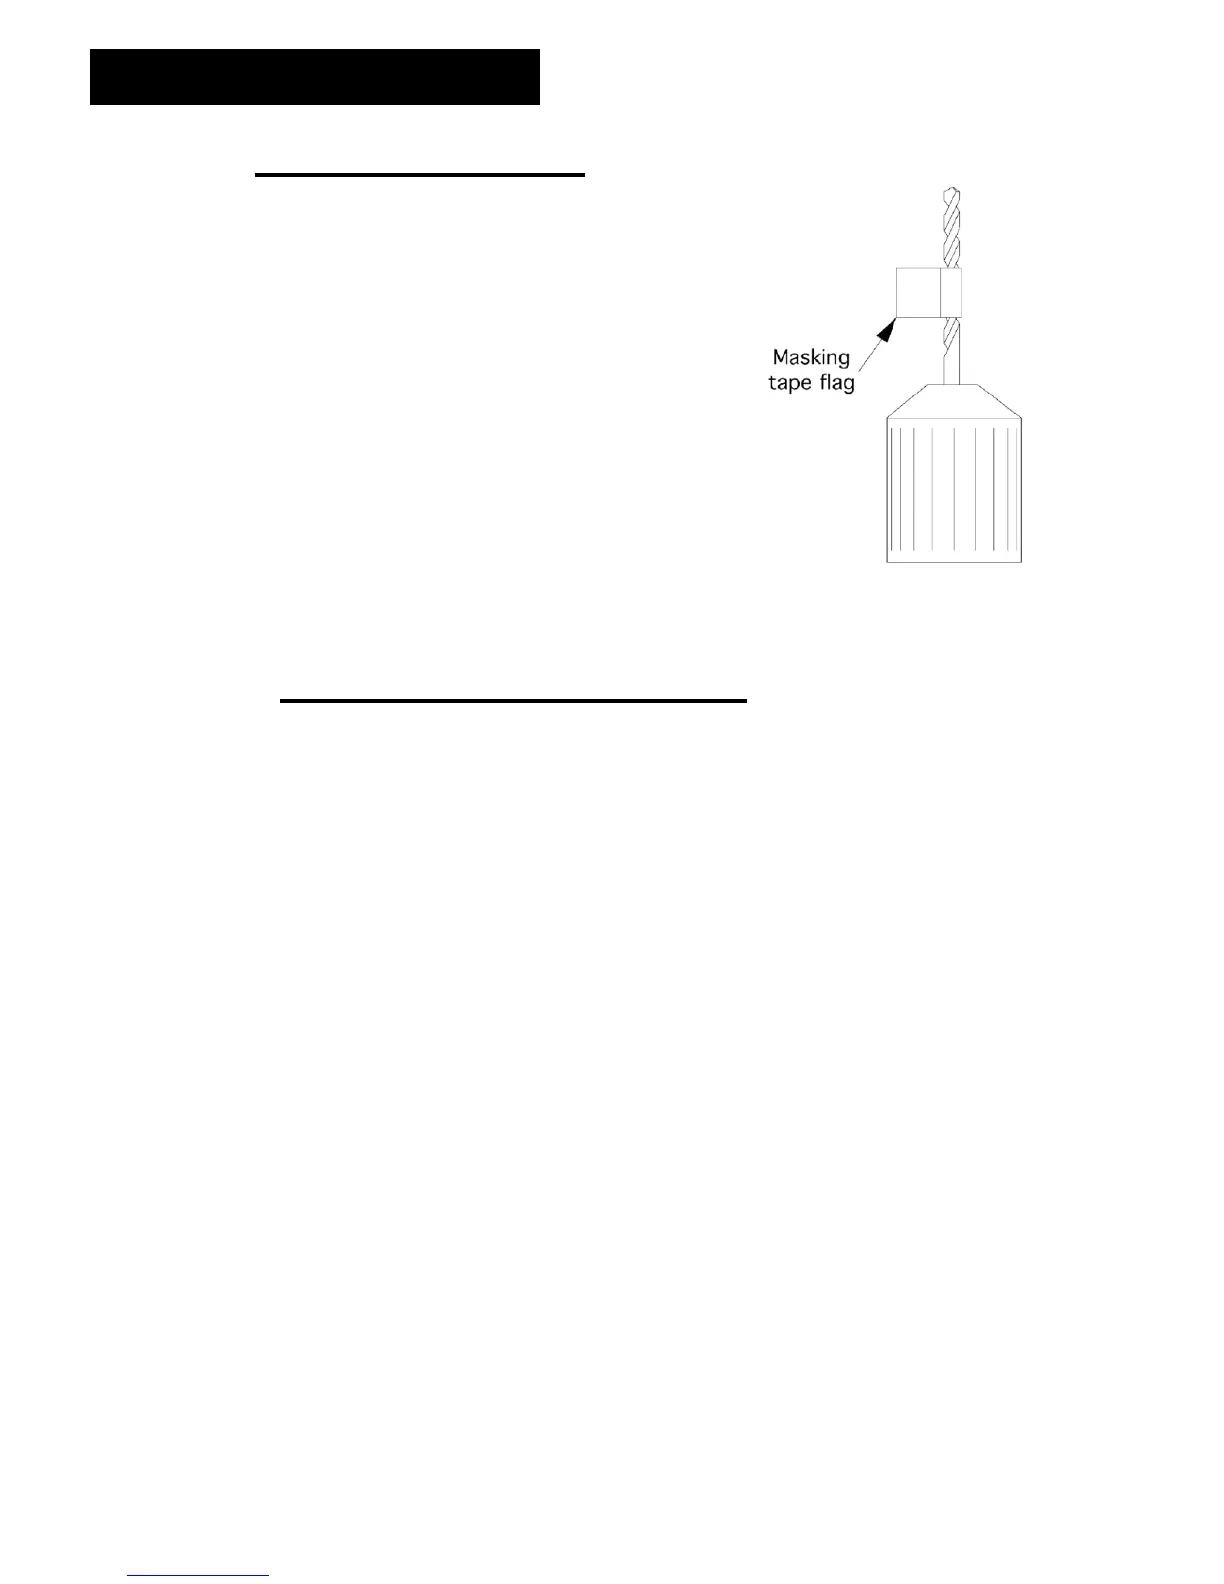
B. Mark the drill bit.
• Take a 3/8” (9.5 mm) bit and wrap masking tape
around the bit at the depth of the keybed.
• This will indicate the point at which the bit will
break through on the other side. This precaution
will minimize the chance of suddenly bursting
through the keybed and damaging the damper
assembly.
C. Drill through the keybed.
• Drill out the holes at the corners of the slot outline
to accommodate the jig saw blade. If a circular
saw is used, the blade depth must be properly set.
Figure 8
Step 10: Prepare to cut the slot
A. Wedge the damper tray in the “up” position to make sure that the saw blade
has enough clearance.
B. Check the depth of the saw blade. Make sure not to cut accidentally into the
damper tray.
C. Remove the “dags”.
• It is very likely that the piano you are retrofitting is equipped with action stops (or
“dags”). Because of their location, cutting the keybed will cut through them as
well, unless they are removed before making the cut.
• Use of the dags is important for the PianoDisc system because they keep the
action of the piano from impacting against the solenoid stems and possibly
damaging them. Therefore, they should be removed and re-installed after the
slot is cut. Due to the amount of frame material removed, the dags can only be
placed at the far bass and treble ends of the slot.
• You should be able to knock the “dags” out fairly easily since the screws that
attach them to the keybed are not in very deep. This will remove the screws as
well.