FINAL DRIVE
7.9
cage. If the unit is driven with the armature plate out
of position, it will cause roller clutch damage.
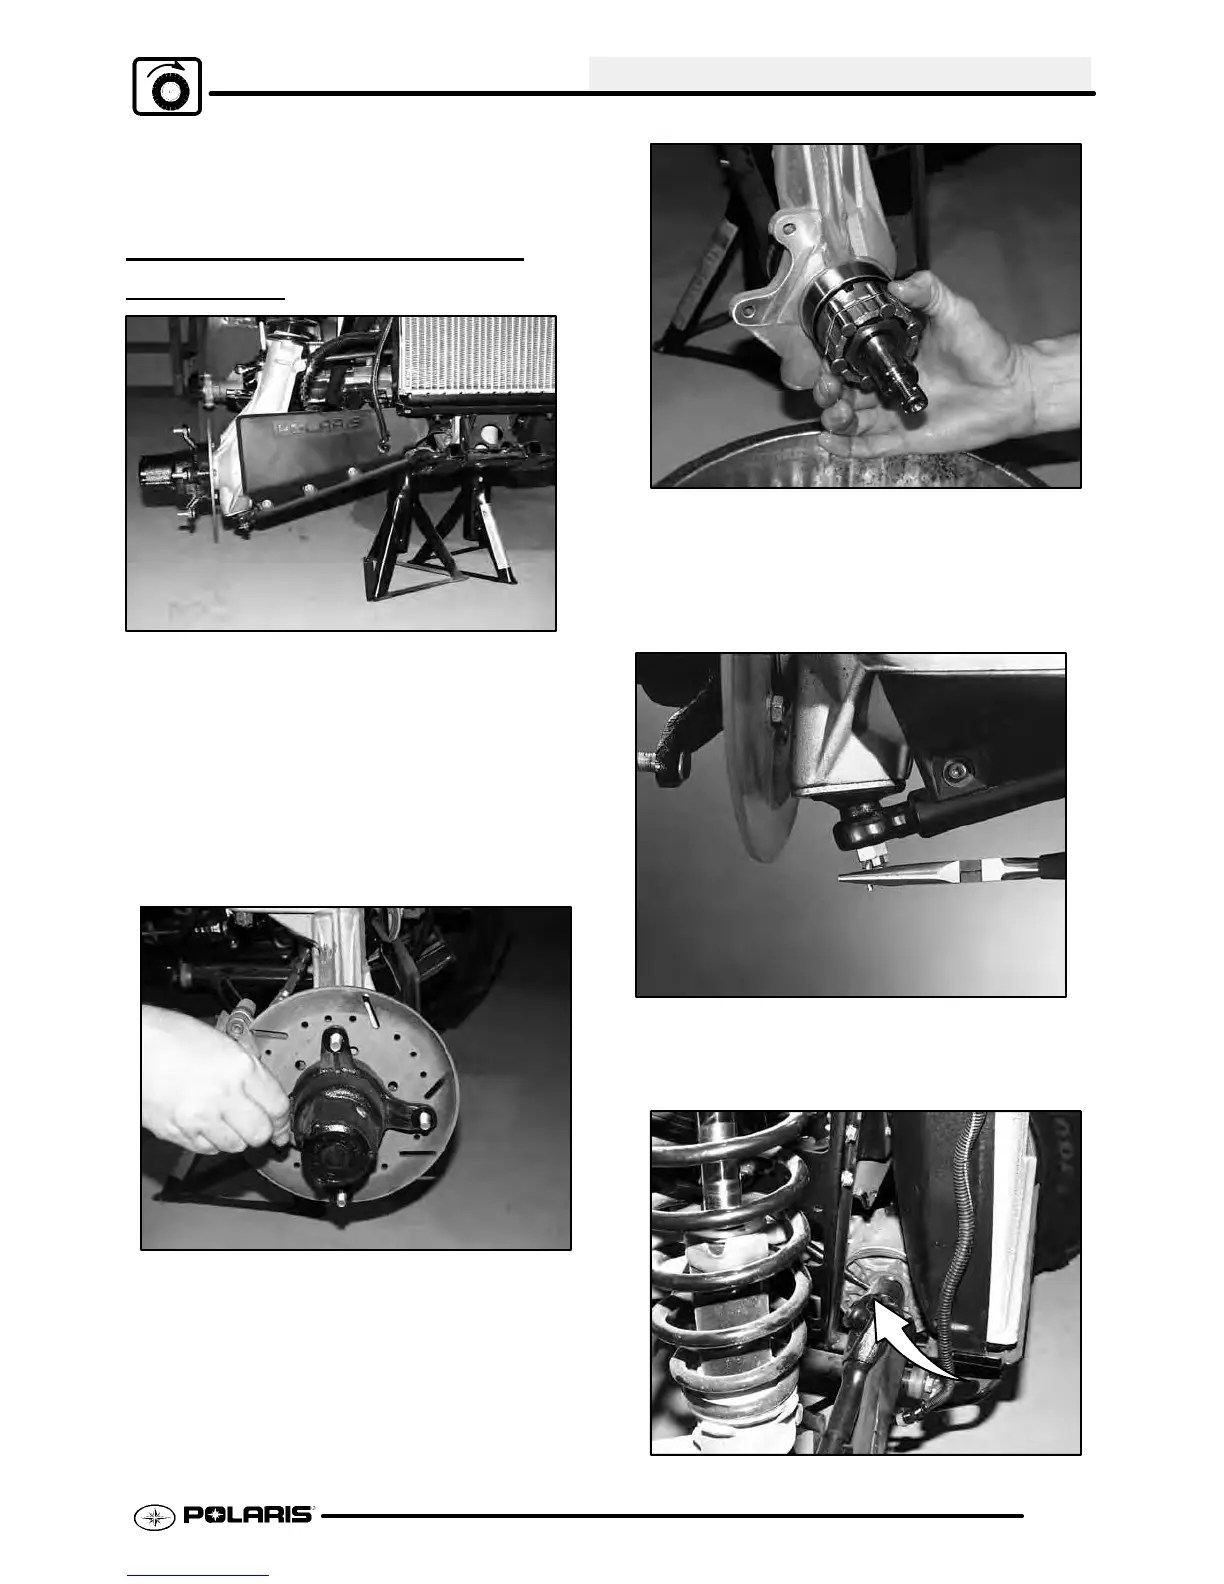
AWD FRONT DRIVE AXLE
REMOV
AL
1. Loosen front wheel nuts slightly.
2. Elevate and support machine under
footrest/frame area with front wheels elevated.
CAUTION: Serious injury may result if machine tips
or falls. Be sure machine is secure before beginning
this service procedure. Wear eye protection when
removing and installing drive axles or component
parts.
3. Remove wheel nuts and wheels.
4. Remove hub cap.
5. Remove the two brake caliper attaching bolts.
CAUTION: Do not hang the caliper by the brake
hose. Use wire to hang the caliper to prevent
possible damage to the brake line.
6. Place a catch pan beneath the front hub and
remove the hub cap.
7. Remove cotter pin and nut.
8. Remove hub, bearings, hilliard assembly, and
armature plate.
9. Remove cotter pin and nut from lower A-arm ball
joint. Remove lower A-arm from ball joint.

 Loading...