BRAKES
9.19
9. Inspect caliper piston bore for scratches, severe
corrosion, or galling and replace if necessary.
Inspect
10. Inspect surface of caliper piston for nicks,
scratches, or damage and replace if necessary.
REAR CALIPER ASSEMBLY
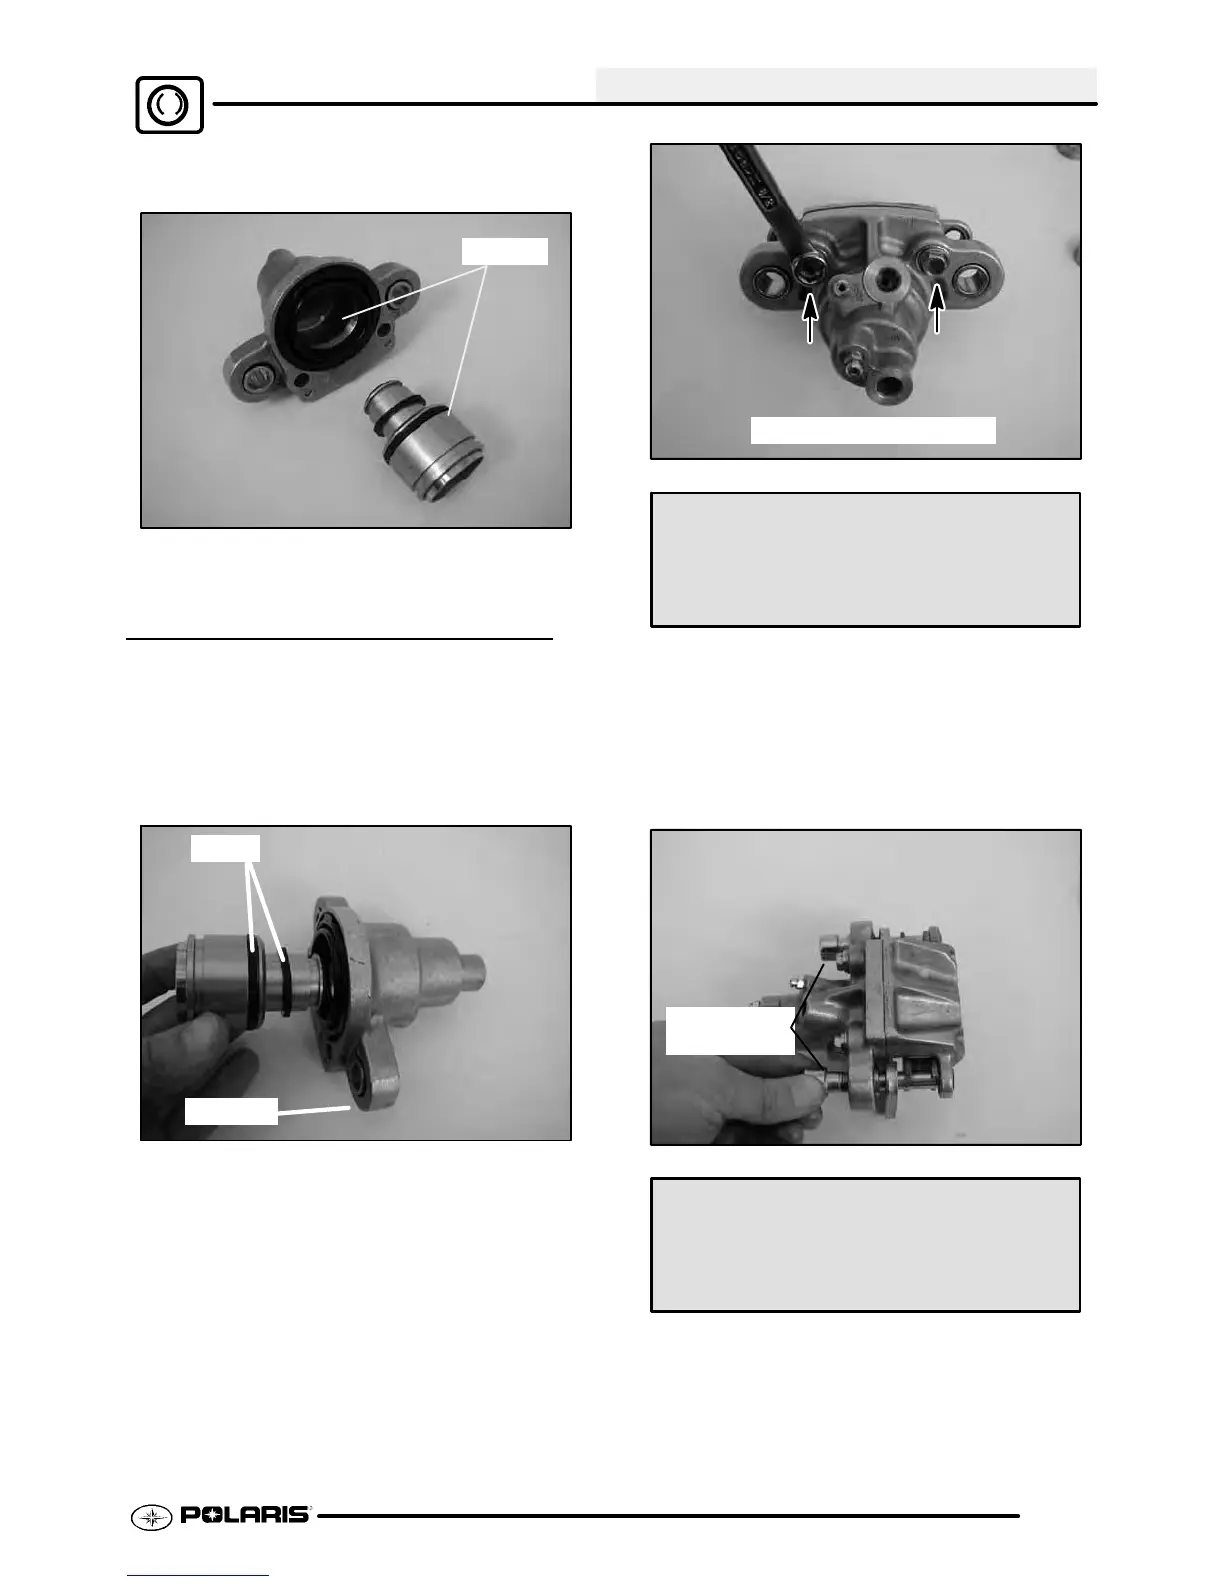
1. Install newO-rings inthe slidebolt bushingholes.
Be sure O-ring and seal grooves are thoroughly
cleaned of all residue, or piston maybind in bore.
Apply brake fluid to piston seals and install
carefully with a twisting motion to ease assembly
until fully seated.
O-Rings
Seals
2. Carefully assemble caliper body, making sure
O-rings are properly positioned in groove.
T ightenthecaliper anvilbolts and then torquethe
anvil bolts evenly to 16--18 ft. lbs. (22--25 Nm).
16--18 ft.lbs. (22--25 Nm)
Caliper Anvil Bolt Torque:
16--18 ft. lbs. (22 Nm--25 Nm)
3. Install brake pads in caliper body with friction
material facing each other. Install the slide pins
and the slide pin retaining ring. Torque the slide
pins to 30--35 ft.lbs. (41--48 Nm).
NOTE: Torquingtheslidepins whilethecaliper is
mounted on the ATV simplifies the torque
procedure.
30--35 ft.lbs.
(41--48 Nm)
Caliper Slide Pin Torque:
30--35 ft. lbs. (41 Nm--48 Nm)

 Loading...