2 - 7
4. Connect the Tester to a 115 VAC, 50/60 Hz line.
5. Mount the ProCam on the test horn and connect the cable from the horn to
the HORN receptacle on the right side of the Tester.
6. Turn the Tester POWER switch ON (switch will illuminate if the Tester is
receiving power). Let the Tester warm up a minimum of 10 minutes before
performing any tests.
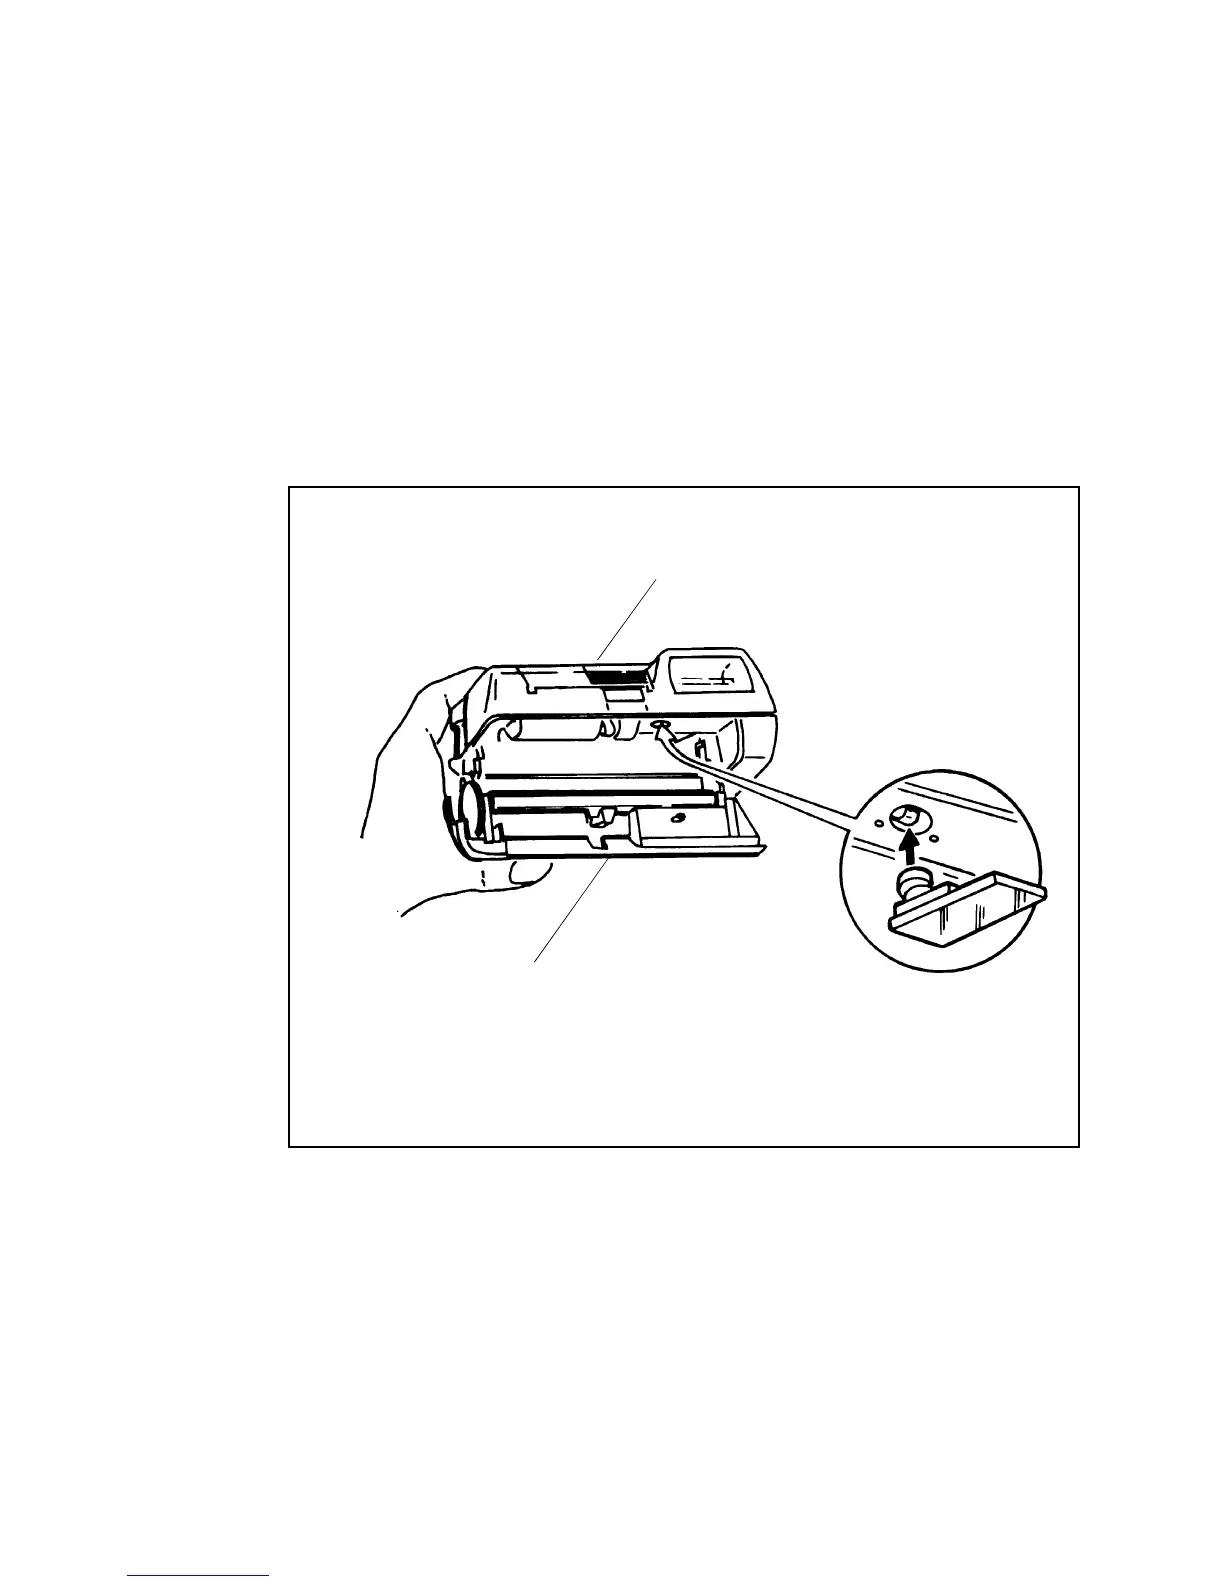
7. Open the ProCam door and then with tool # 13537 trip the door switch
(Figure 2-3).
Figure 2-3. Trip ProCam Door Switch to Down Position
8. Position the test horn with the ProCam mounted on it against the front of
the Tester, with the guide tab on the right side of the test horn against the
right edge of the window mounting plate (Figure 2-4).
9. Fully depress the ProCam shutter button five times. Read the STOPS
ERROR meter and check the ProCam specification for agreement.
PROCAM
DOOR
DOOR ACTUATORTOOL

 Loading...