3 - 38
Shutter Assembly
1. Disassembly
Note: In the following steps, it is assumed that the Shutter Assembly has
been removed from the Bellows/Cone Assembly (Figure 3-14), and
the following parts have been removed/disconnected from the
Shutter Assembly:
• Front Bezel (Figure 3-6)
• Close-Up Lens Switch (Figure 3-9)
• Photodiode and Cap (Figure 3-11)
• Transducer (Figure 3-13)
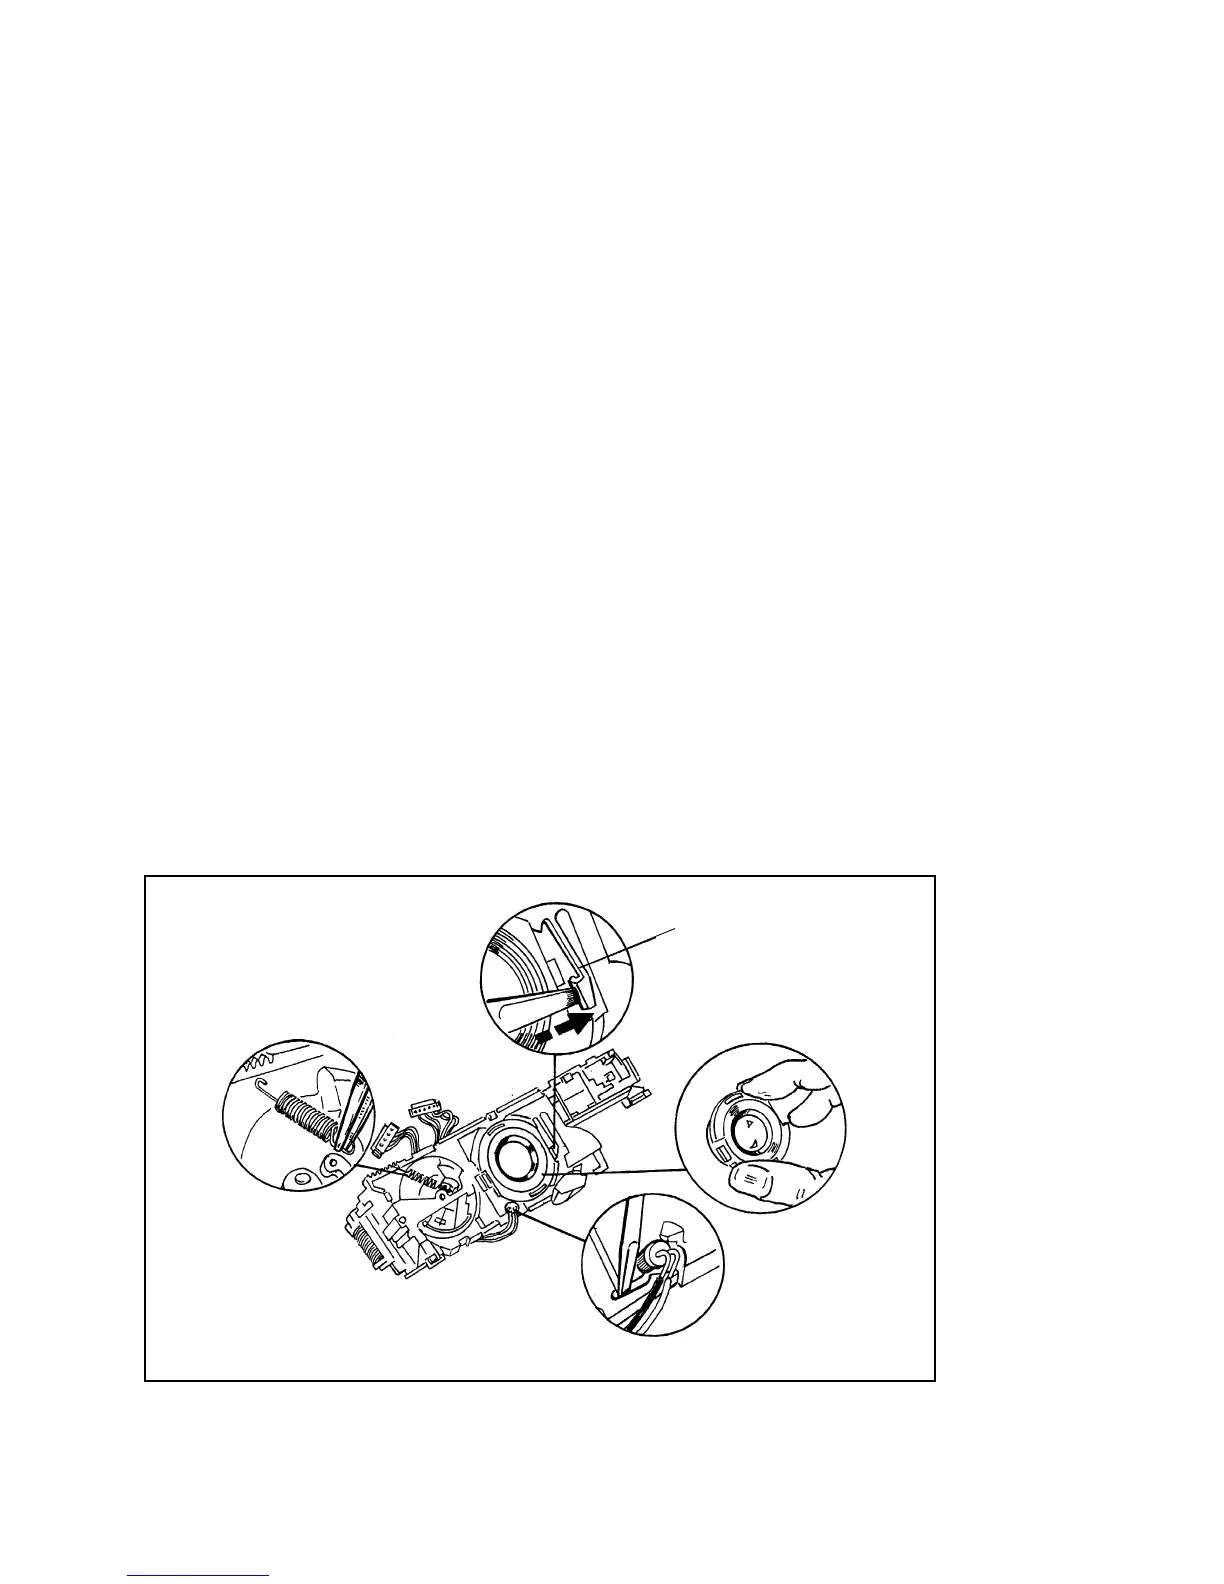
a. Using a greenstick, press tab A on the Lens Mounting Plate to the right
(Figure 3-37), to release the Front Lens Assembly. Remove the Front
Lens Assembly, being careful not to smudge or scratch the Lens
(wearing lintless cotton gloves is recommended).
b. Remove the Encoder LED from the Lens Mounting Plate (it may be
epoxied in place) (Figure 3-37).
c. With tweezers, unhook the upper end, then the lower end of the Opening
Blade Spring and remove it (Figure 3-37).
Figure 3-37. Removing Front Lens, Encoder LED and Opening Blade Spring
TAB A ON LENS
MOUNTING PLATE
ENCODER LED
OPENING BLADE SPRING
(NOTE NOTCH POSITION
BEFORE REMOVING)
FRONT LENS
ASSEMBLY
 Loading...