19
Polyend Synth Manual
18
Polyend Synth Manual
1.9 Shortcut Commands
Other than the labelled buttons a number of shortcut commands also exist. These are covered here
as a quick reference.
Overview
1
Overview
1
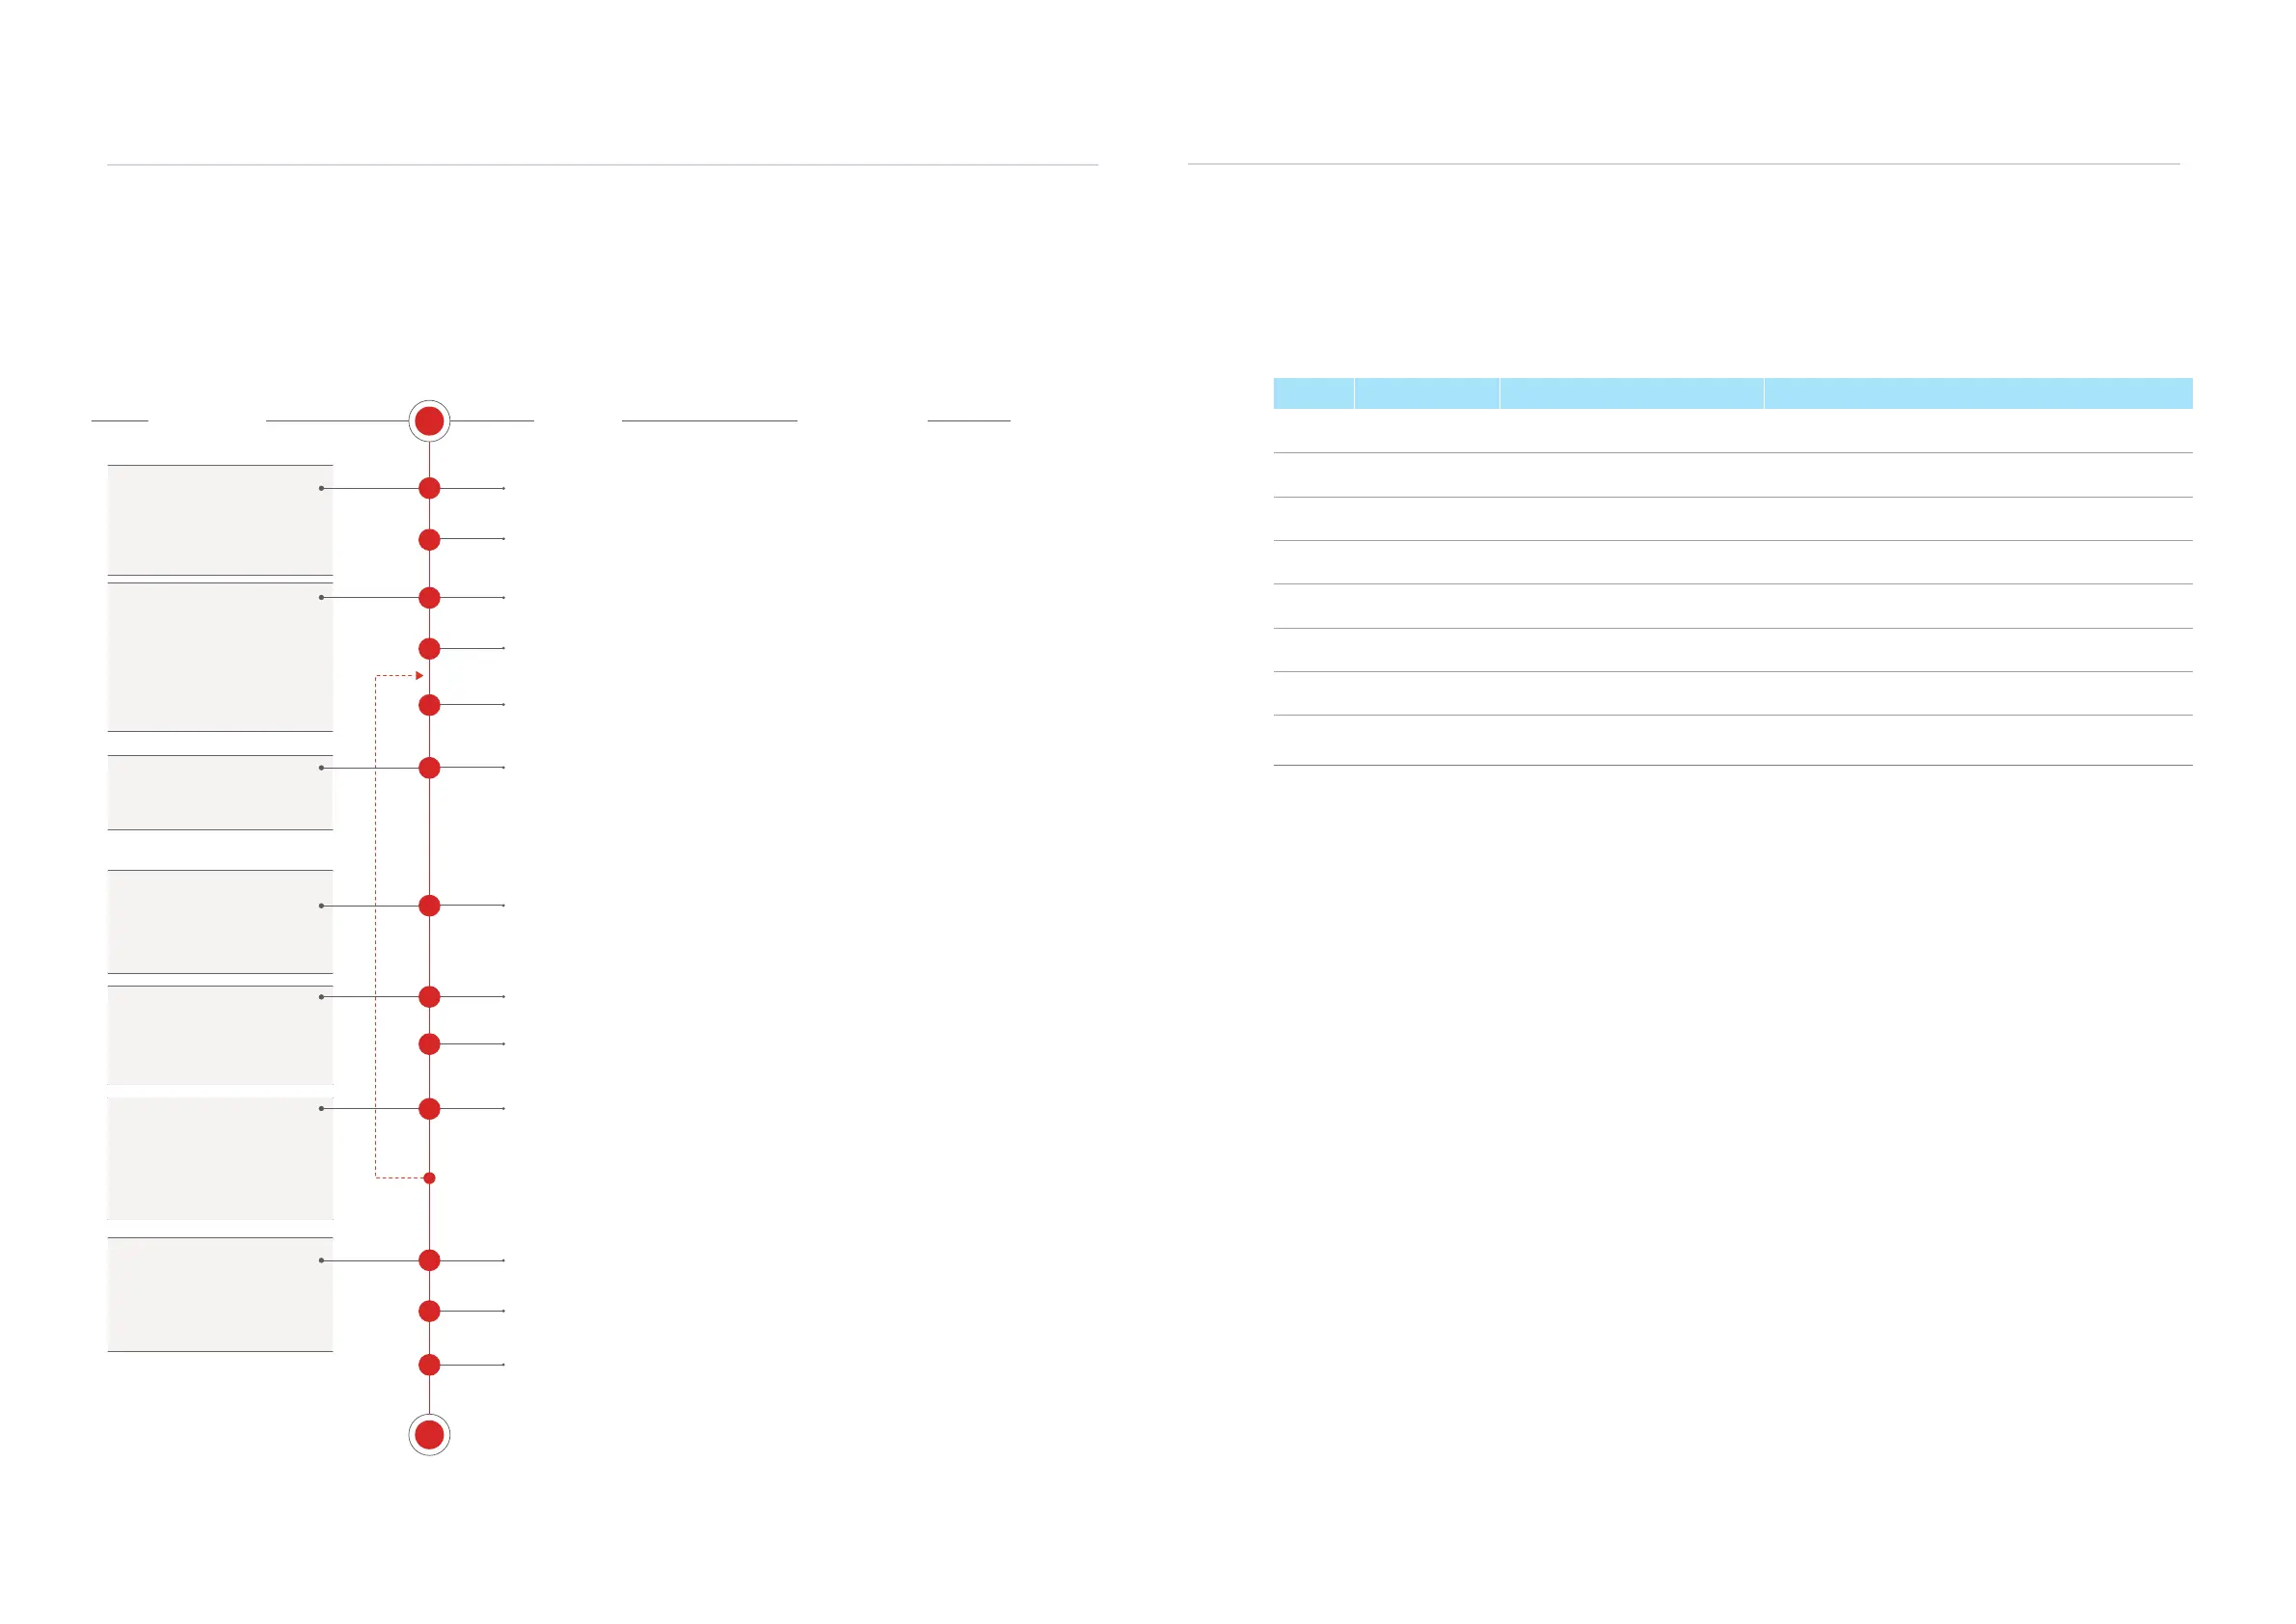
1.8 Example Workow
The workow adopted with Synth will of course develop to t your personal approach. To get started
a typical journey is described below which covers the basics of getting started with sound design.
S
E
1
2
3
4
5
6
7
9
10
11
13
12
8
Create & Save New Scene
Set the Scene Tempo
Set the Grid Layout
Assign Synths
Setup of the Synths
Map Modulation
Apply effects
Play Pads
Mix and Balance
Set up or use Macros
Housekeeping
Save Scene
Arp or Sequence
The SD Card must be installed to start a new
scene and use Synth. Scenes are stored on the
SD Card. Create a new scene.
Project (Tempo) 10-400 BPM. Used for time
based functions such as the seq or effects.
The prerequisite starting point is
to create a scene which contains
the majority of the settings and
sound designs.
Three synths can be assigned
using presets or initialising the
slots. The pad Behavior can also
be set up for the scale, root and
pad layout style. A synth starts
with its engine plus the lter and
modulation.
LFO or Envelopes can be routed
to modulate various parameters.
Three send effects allow audio
to be routed to Mod, Delay or
Reverb effects. These can also
be saved as presets.
Pads can be played manually.
Also a pattern can be recorded
in a sequence or an arpeggio
created to play notes.
A macro controls multiple
parameters from a single
knob. Useful for manual
modulation and combined
parameter editing.
The scene can be saved (is
actually auto saved). Once
completed scenes can be
shared with other users.
Scene
Synths
Modulation
Effects
Play or Sequence Pads
Macros
Output
The grid layout, scale, and root for the 3 synths
depend on the user's preferences. They are set
in Main Menu > ‘Synths’.
Select the Synth engine for each of the 3 synth
slots. Presets can be used to load to each slot.
The sound design starts here. This allows the
sound to be established. Adjust the synth
parameters to develop the sound. Also the lter
and envelope parameters are set too.
To expand the sound options further connect
LFOs or Envelopes to the parameters to add
movement and interest.
The Mixer page 2 is where the audio send levels
are set up. This applies effects, mixed into to the
main output.
Pads can be played to control the Synths live.
Mix and balance between the 3 synths. Also set
panning for the stereo eld.
Multiple parameters can be controlled by one
knob. These are assigned to the 3 dedicated C1,
C2 and C3 knobs.
Save the scene while designing the sound or at
the end of the process.
Yeah yeah…. The boring bit. But it will help as
scenes develop to keep things tidy. Also consider
periodic backups of the SD Card.
The ‘Seq’ Page allows an arpeggio to be created
or a pattern recorded for each synth.
ACTION COMMENTSPROCESS
Function Action Buttons Description
Pads Play Pad Press [Pad] Plays the pad note.
Pads Lock Pad Play Hold [Shift] + Press [Pad] Locks pad selection on or off. Locks note on.
Pads Clear Locks Double Tap [Shift] Removes all pad locks. Sets the locked pads to note off.
Effect Select Effects Hold [Shift] + Press [Filter] Opens the effects pages. Alternative to [Shift] + [Effects].
Preset Effect Preset Hold [Shift] + [Preset] From any effect page, opens the effect preset browser.
Preset Engine Preset Hold [Shift] + [Engine] Opens the engine preset browser for the current synth.
Preset Engine Preset Hold [Synth X] Screen Btn + [Scene] Opens the engine preset browser for the chosen synth X.
Synth Root Note Hold [Synth X] Screen Btn + (Screen)
Turn screen knob to set the root note for the chosen synth X.
This is the same option as in grid page.