Scenes
3
31
Polyend Synth Manual
30
Polyend Synth Manual
Scenes
3
NOTES
3.1 First Steps with Scenes
Scenes are the core structural elements of the Polyend Synth. A scene is a
collection of patches, settings, macros, parameters and sequence data.
Think of a scene as one specic section or building block that contributes to
a complete song or arrangement. A scene is the container for the all of the
musical elements and helps to compose and organise discrete sections of
an arrangement by working with manageable parts.
A collection of Artist Scenes are available in the factory library that
showcase how Synth is used as an instrument, offering unique insights into
the composition of the scene and bringing a signature style and air to the
collection.
Once created, Scenes can be copied and shared in the community with
other Synth users.
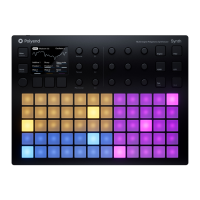
Components of a Scene
To create a scene, the conguration and development of these elements is
required. The assembly of these will develop sounds and construct the
scenes that can be used together in a wider production. You will develop
your own workow but the following steps cover the basic principles of
scene creation.
Grid Setup
Custom setup of the 5 x
12 to enable control and
playing of the synth.
Macro Controls
Map up to 9 knobs to
control the parameter
value macros.
Mixer Settings
Set synth levels, pan and
FX send levels.
Synth Preset Patch
Patch creation and
conguration of each of
the 3 synth engines.
Pressure / Aftertouch
Adds interest and
contributes to the overall
expressive character
PC Mapping
Mapping of presets to
MIDI Program Changes
messages.
Name
Name the scene and
save it to one of the
scene slots.
Scene
Synth Setup
Setup and conguration
the synths that contribute
to the scene.
FX Parameters
Add effects. Custom
presets can be created
and used in a scene.
NOTES
3.2 Selecting a Scene
Scenes can be managed directly by using the dedicated [Scene] button
located to the left of the display screen. Up to 1000 scenes can be saved
on the Micro SD Card.
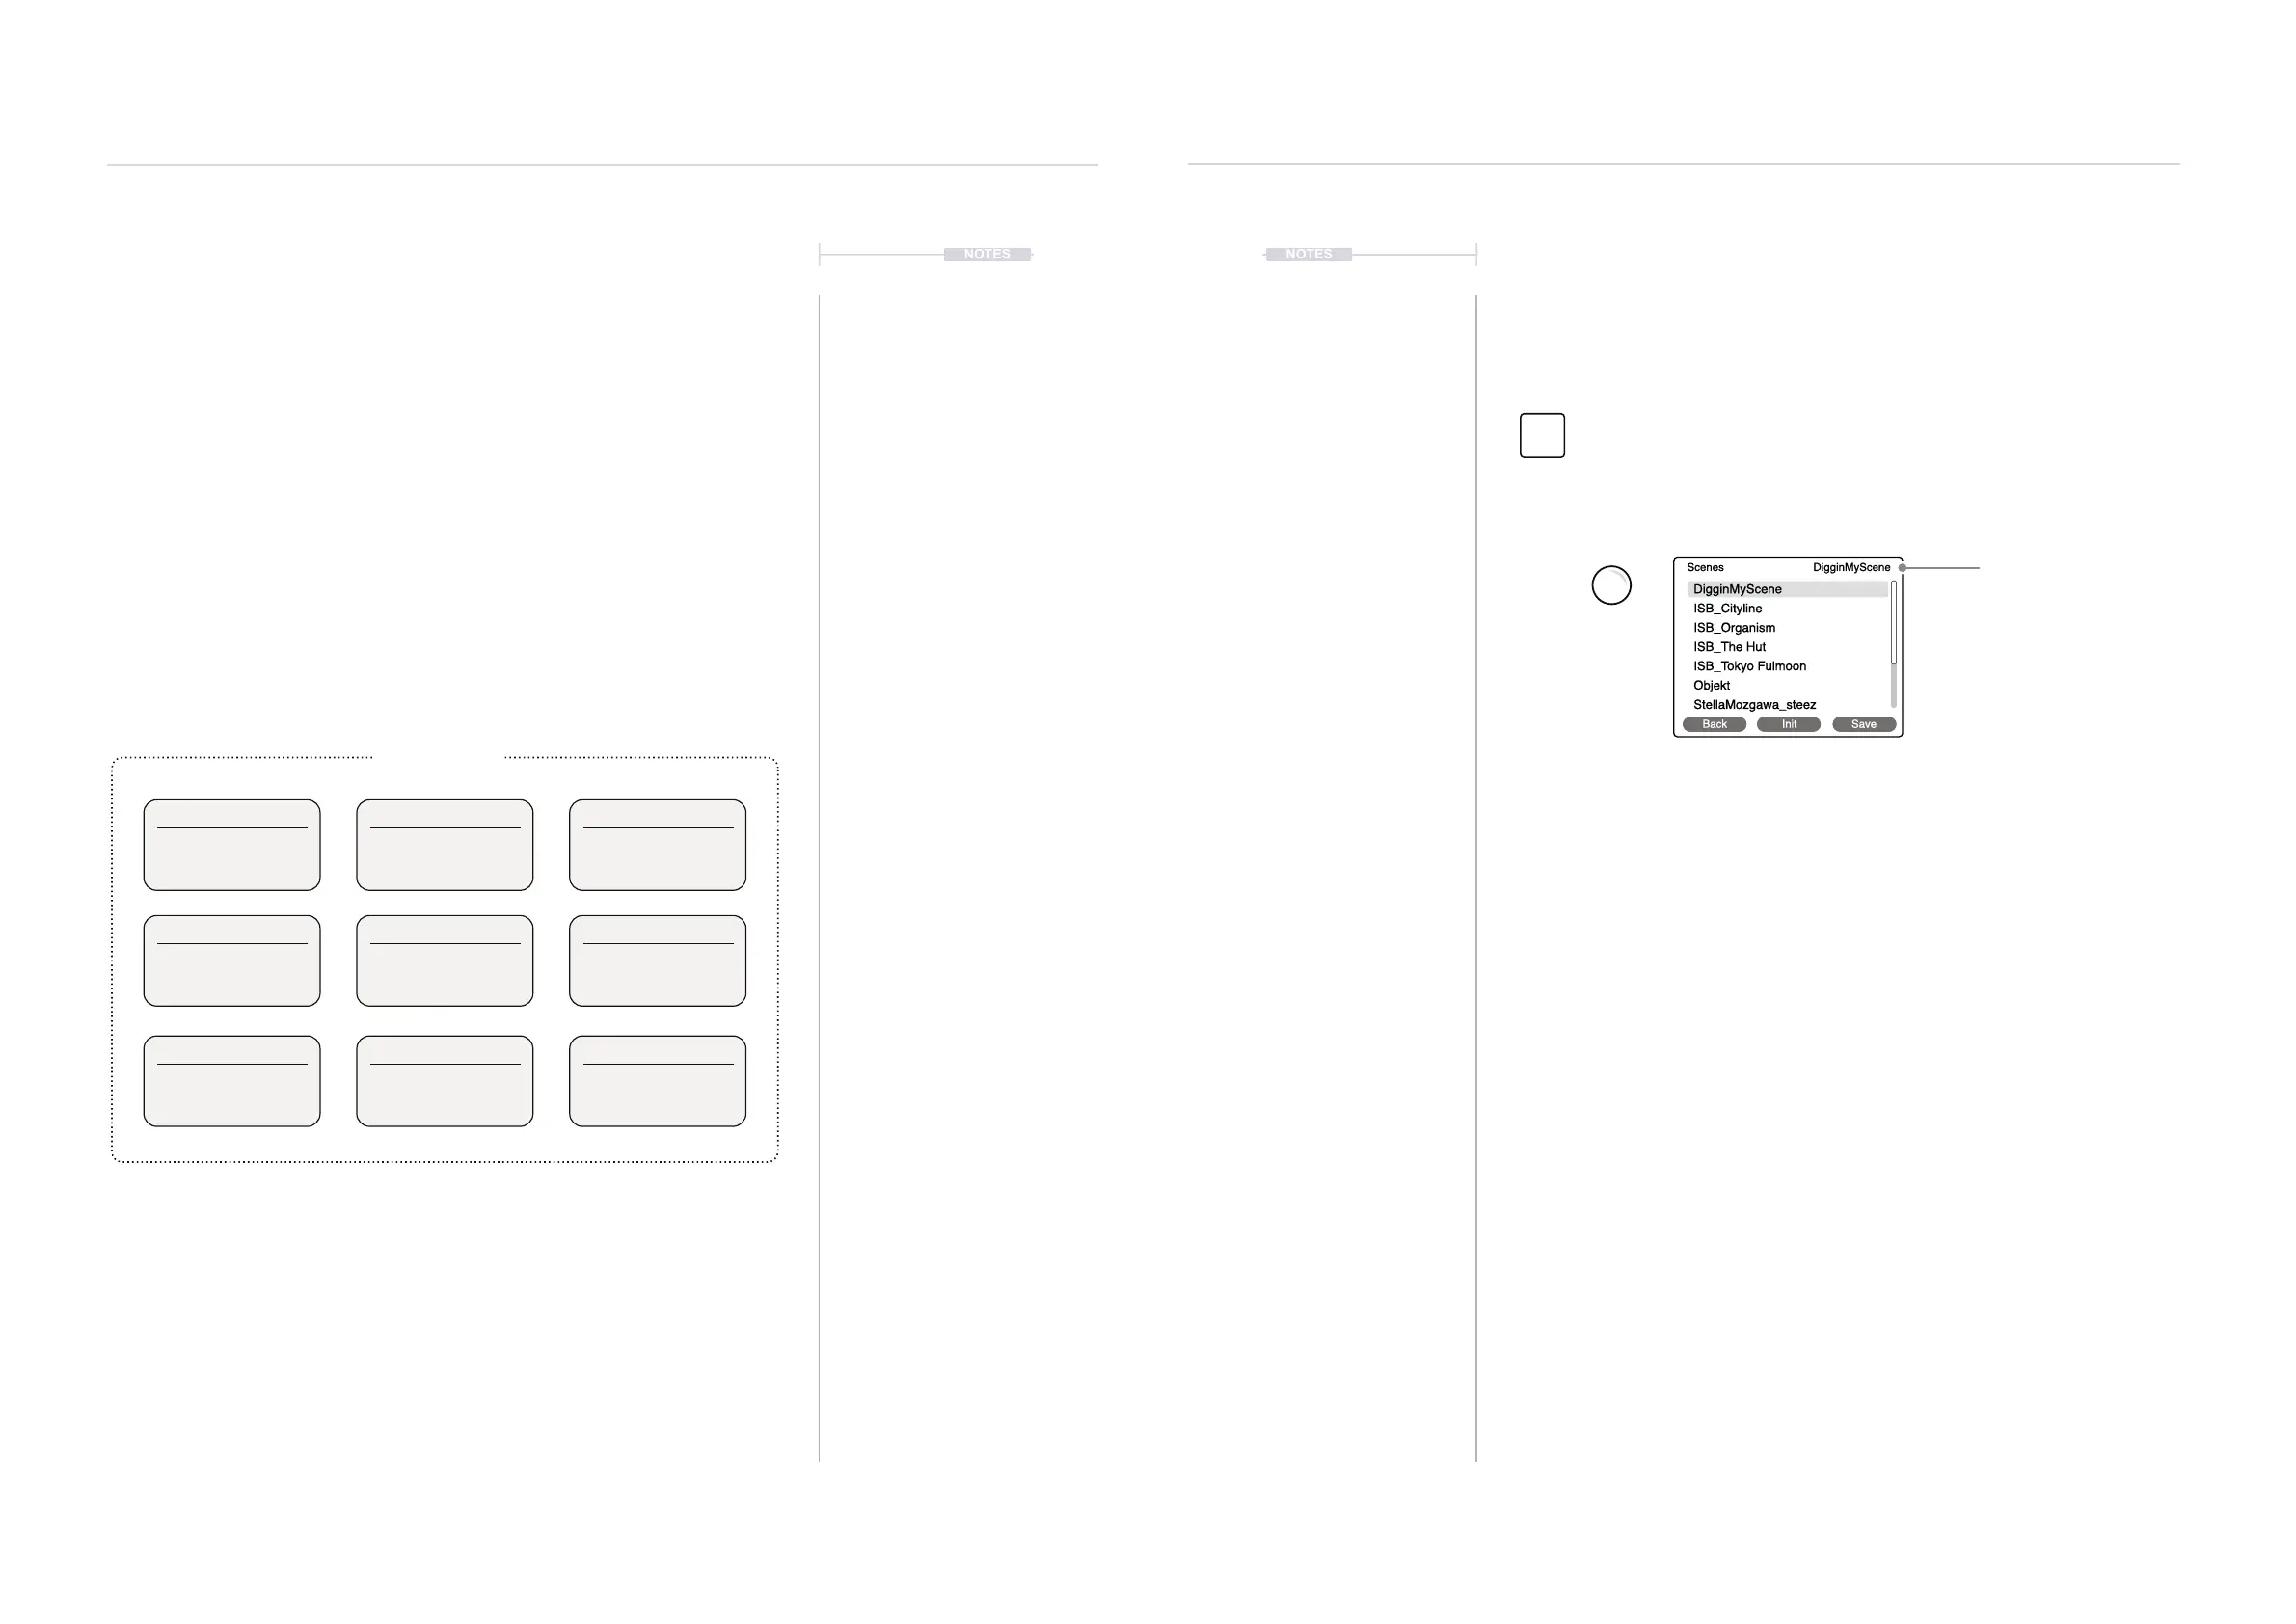
▌ OPENING A SCENE
1. Open the Scene Menu. Press [Scene] button. If needed, the ‘Back’
screen button option will step back to the prior screen page. The
currently active scene is displayed top right in the scene page.
2. Turn (Screen) knob to navigate the Scene list. Highlight the scene to
select and load.
3. Press (Screen) knob to select the highlighted scene and load it as the
active scene. One scene will always be active to host the synths and
project data.
DigginMyScene
ISB_Cityline
ISB_Organism
ISB_The Hut
ISB_Tokyo Fulmoon
Objekt
StellaMozgawa_steez
Scenes DigginMyScene
Back Init Save
Press the [Scene] button to open the Scene menu options. Turn (Screen) to scroll
and navigate the menu. Press (Screen) to select the highlighted option or sub-menu.
Navigate the list with the (Screen) knob.
Currently active scene.
Press the screen buttons located below the display to navigate backup
in the menu. Press (Scene) knob to open the highlighted scene.
Scene
Preset