25
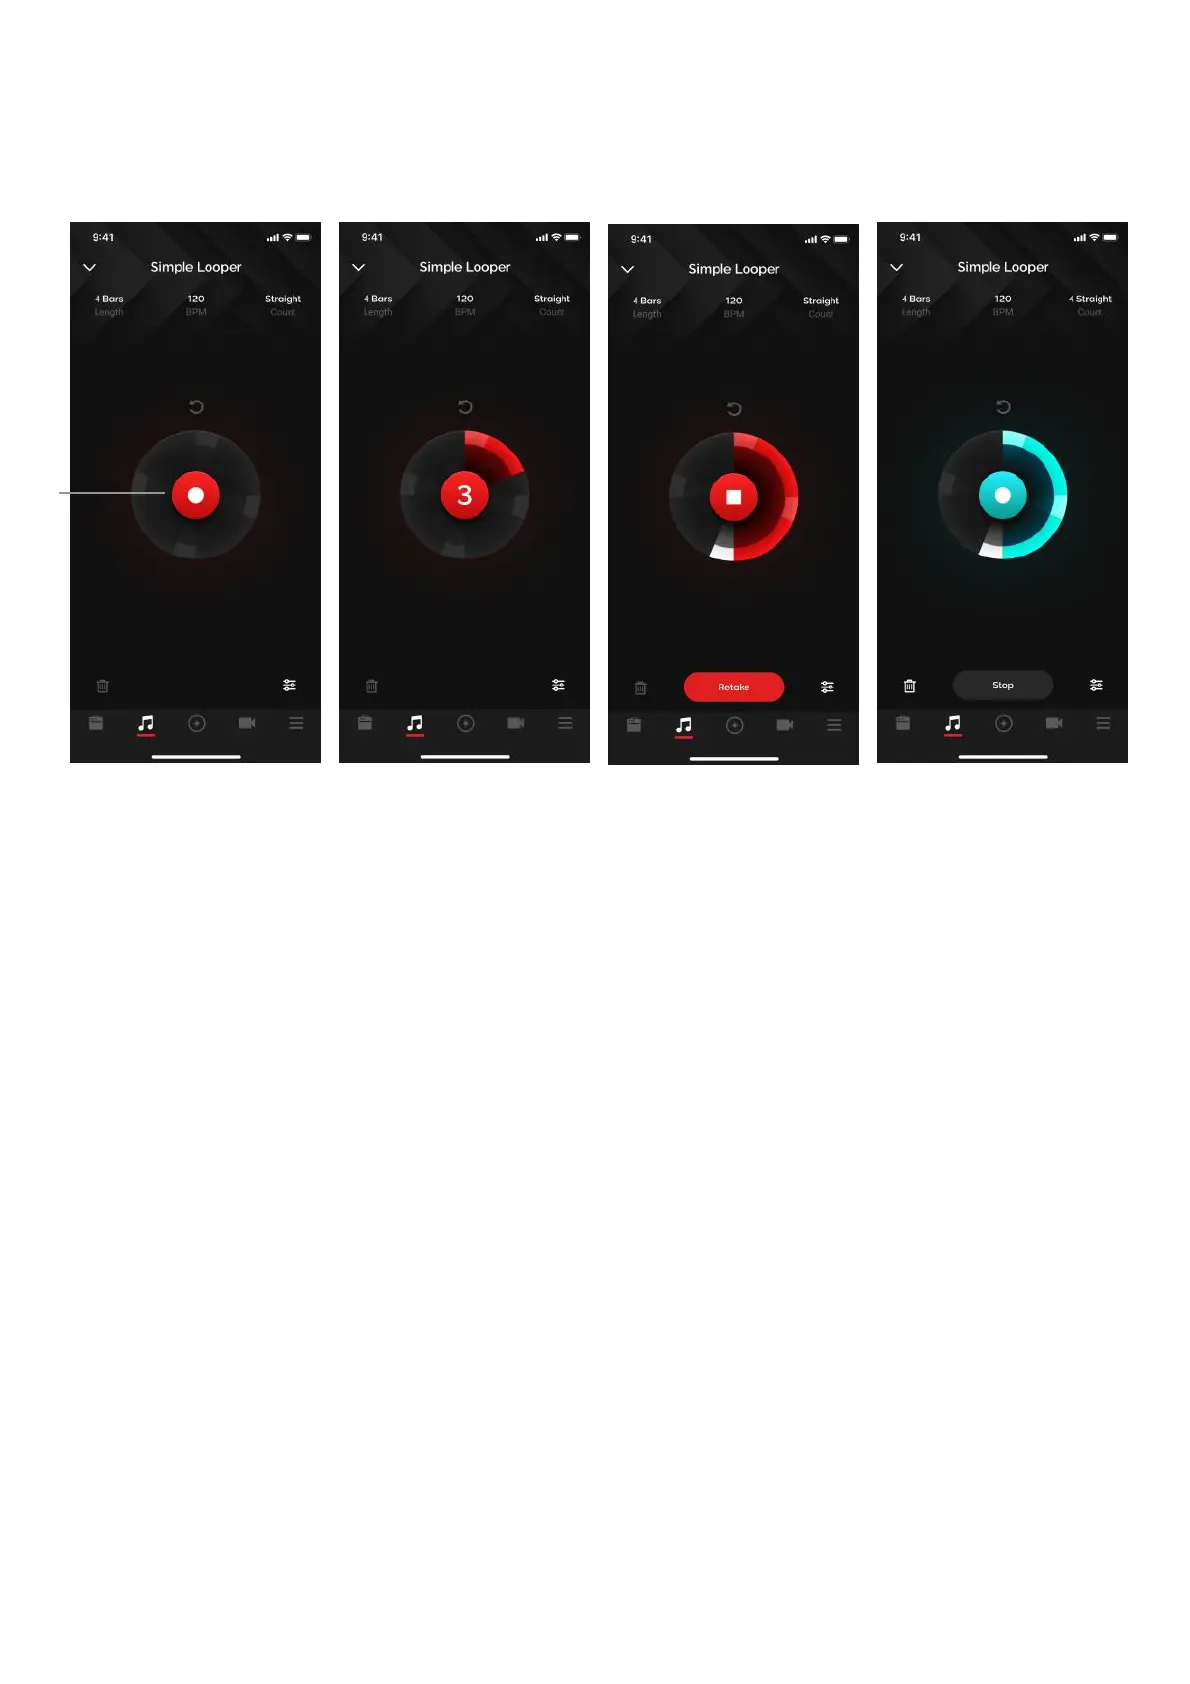
Simple Looper: Start Recording
Start Recording
(A) Tap on the recording button in the middle of the circle
1. Depending on your Click and length settings, the recording function exhibits different behavior:
I. Click On (Auto Mode): a four beat count in will begin, after the four beats it will start
recording
(i) Length Not Free: after the recording reaches the length of the loop length set in
looper settings, it will automatically stop recording. If you tap the record button
during this step, you will stop the recording, however the length of the loop will be
the same depending on the length you set in the looper settings. Playback will
begin from the point you pressed stop, so the loop will be empty until it replays the
loop.
(ii) Length is Free: to stop recording, tap on the record button again. Playback will
commence immediately from the beginning of the loop.
II. Click Off (Signal Detection Mode): the button will start breathing, and will start recording
once a guitar signal is detected. Stop recording by tapping on the record button again
2. If you make a mistake, tap on the Retake button to immediately go back to the count in step to
immediately start recording again
3. After a recording is complete, you may not adjust looper settings until you discard the loop.