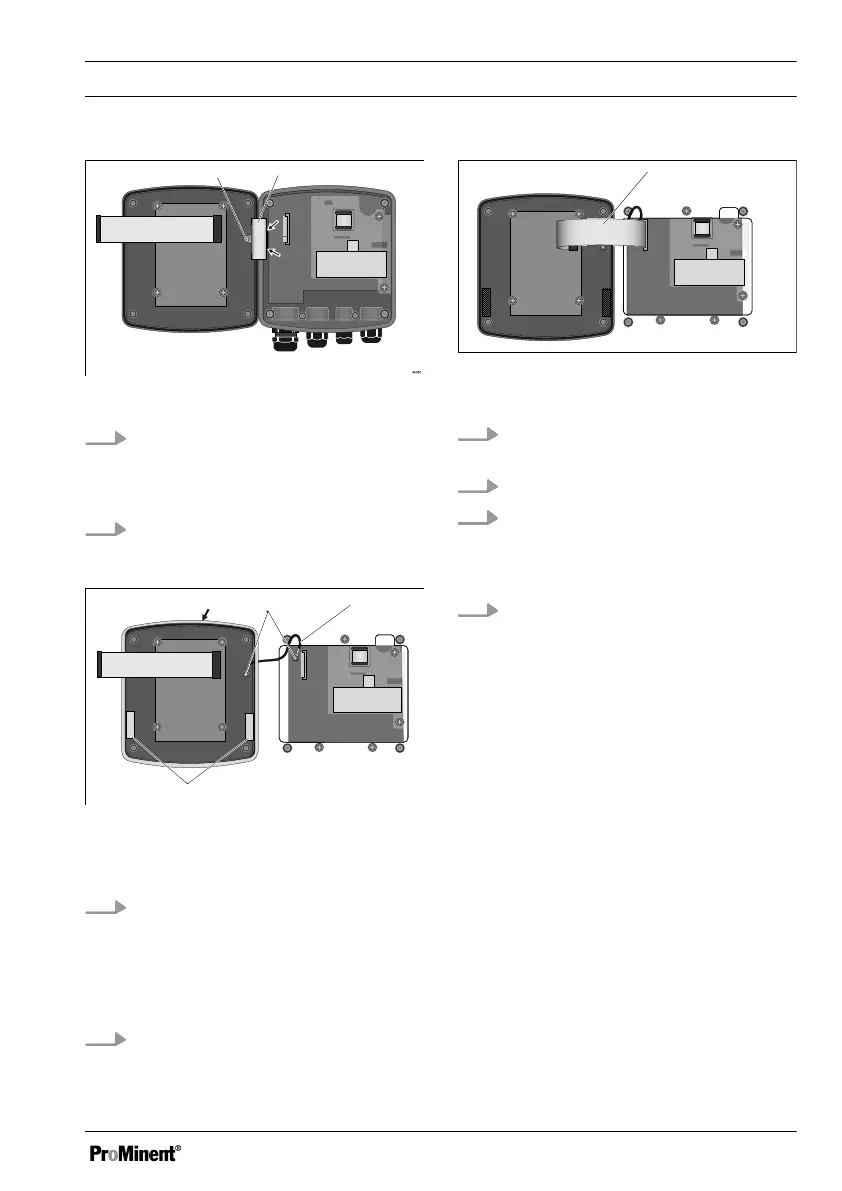
Fig. 37: Dismantling the hinge
4. Remove the screw (2), unclip the
hinge (1) on the lower part of the
controller housing (arrows) and
remove the hinge
5. With control panel installation:
Remove the two screws and
remove the strain relief
Fig. 38: With control panel installation: Fit
the profile seal onto the top part of the
controller housing
6. With control panel installation: Posi‐
tion the profile seal (arrow) evenly
into the groove in the top part of the
DULCOMETER
®
Compact Con‐
troller housing. Arrange the flaps (3)
as shown in the figure
7. With control panel installation:
Secure the strain relief (2) using
two screws (1)
Fig. 39: Pushing and locking the ribbon
cable in its base
8. Push and lock the ribbon cable (1)
in its base
9. Fit the hinge
10. Screw the top part of the controller
housing onto the lower part of the
DULCOMETER
®
Compact Con‐
troller housing
11. With control panel installation: Re-
check that the profile seals are
fitted properly
ð
Re-check that the seal is
seated properly. Only if the
mounting is correct, can IP 67
(wall/pipe mounting) or IP 54
(control panel mounting)
degree of protection be ach‐
ieved
Replacing spare part units
103